HOLIDAY DONATION DRIVE - SUPPORT MSW - DO YOUR PART TO KEEP THIS GREAT FORUM GOING! (89 donations so far out of 49,000 members - C'mon guys!)
×


Beef Wellington
-
Posts
2,249 -
Joined
-
Last visited
Content Type
Profiles
Forums
Gallery
Events
Everything posted by Beef Wellington
-
 Well this was over before I even found it, but really nice looking pickle dipped in ketchup Carl!
- 46 replies
-
- 7
-

-
- o16
- pacific crossroads
- (and 2 more)
-
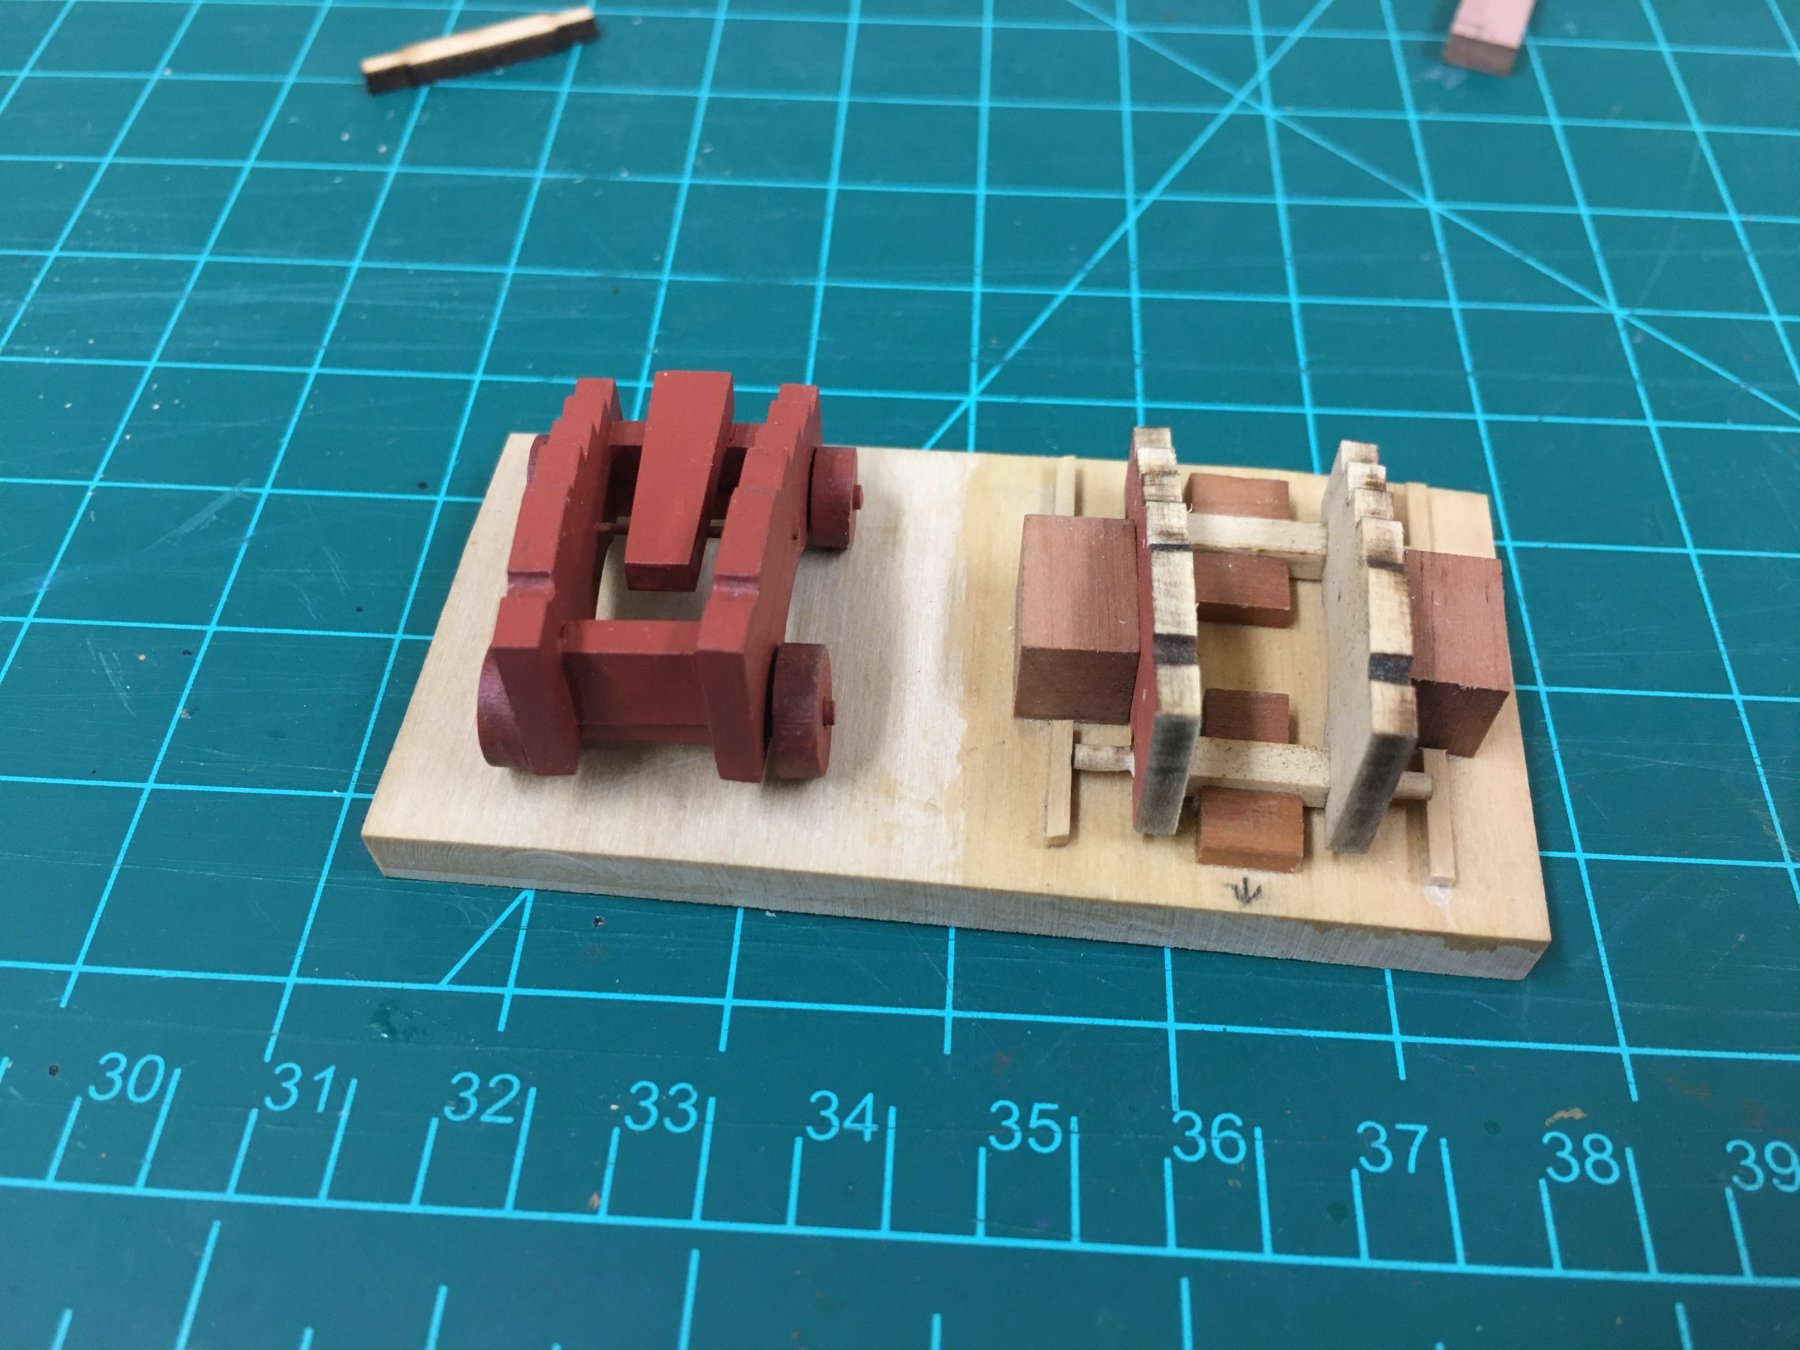
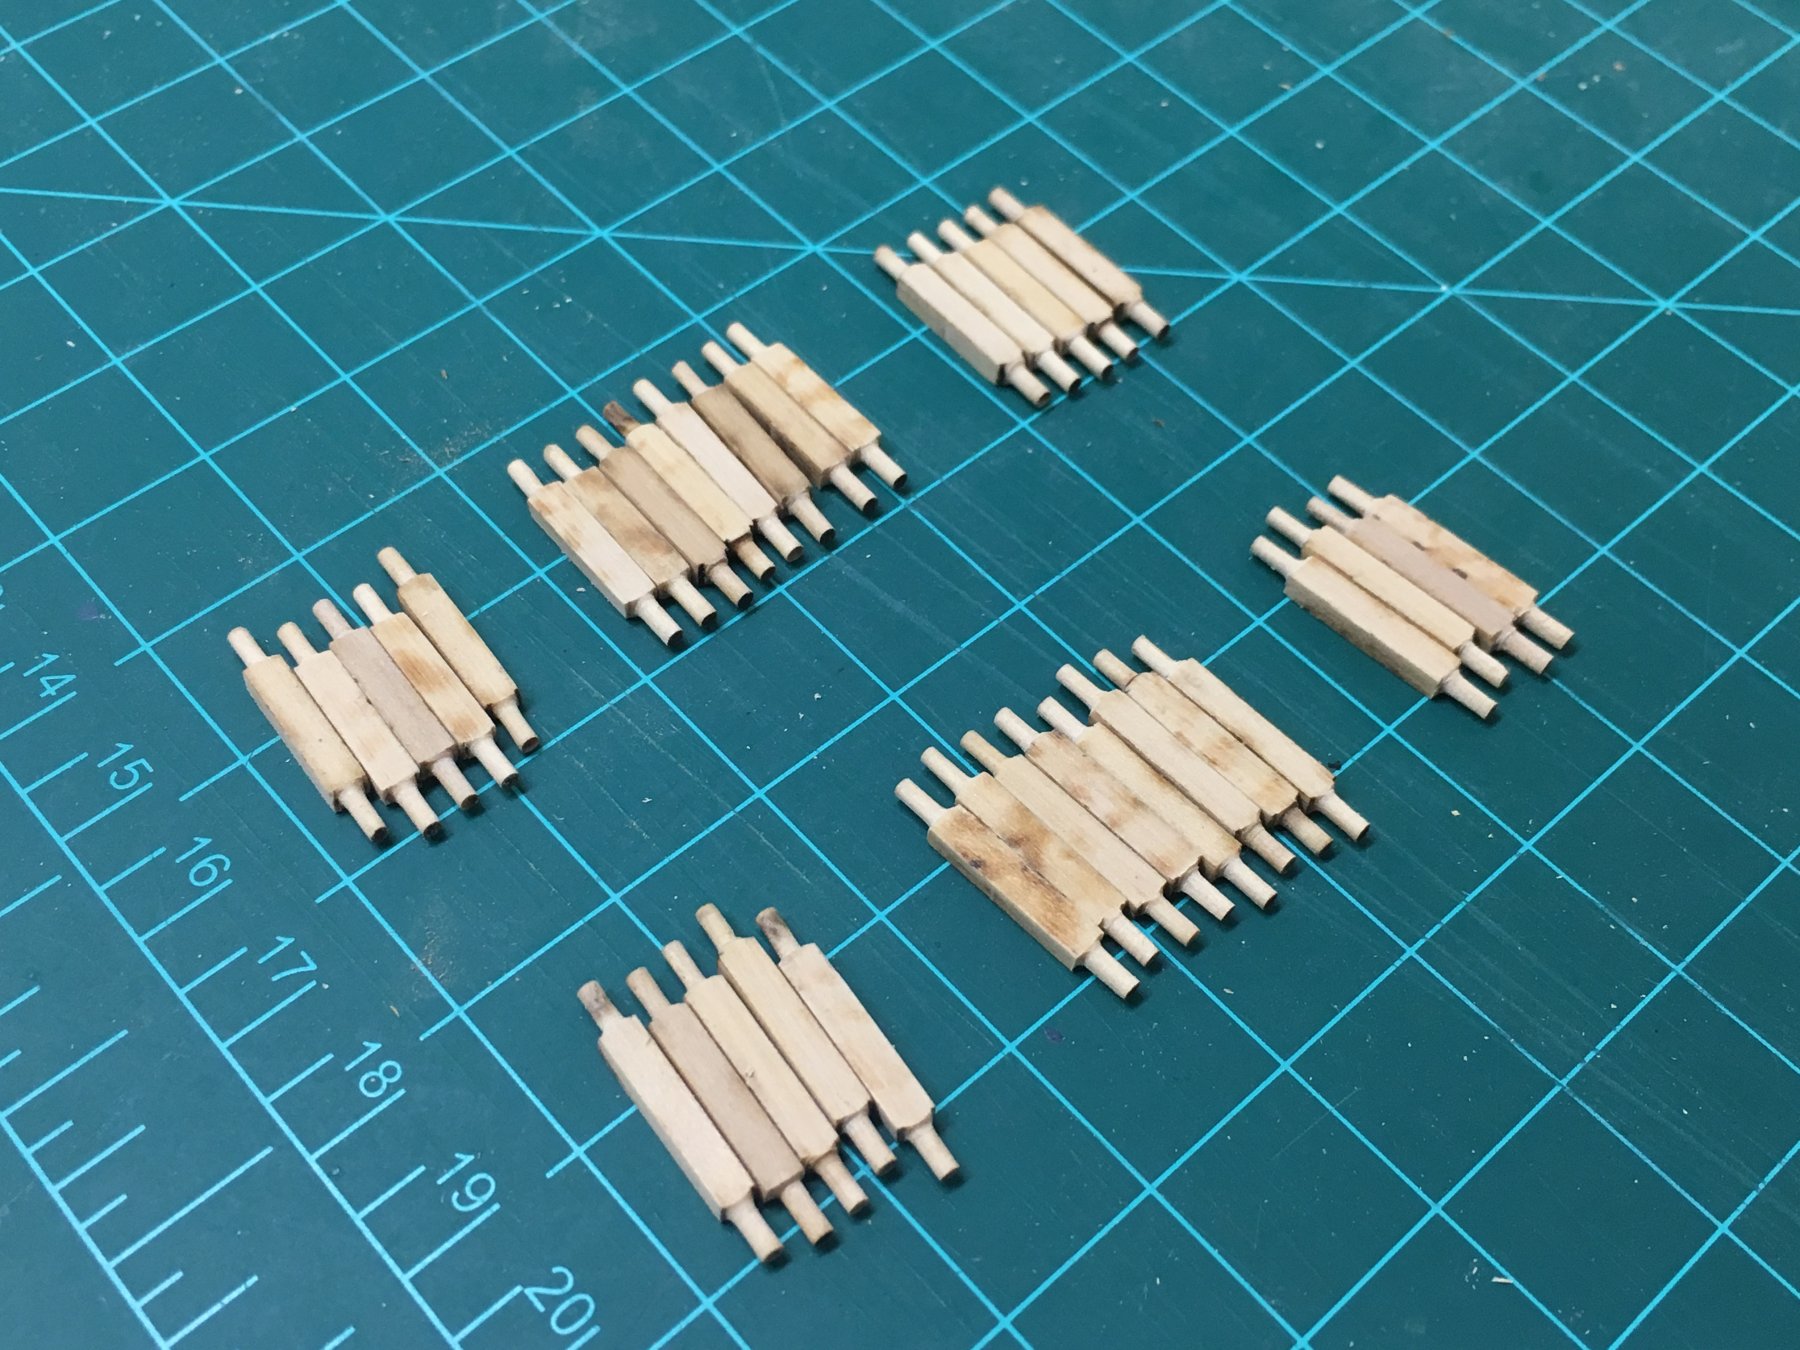
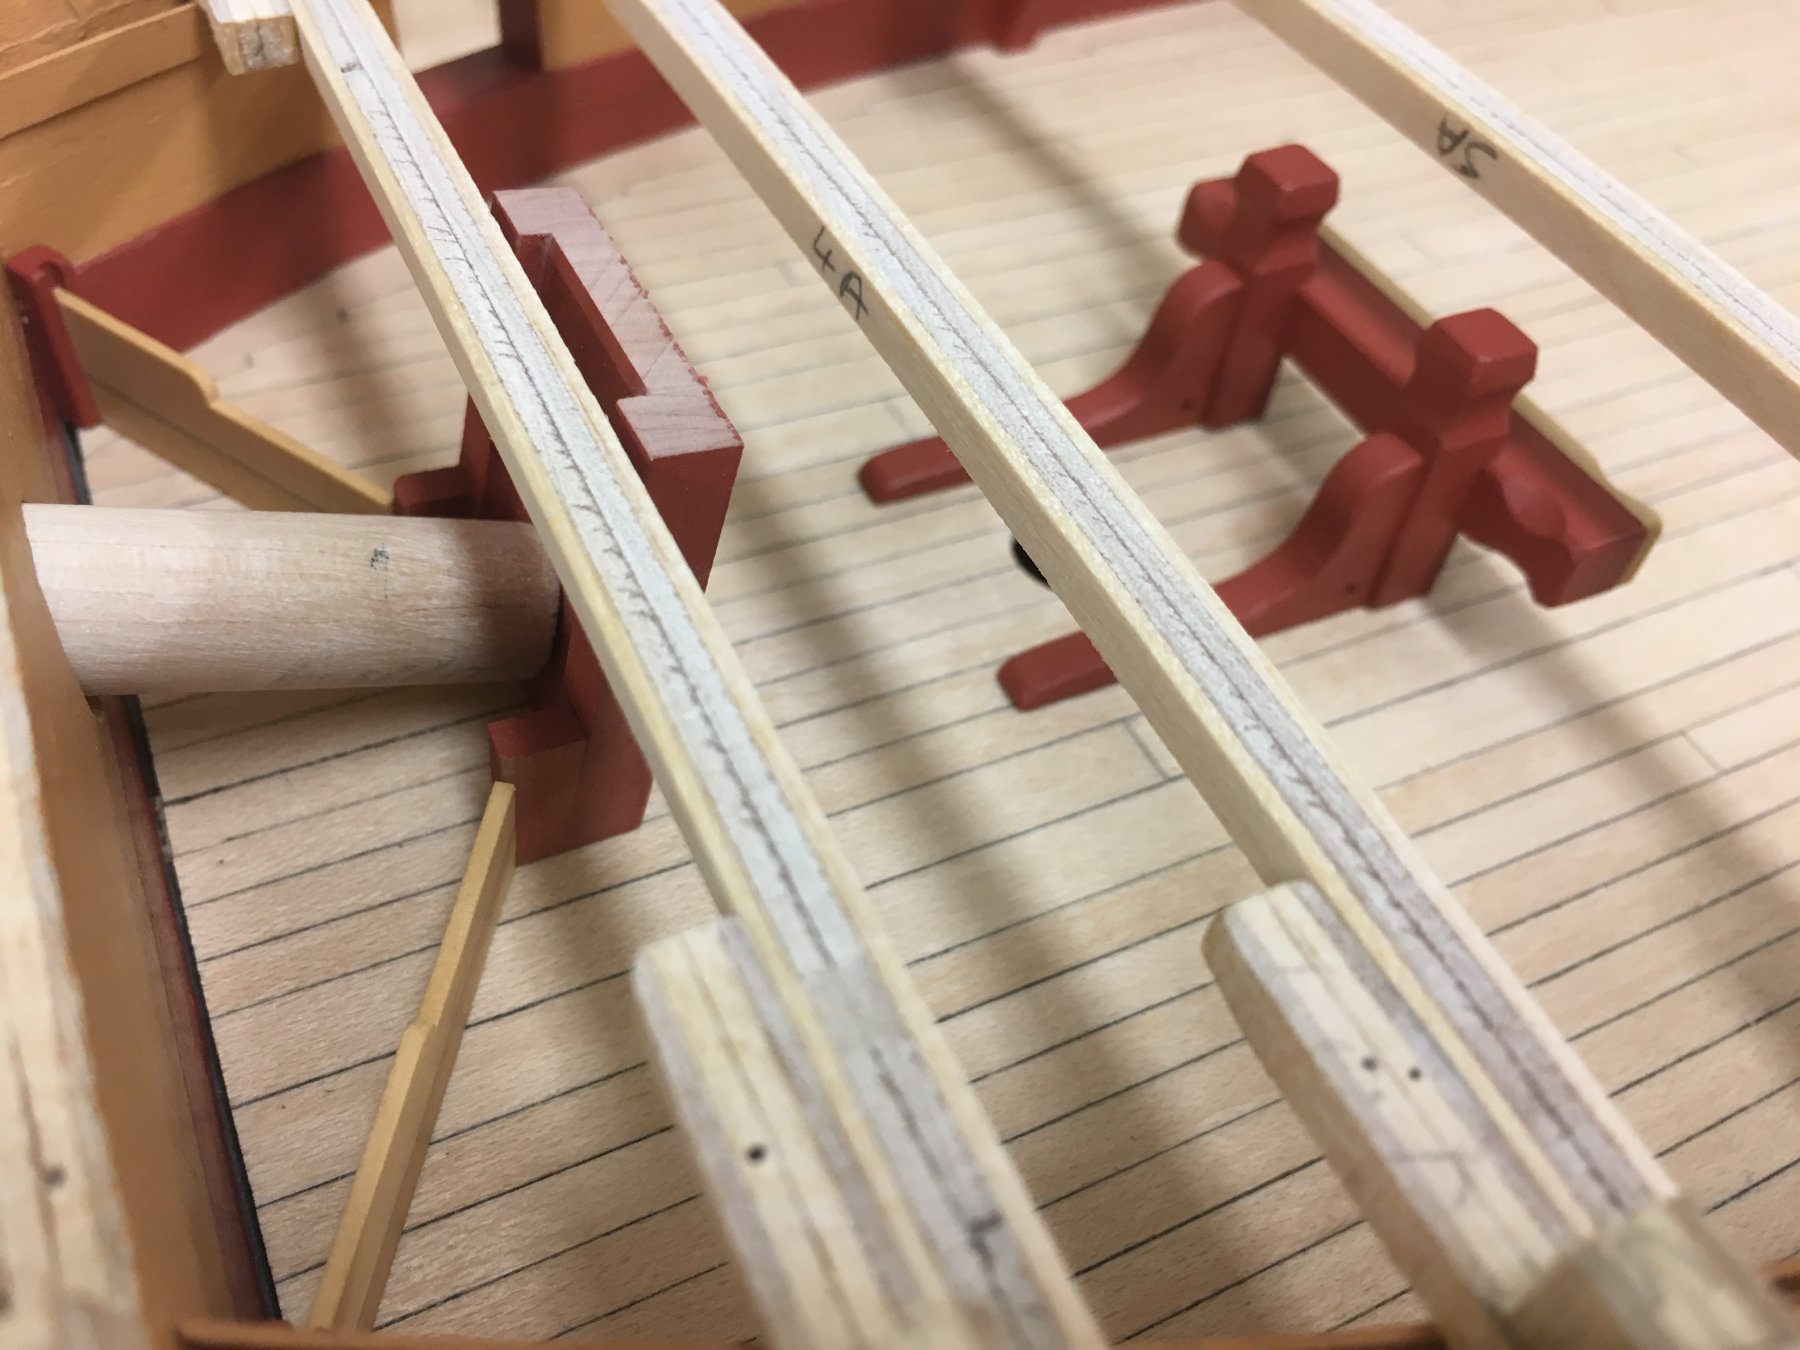
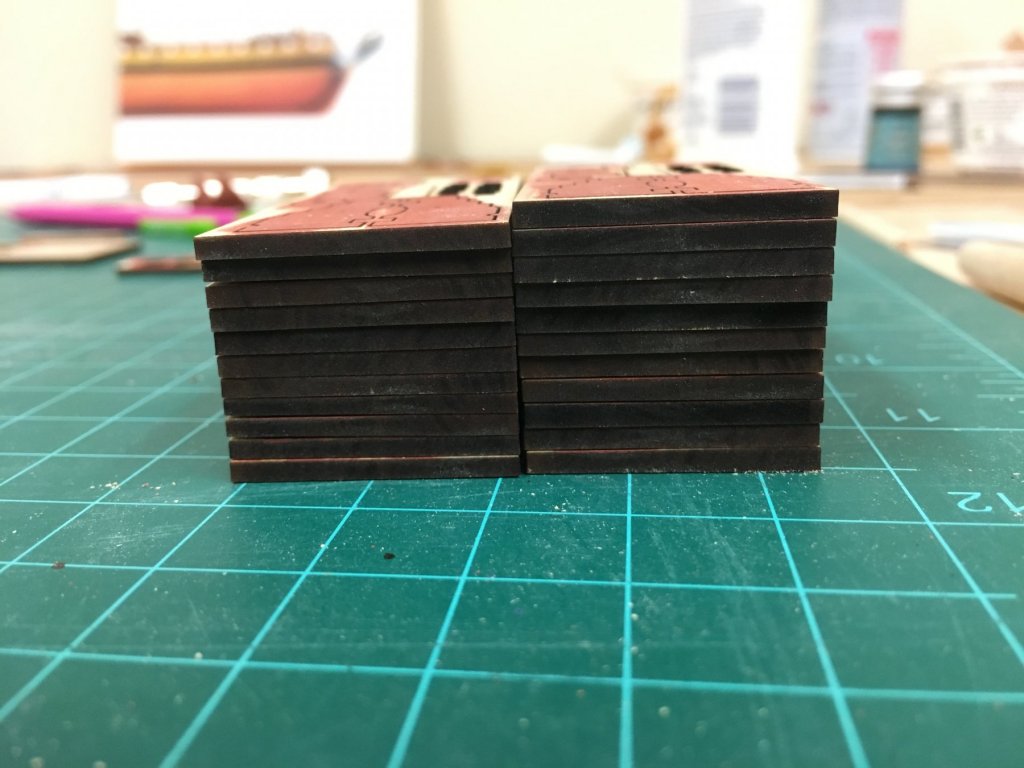
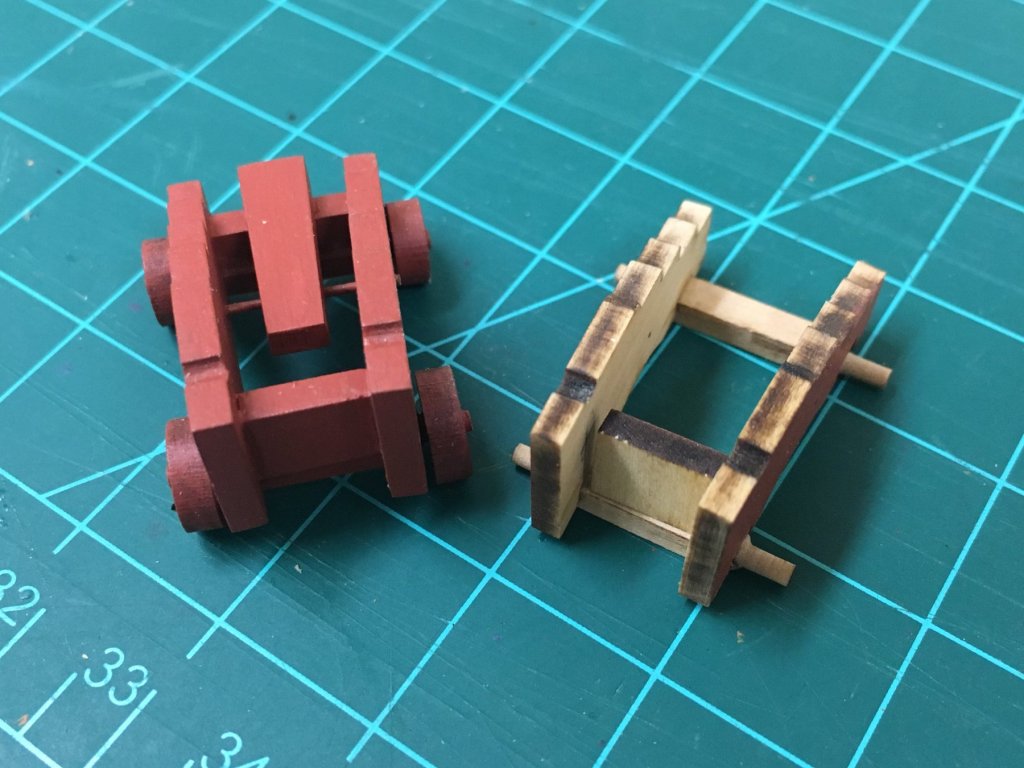
Thanks everyone for the very kind words and continued interest...not really much to report with only some ad-hoc shipyard activity, but a cautionary tale whilst its still fresh. Started to make up the gun carriages, all 28 of them :-( The axles took quite a bit of time to shape appropriately which I did with a file to rough shape and then turned in the lathe to fine tune. Cautious going is the name of the game, and of course some turned out not at well as I'd hoped but these should be able to be "hidden at the back". The issue I encountered was that I didn't think to check the thickness of the Syren sheets the parts come from and assumed these would all be consistent. The prototype I had already built all seemed to go together nicely and to make life a little easier I built a simple jig to make alignment easier. By chance, I then noticed that there are some reasonably significant differences in dimension. If you look at the second picture where I stack those that look thicker against those that appear thinner the difference is apparent (both 11 in number). What this means is that to build the carriages to the same dimensions will need some parts to be custom made from spare stock as the laser cut part is too small. It appears by chance that the prototype was built using the 'thicker' variety.


-
Rob - personal opinions only. The contemporary models at the Annapolis Museum consistently have a satin(ish) sheen to them, far from matte. Its a fine line between too much and too little sheen it seems. For example, I'd used the Admiralty recommended 'dull black' paint on my Snake build but its just a touch too shiny for the scale (in hindsight) in my view. For that reason I'm using the 'matt (metal) black' for the wales and black paintwork. It seems to look good next to the satin finish of the wipe on poly I'm using (oil based). One option I used on the deck was to use a waterbased 'satin' finish to give a little richness to the colour, and then use a water based matt to finish (think again these are minwax products). Answering the question of varnish on paint, I've found that to be on a case by case basis. The admiralty paints in my view don't need it, but the Tamiya flat blue paint I used is much to matt, but looks so much richer with poly on top. All personal opinion and results from experimentation :-)
-
Looking really nice Rob, the colour of the boxwood looks really nice even without a finish!
-
Looking great. How did you make the very nicely defined square holes in the windlass?
- 91 replies
-
- 1
-
-
- 18th century longboat
- model shipways
- (and 1 more)
-
Yeah! I'm first to the next Mobbsie build and get the best seat.
-
Love what you've achieved with the masts, cleats and tops, should all look stunning all in place. The deadeye plates do look convincing, nicely done.
- 1,306 replies
-
- 10
-
-
- syren
- model shipways
- (and 1 more)
-
Hi Bob - very impressive indeed. On the ensign question, I'd be tempted to attach a couple of cleats to the inside of the stern fascia as Peter suggests to use as belaying points - of course I'm not how feasible that is with everything in place. The other consideration is that given you've shown her without sails and not underway, the ensign would not have been flown from a halliard, rather on a removeable staff mounted in hoops in the center of the stern fascia - you should see plenty of pics of this on HSM Victory to illustrate by googling.
-
Great pictures, especially like the close up view of the stern. I was going to use exactly the same approach for the chain so nice to see it work so well. Now I've "been there and nearly done that" I can appreciate your craftsmanship even more BTW, I think you are referring to the binnacle (?)
-
Jim, you have some real talent, I'm not an art critic either to explain why, but your colour balance, cloud and water effects which are notoriously difficult to do well are to my taste, and work especially well in watercolour medium - oh, and the ships look good too!. Would love to see more.
-
Catching up Jim, everything looks really good especially the rigging. Which manufacturer made the anchor kit from? - it looks well formed and very clean. Just noticed you're in Edinburgh, I used to live in a tiny flat on St Stephen St in Stockbridge many years ago.
-
Very nice lights Tom, do you have any photos you could share of the work in progress, would love to learn your technique.
-
Nice neat waterline and great choice, can only agree with the colour of the Admiralty "light ivory" being a much better scale look. Luckily I have some to be able to put some perspective on the photos as screens never quite seem to do colours justice.
- 91 replies
-
- 4
-
-
- 18th century longboat
- model shipways
- (and 1 more)
-
Beautiful work Christian, I agree that these small details make a huge difference!
-
Swan class 3D model in progress
Beef Wellington replied to dvm27's topic in CAD and 3D Modelling/Drafting Plans with Software
Greg - this is just amazing to see. Will the 'photos' be published in a book, or be viewable on a PC?- 141 replies
-
- 2
-
-
- pof swan series
- swan
- (and 1 more)
-
Really nice finish, you also managed to sneak in the tricky planking at the stern. 🙂
-
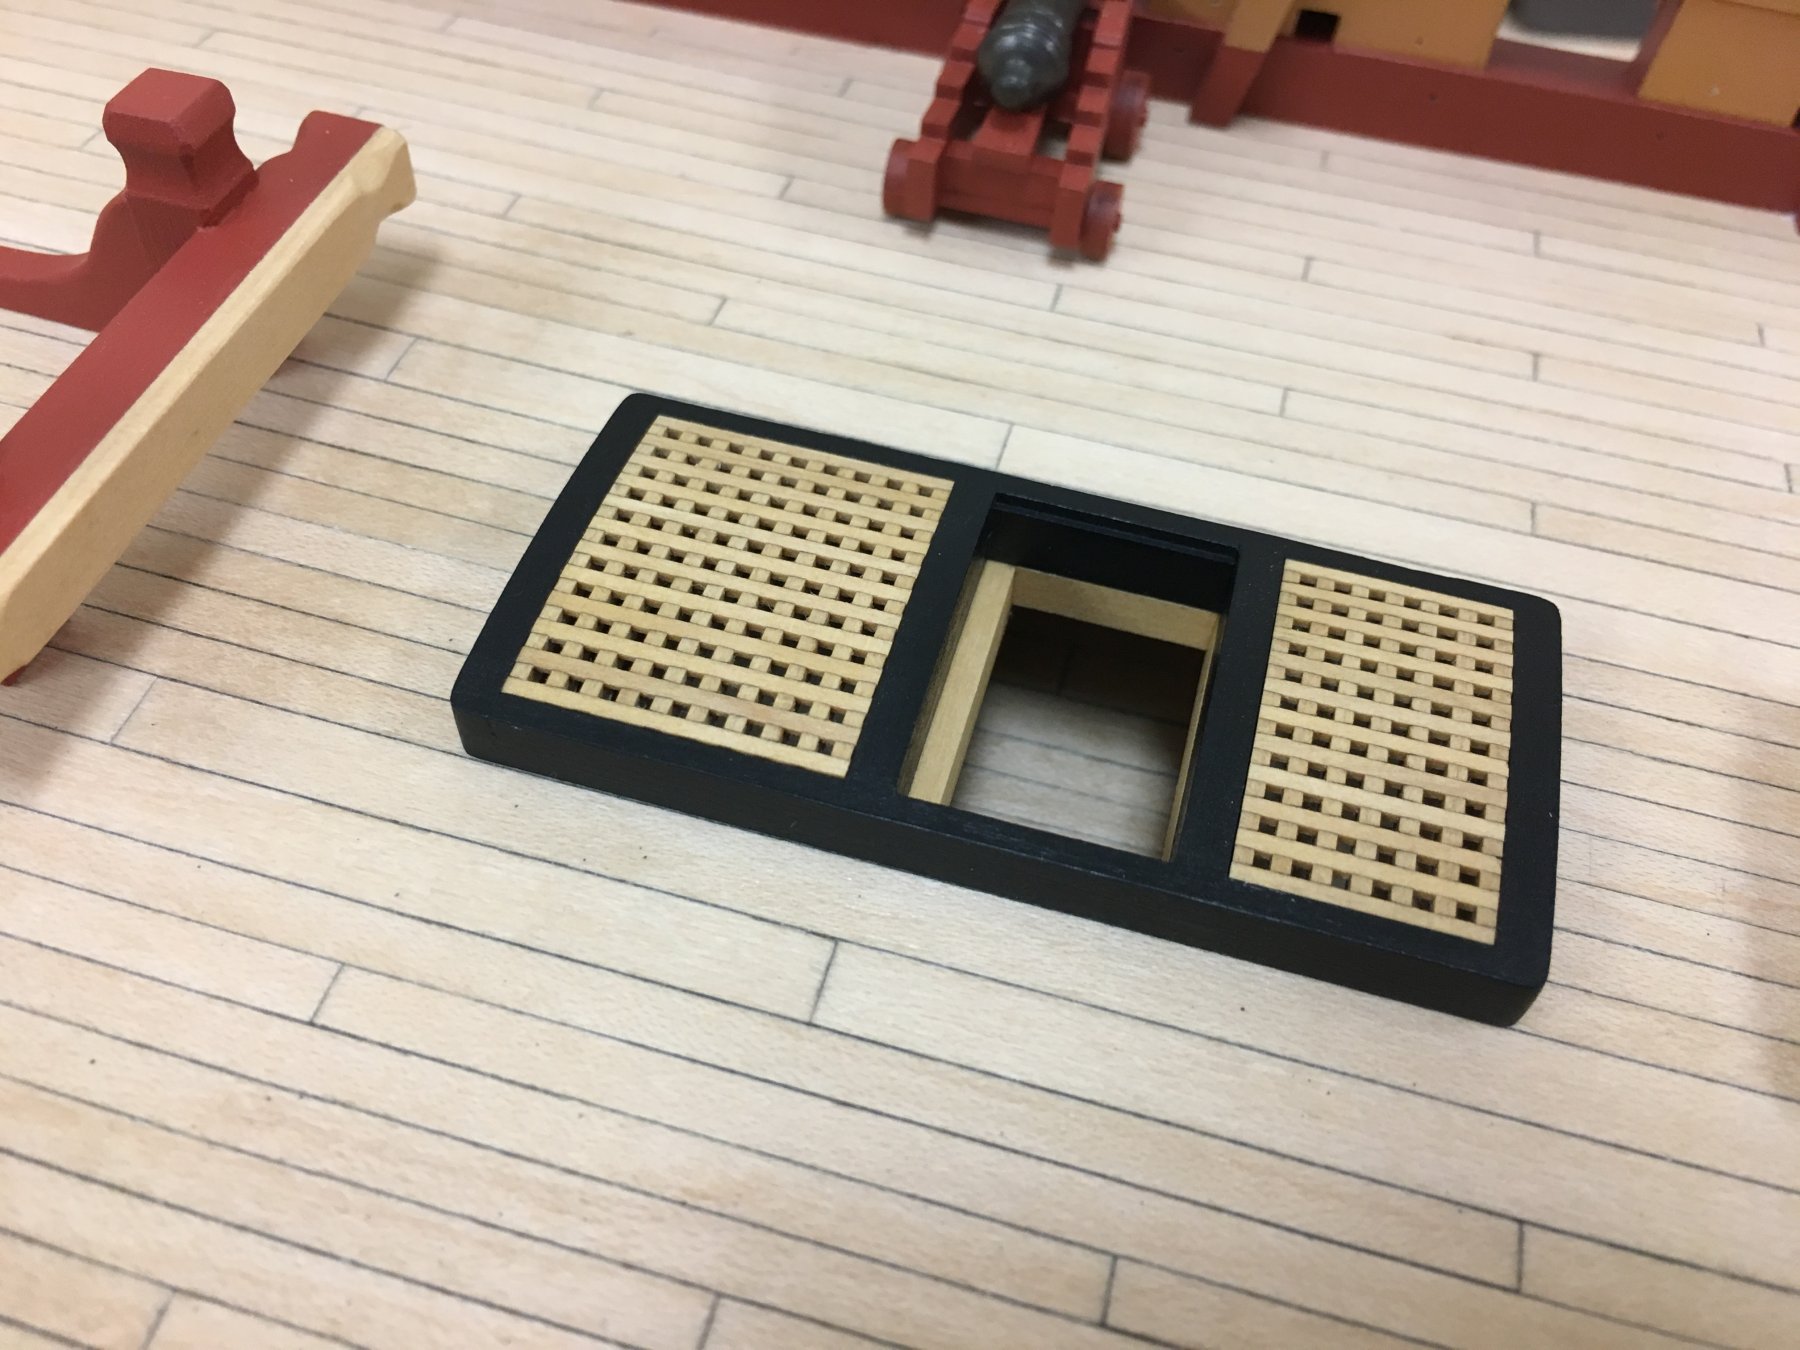
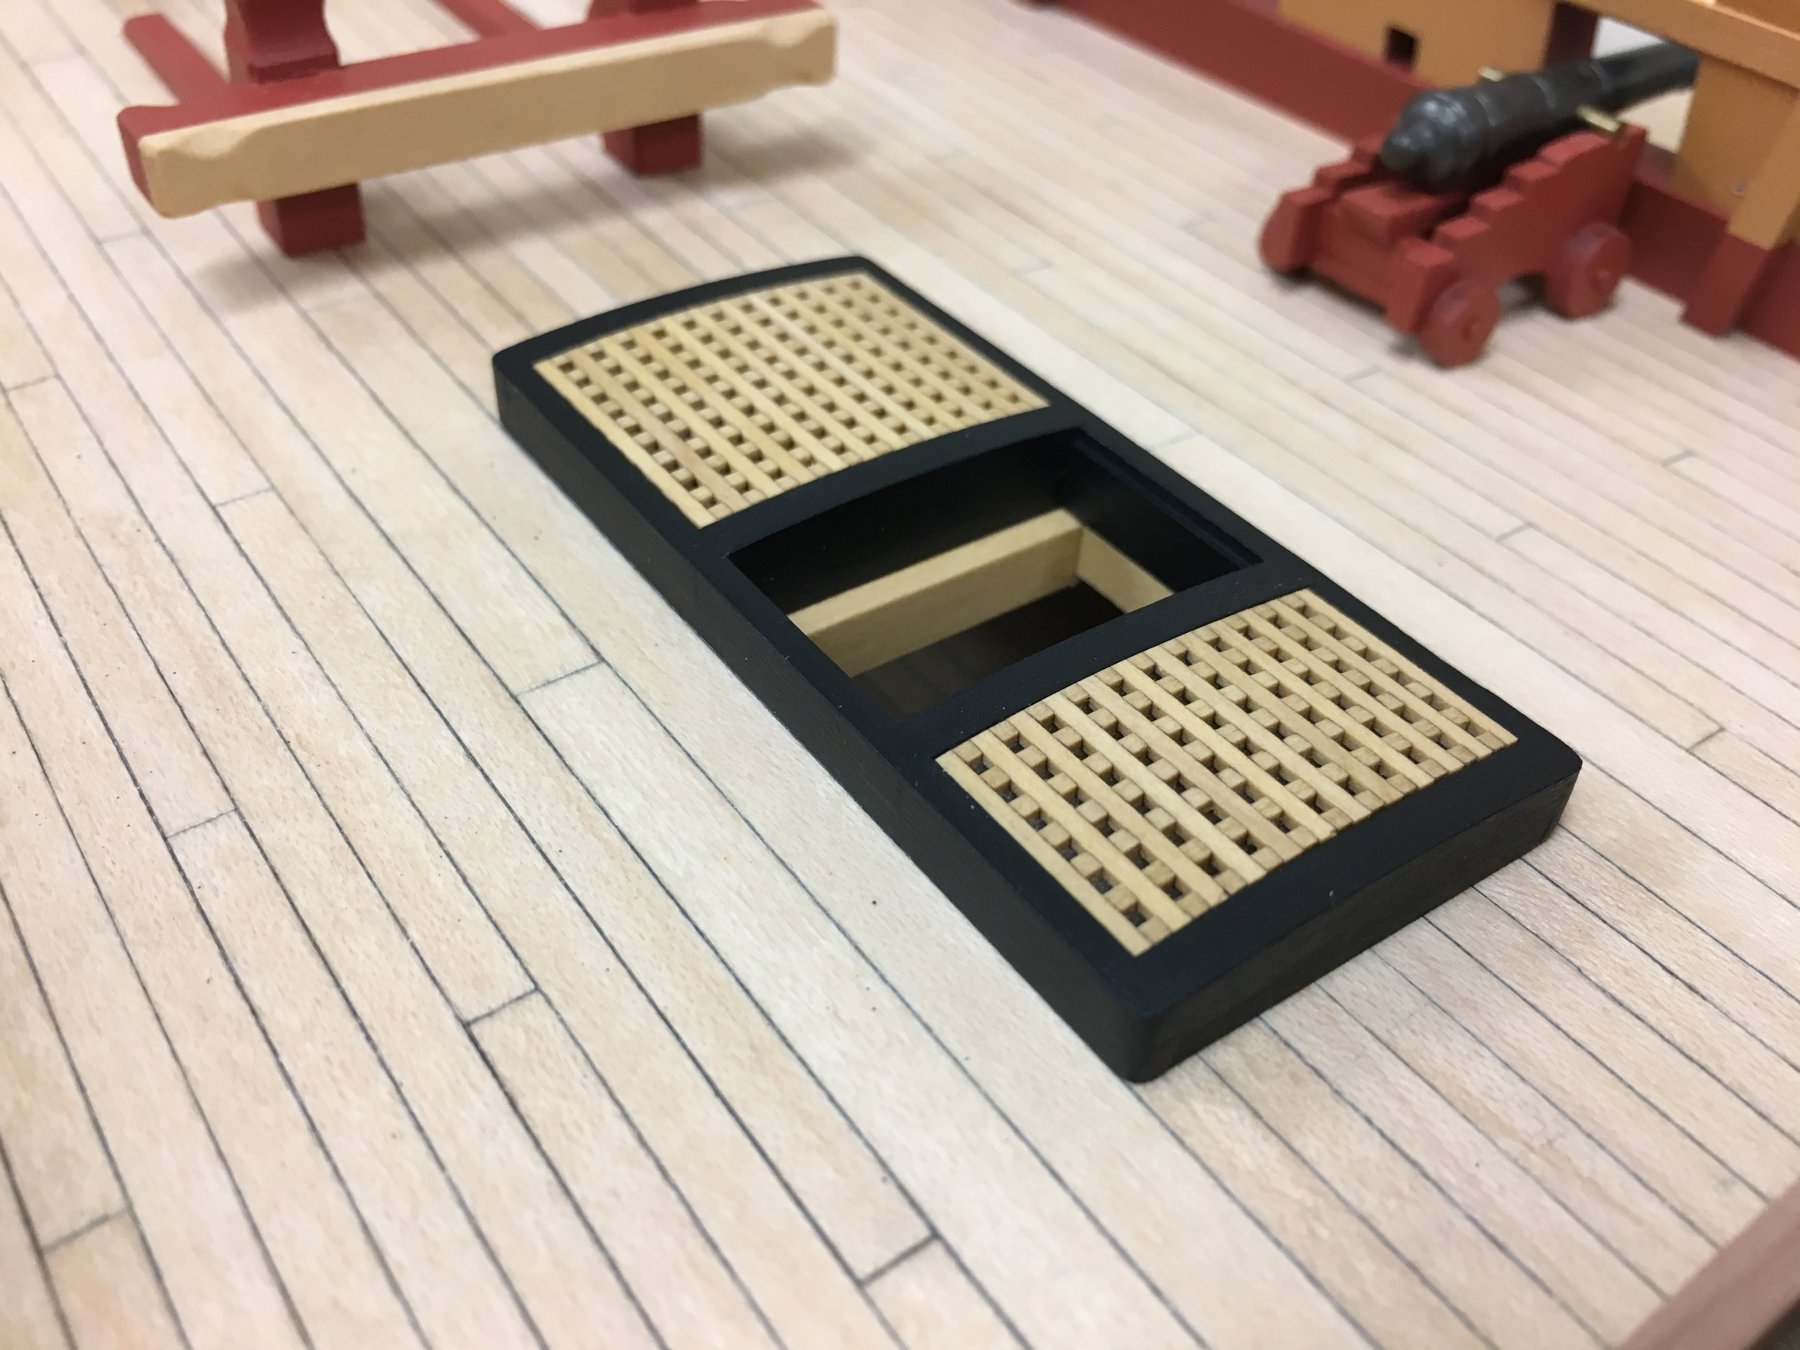
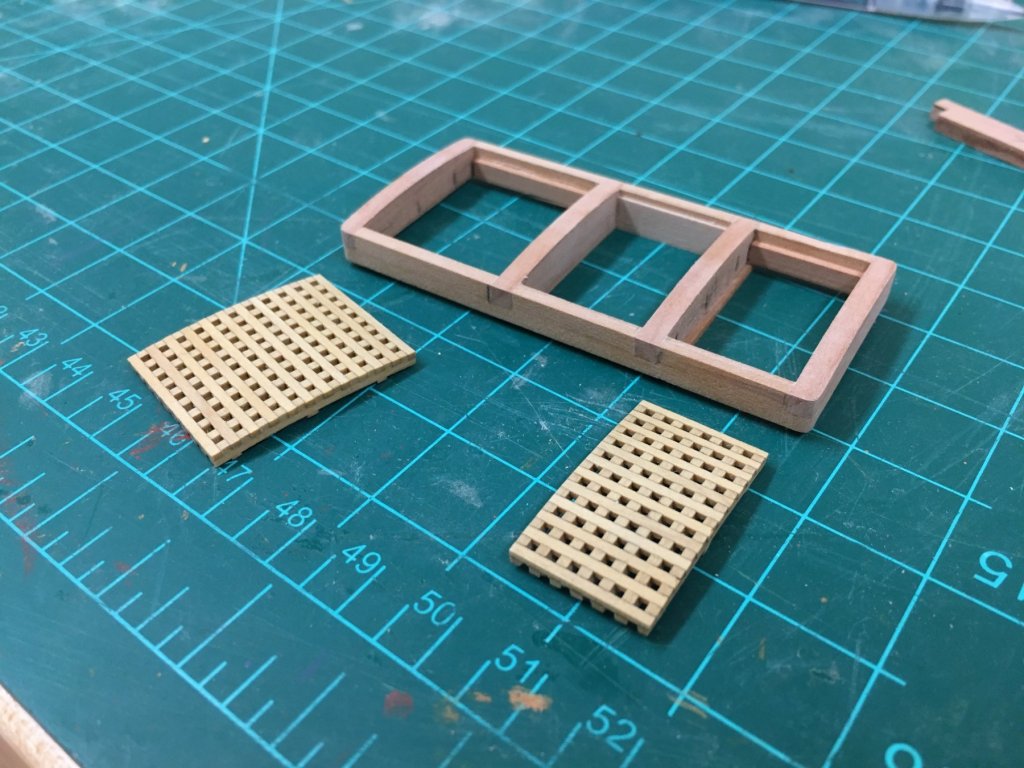
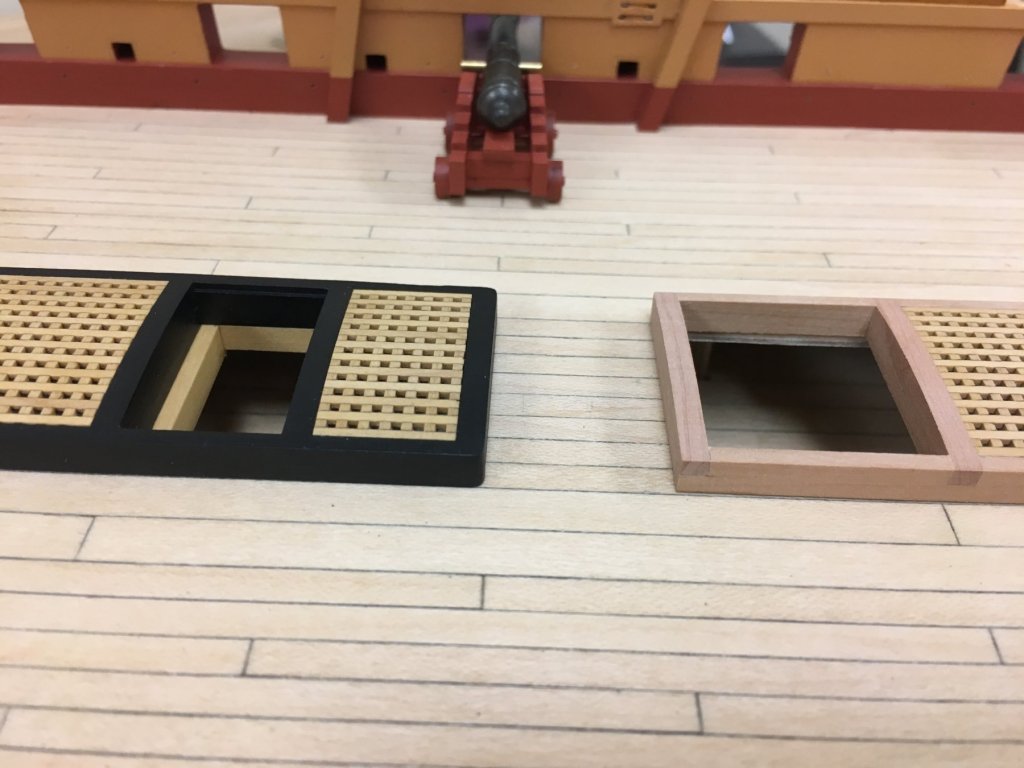
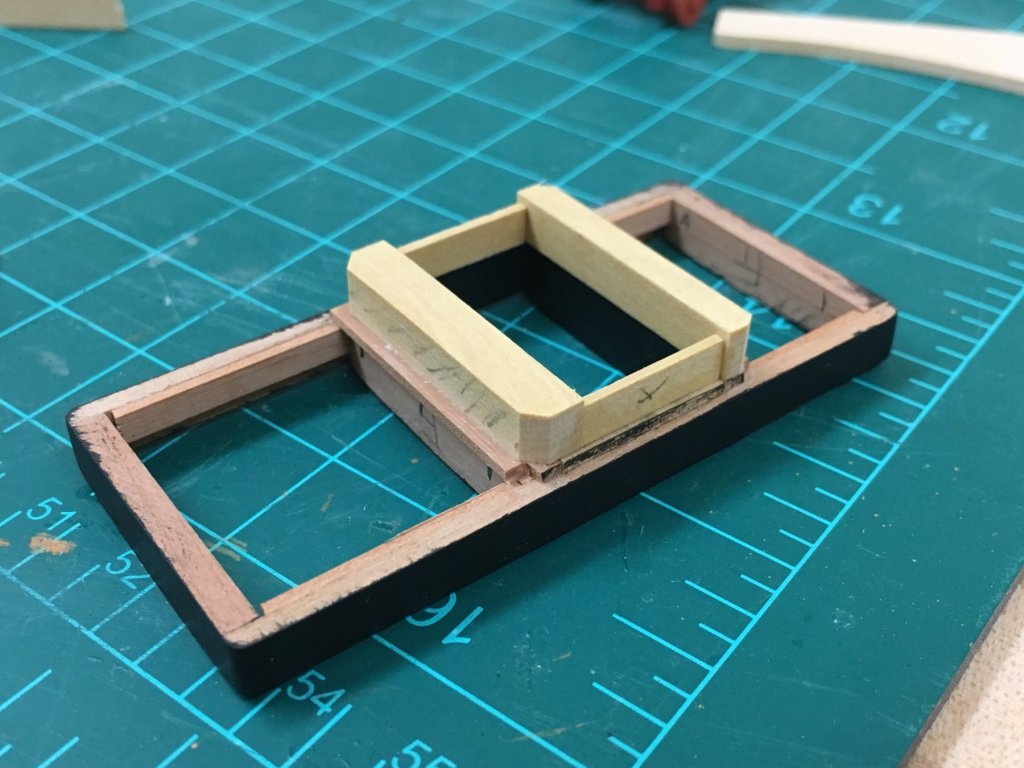
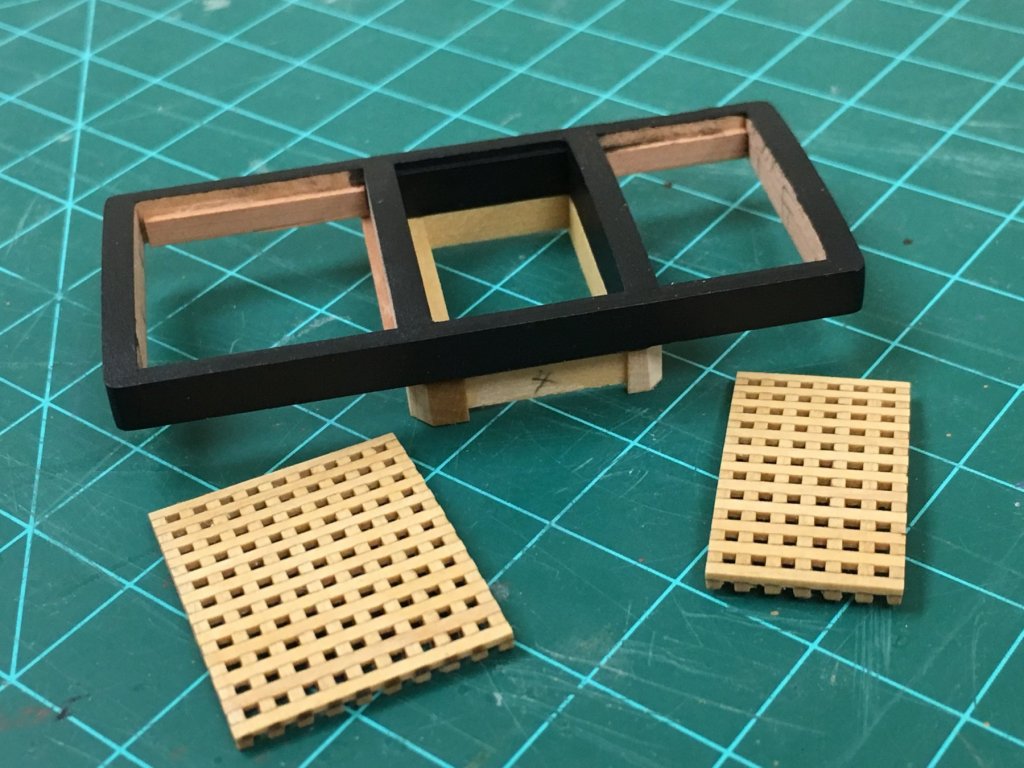
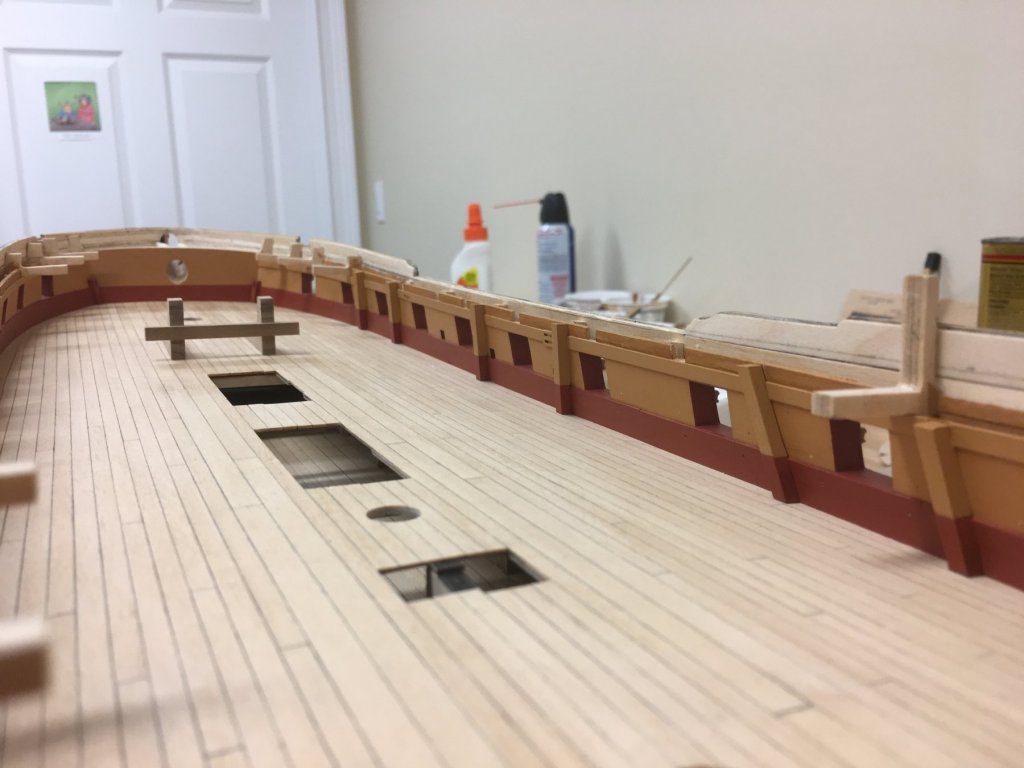
Thanks for all the 'likes', and Greg, Pat, Mike, Christian, Bob, Tom, Hamilton, Michael, Mobbsie - I really appreciate your thoughts and interest, the good news is that I don't need to decide right now. I got a little over-obsessive on Snake using the kit supplied materials which bogged things down a bit, I'm sure I'd enjoy rigging more with better quality line and be happier with the result. What I'm hoping is that I can leave my options open even after things get closed up when the quarterdeck and f'csle go on (e.g. mast stumps that could easily be replaced with full masts and yards at some point) BE - your Victory, despite just looking fantastic, presents yet another interesting alternative. I too like that look a lot. Coamings Moving on a little, have started on the coamings and gratings. I had ordered some of Chuck's gratings some time ago and these were relatively painless to make up. The coaming dimensions were taken from AOTS with a few small adjustments to ensure the edge of the coaming met the wider binding strakes as illustrated. I did go the whole hog and build these as per TFFM which was good practice, if not slow. Not really much else to say. Where the companionways are, I did do bit more fiddly work to try and simulate the beams and carlings that would be visible. I'm sure there must be a better way, but the approach I took was as follows: Build up the bottom of the companionway coaming by 1mm to account for the thickness of the deck (as coamings would sit on the beams/carlings, not the deck) 0.5mm sheet was applied to the side faces to simulate the recess on the interior face Boxwood sheets and strips attached to simulate the beams/carlings. This was not hard once the approach had been figured out as this all still needs to slide in through the holes in the deck (which had to be enlarged a bit). I did decide to paint these black, as is shown to good effect on the contemporary Winchelsea model. I was tempted to leave these natural, but as I had made these out of pear, I felt that another wood tone would be distracting. In any event, black appears to have been quite commonly used toward the end of the century to aid safety by making the companionways more visible against the deck. Bit of a Frankenstein's monster from underneath, but to my eye looks convincing enough when in place. All the coamings and gratings have been made up and just need some finishing. I was pleased that the coamings lined up with the butt pattern of the planks, because as irregular as they looks, they do correspond with the theoretical placement of the beams below. The third photo shows the difference in appearance with the added depth in the companionway, vs the coaming simply sitting on the deck for comparison. The last photo shows everything in place. One slight fudge I'm making here is to put a grating into the foremost of the two rearmost openings. This should really be a companionway down to the wardroom, but the keel former realistically presents this being represented, and given that this will barely be glimpsed, a grating went on top instead. The kit plans omit this feature entirely.


-
Beautiful work Dafi, one thing I've always been curious about was the purpose of the yellow 'pillar' at the front of the topmast between the top and the cap. doesn't really seem substantial enough to perform a significant purpose and I haven't seen similar examples on other ships. Only thing I can think of is to provide a little additional support to the front of the mast when the weight of the topmast is .being hoisted - maybe similar to the use of a triple block on large ships vs a double.
-
She's looking really good Christian and those overall shots are testament to your work! The reworked coils look to have much more of a scale weight to them which greatly enhances the effect.
-
Looking very nice BE, the run of the planks looks great. Now you are able to compare, do you think the pinnace is just fundamentally more challenging because of its shape, or was it simply your recent experience that allowed you to complete this more satisfactorily?
- 91 replies
-
- 6
-
-
- 18th century longboat
- model shipways
- (and 1 more)
-
Nice start, hope the planking continues easily!
- 91 replies
-
- 2
-
-
- 18th century longboat
- model shipways
- (and 1 more)
-
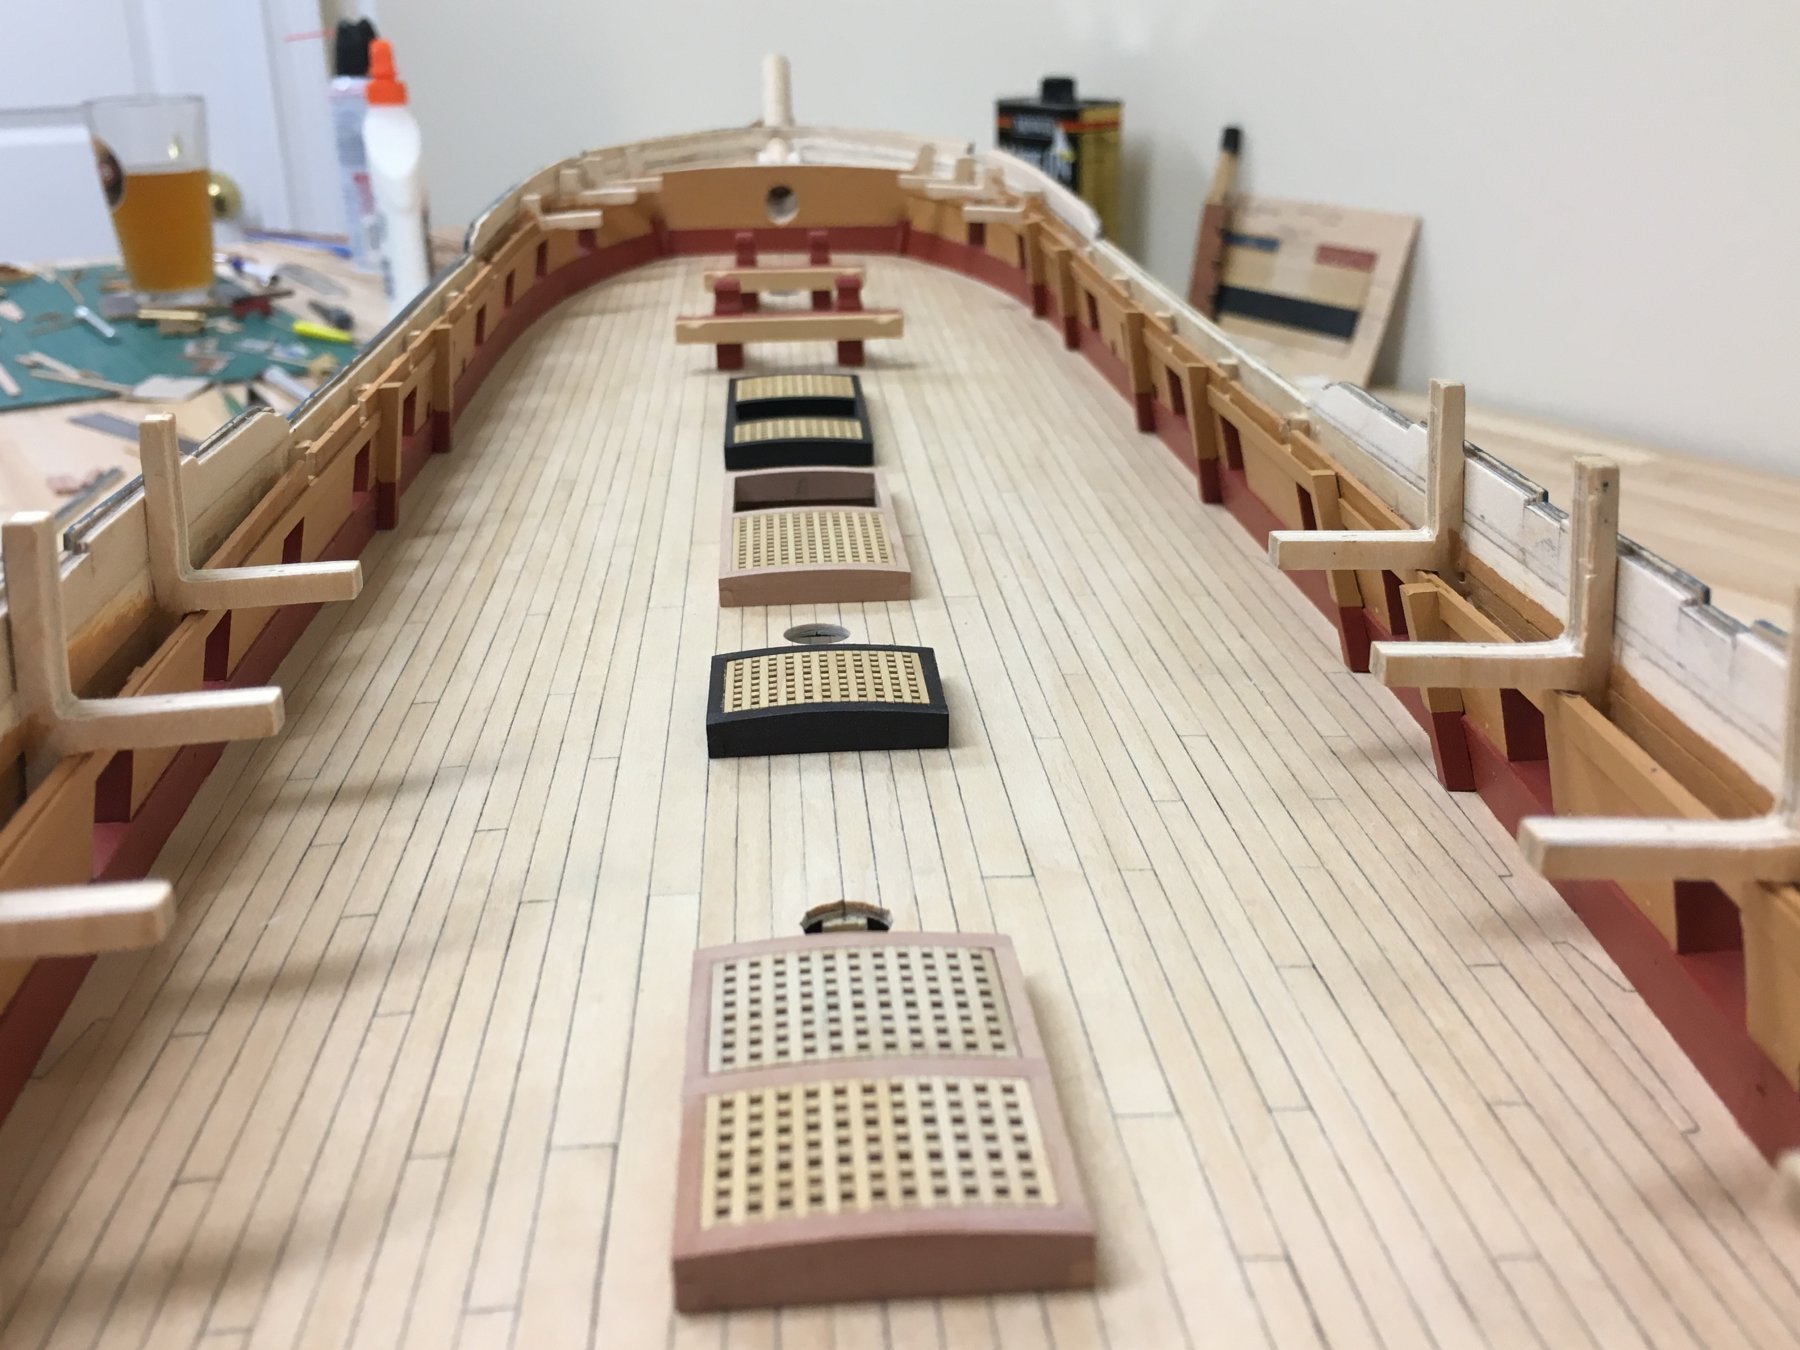
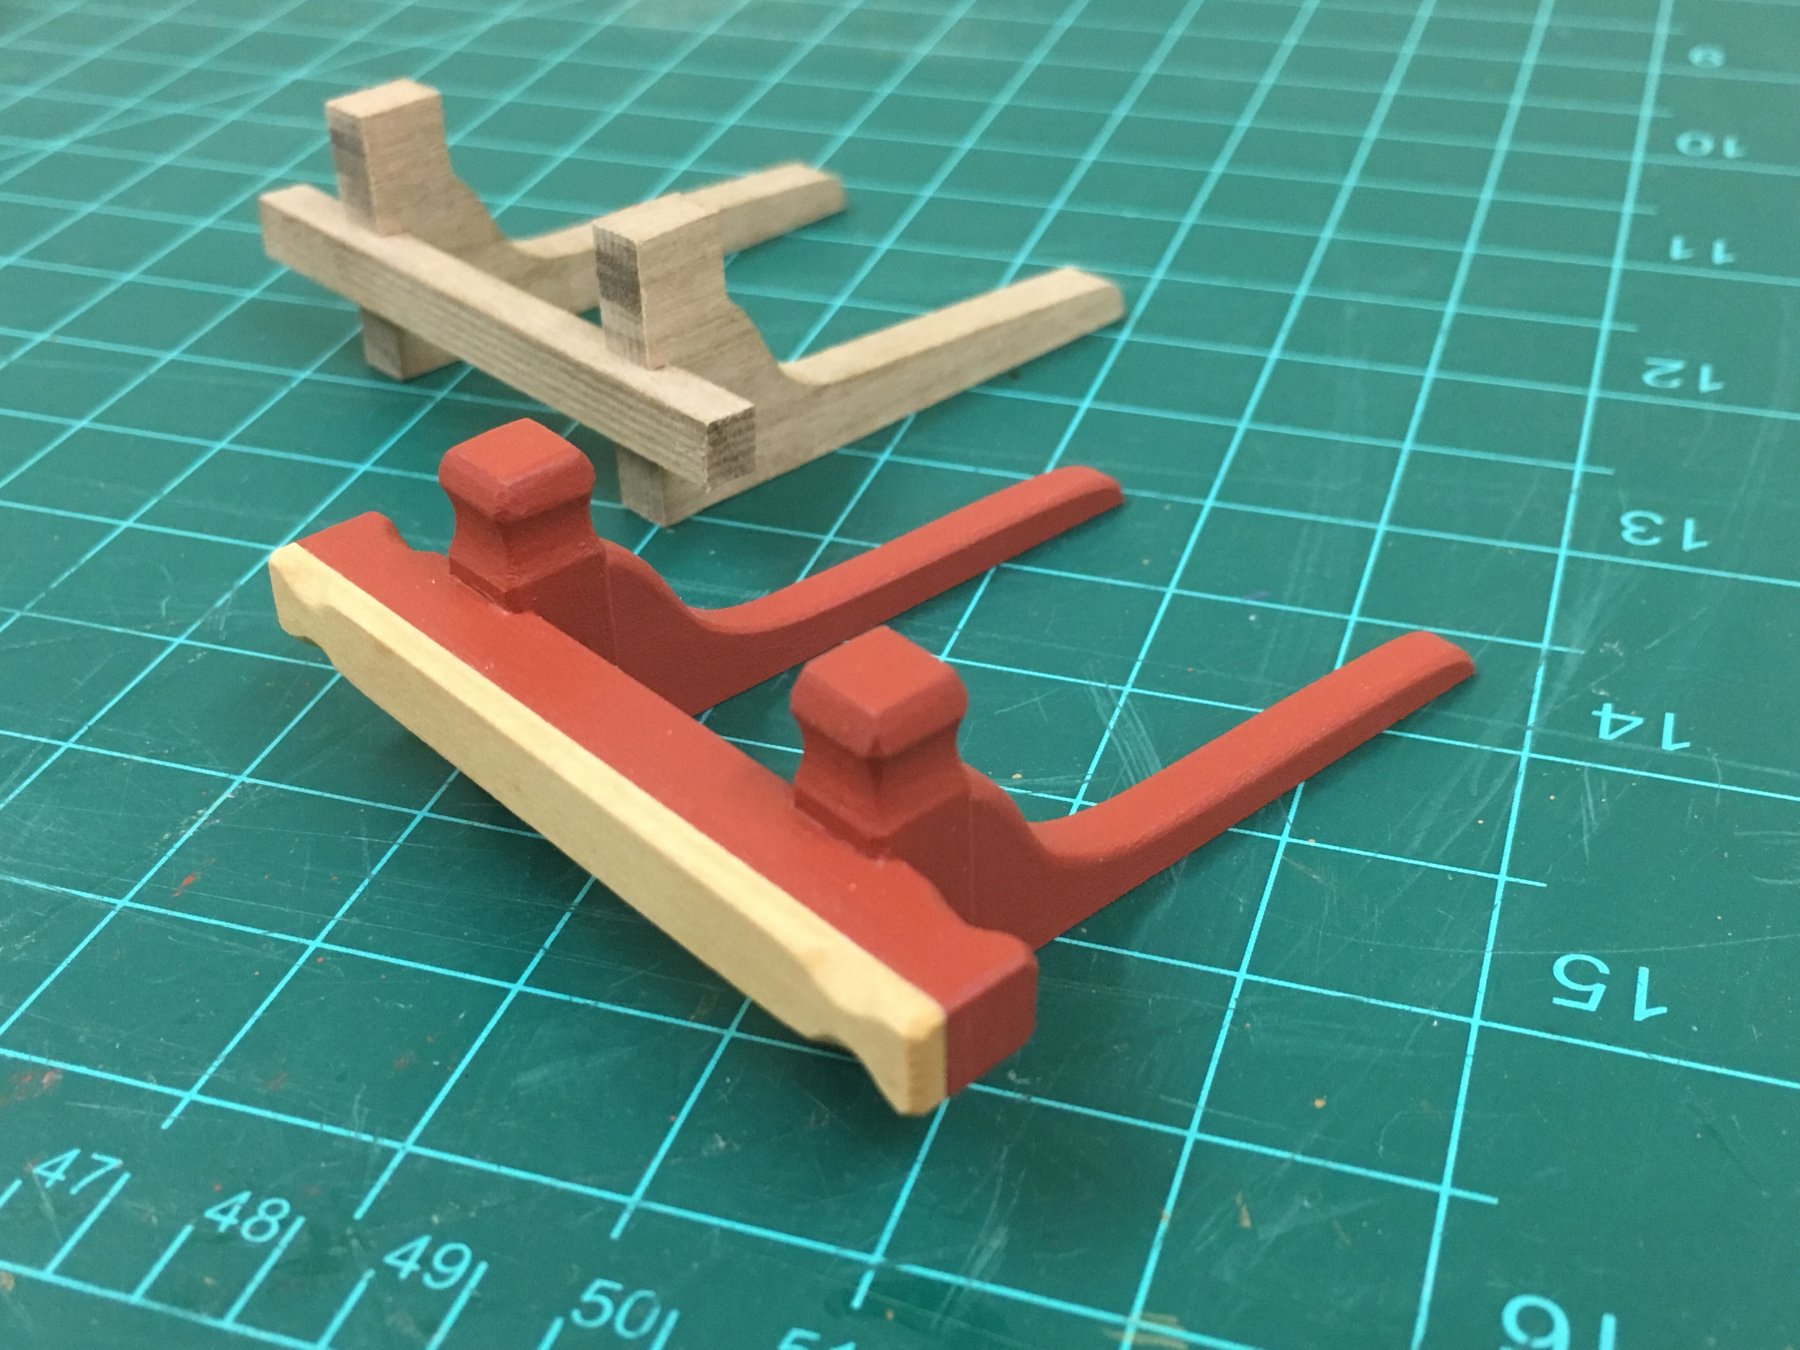
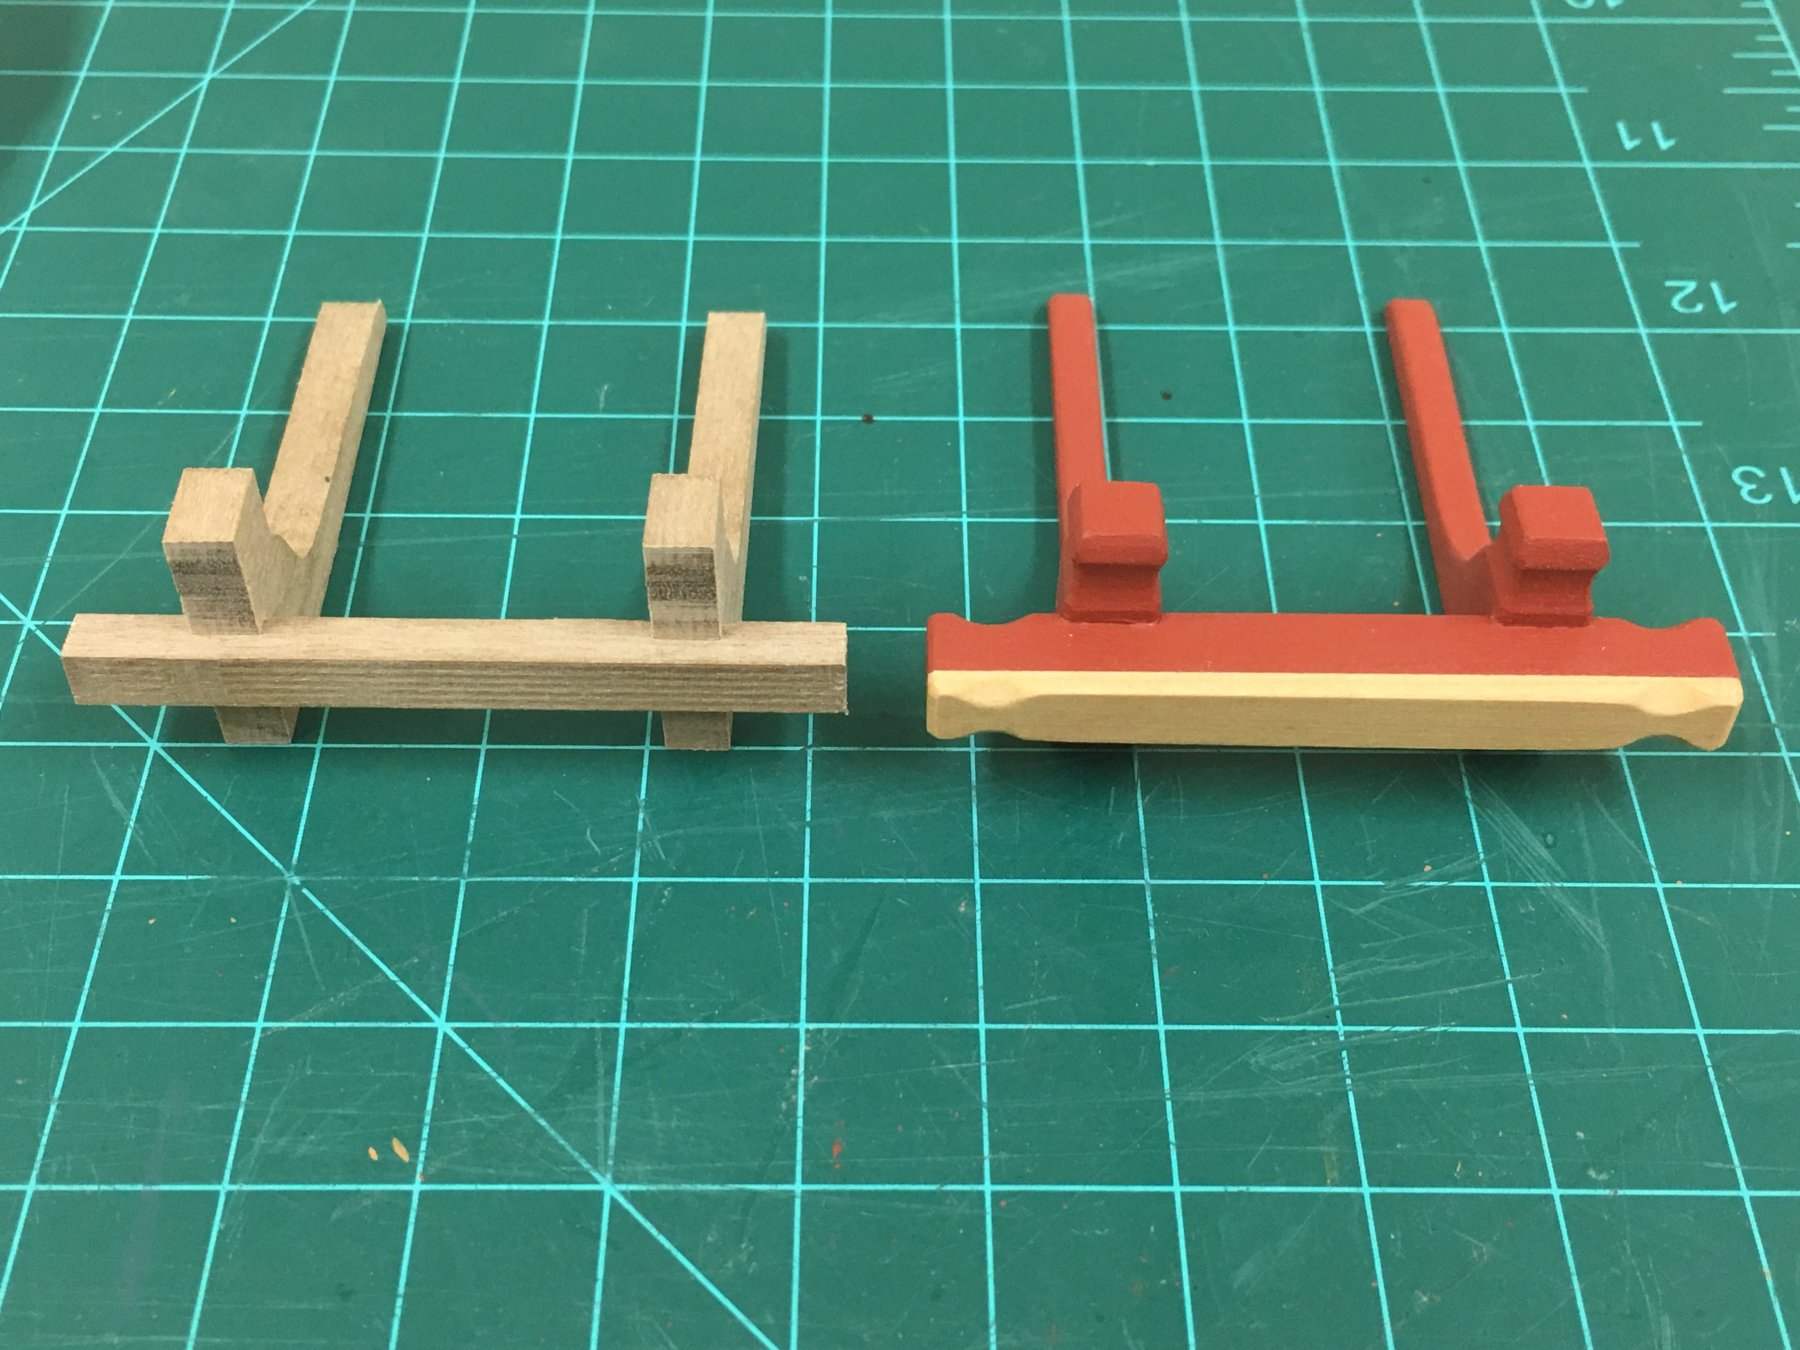
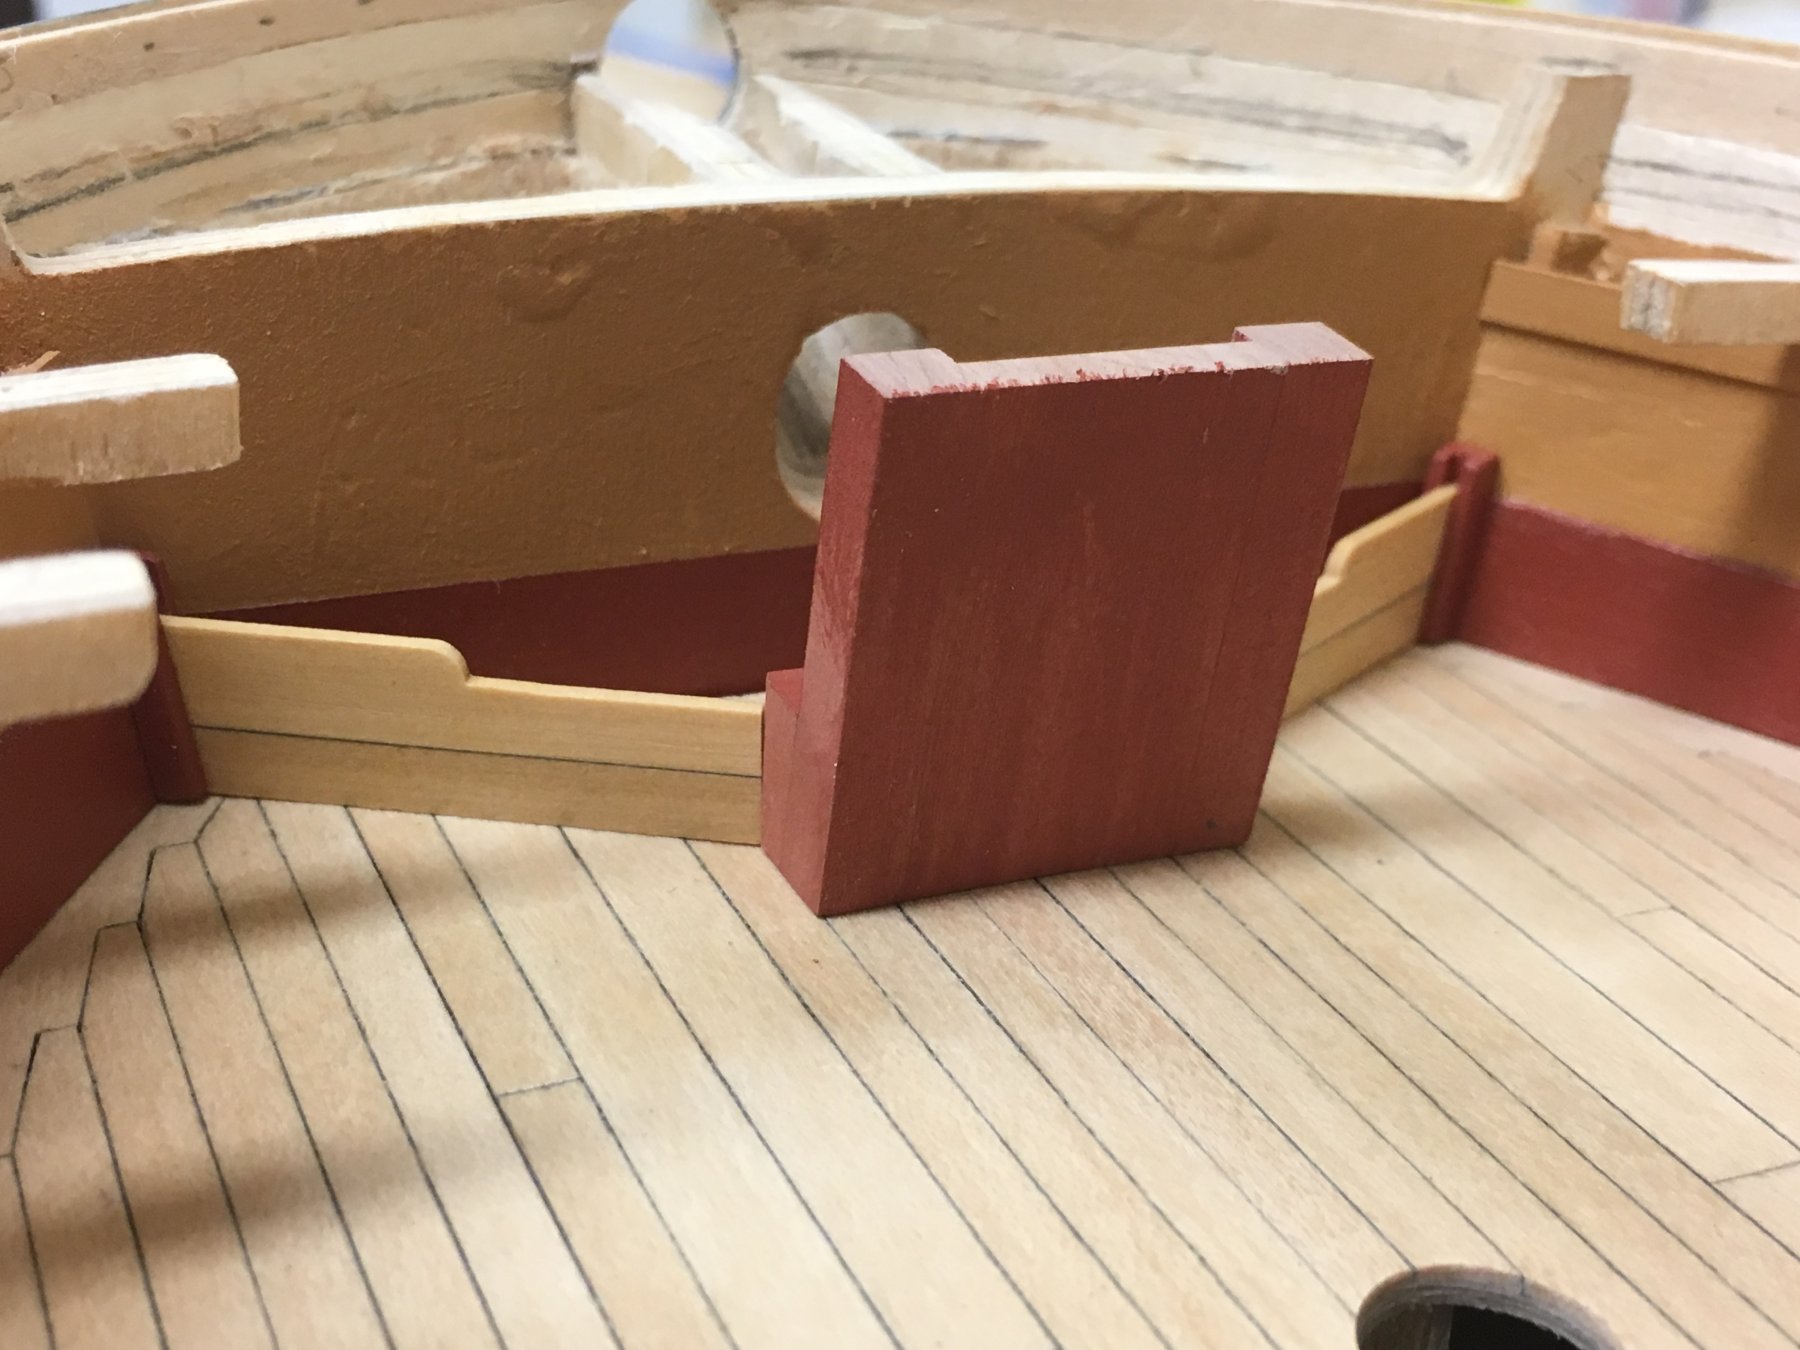
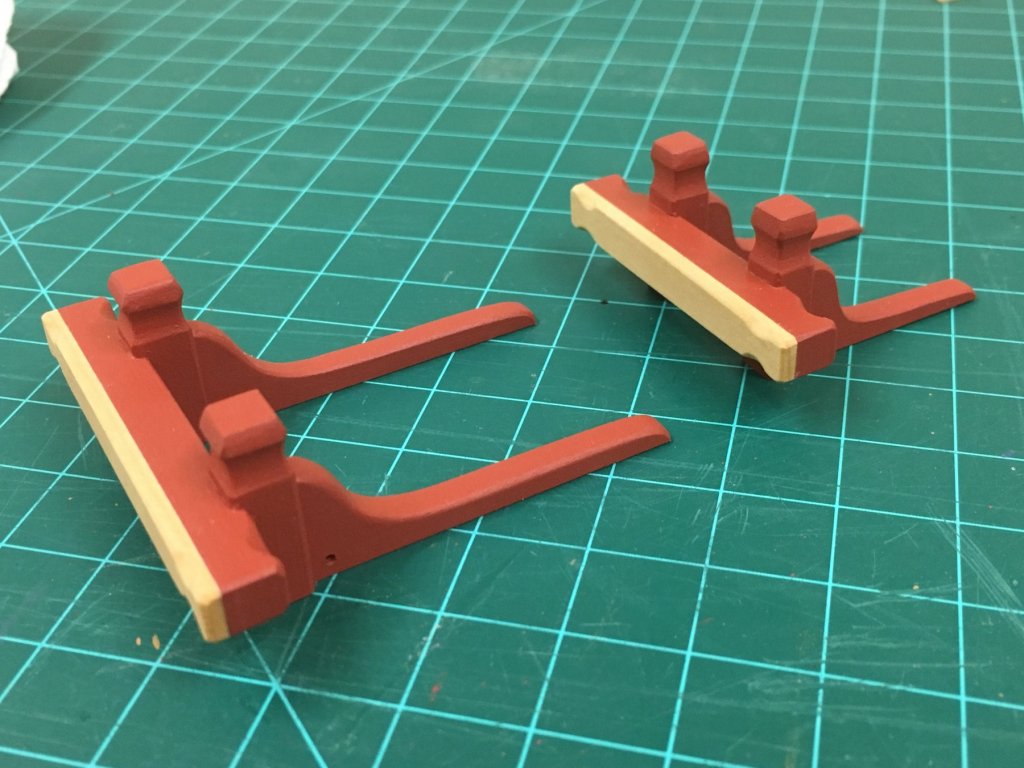
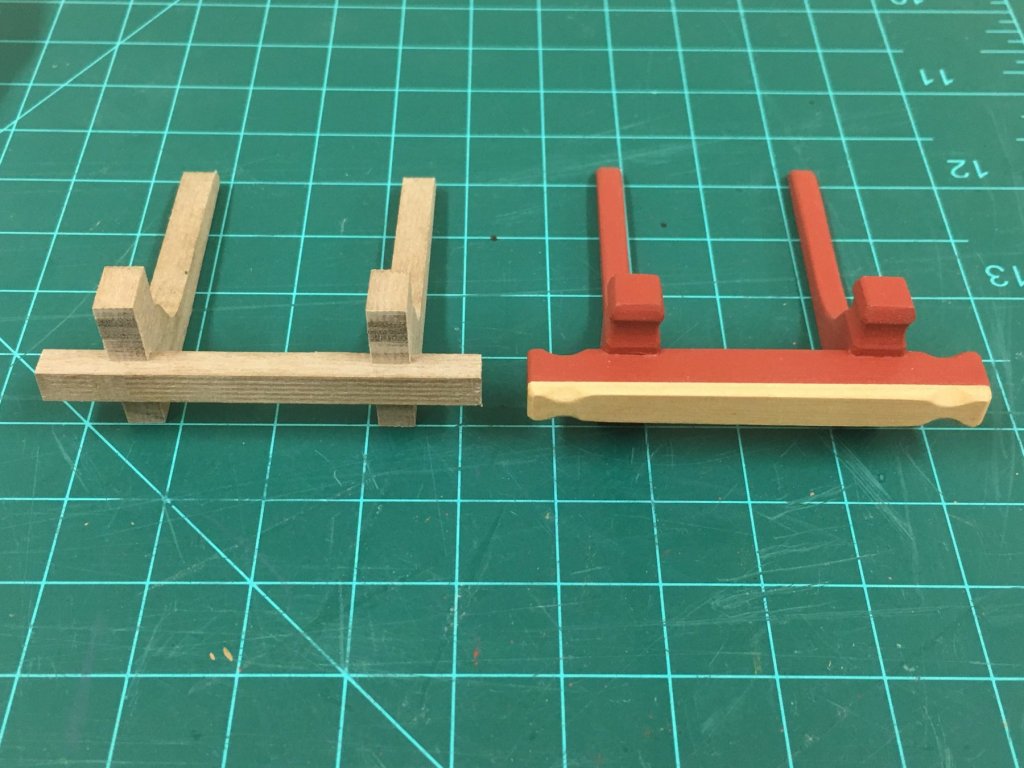
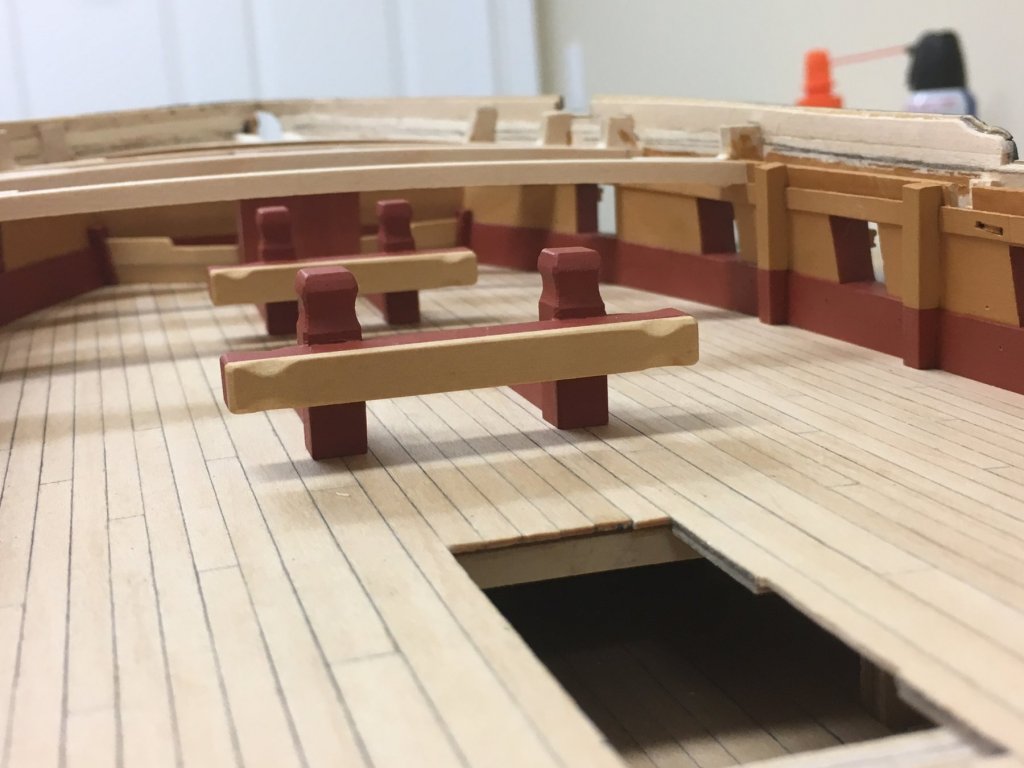
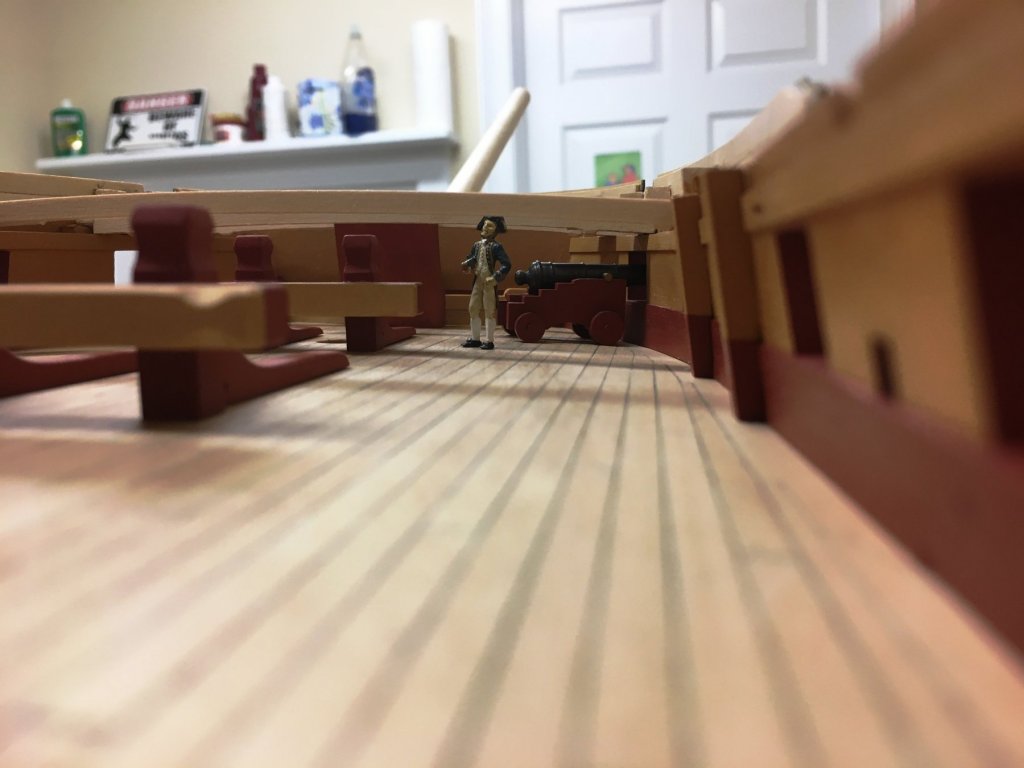
Thanks all for the "likes" and looking in. Think a point has been reached where all of the known big challenges have been addressed, or at least an approach developed, so I can start to have a bit of fun tackling some of the other odd pieces on the deck. I am starting to seriously consider not rigging this model... the reason being that I certainly still have plenty ahead of me (and I still haven't even finished rigging 'Snake' yet) even without rigging, also the size of the hull is already quite large and adding the masts and spars will increase the needed space significantly. Curious on other's thoughts on this, hopefully it is not anathema. The other consideration is that I would like to move onto another build sooner than I realistically would if I were to fully rig. What this means is that I may spend a little extra time adding some details that I otherwise wouldn't, as I'm also wanting to leave my options open to possibly leave open some of the upper deck planking/scuttles. 4 additional standards have been added, 2 fore and 2 aft (still in process on larboard side) as these will be visible when the upper deck is in place. You can see the kit supplied riding bitts in place. The scale of these bitts is actually pretty accurate, but I didn't like the shape so decided to make up my own...and while I was at it also made up some fore riding bitts following guidance from TFFM as the AOTS book is a little sparse on detail. These were fun little projects. I believe the forward elm battens were nailed on for easy replacement but I haven't tried to simulate that, not sure how this would be done however, or whether this is a "less is more" situation. Previous mods allowed the bowsprit to be secured within the hull on a bowsprit step so this was also constructed. Going a little crazy some manger boards were also made up, these will not be readily (understatement) viewable but I think could add to the sense of depth when undergoing close inspection through a gun port , and help mask the obvious edge of the bulkhead against the deck. The dimensions of the bowsprit step are a little ambiguous, in retrospect I would have made it 2-3mm narrower, but given the likely visibility, this will not be redone. The placement of the bowsprit step is a little dependent on some of the foremost beam, to be obsessive this should be a little further forward, but think it will be just fine where it is. The foremost deck beams required modification to work around some of the other alterations made up to this point but this was simple enough. And with everything in place a couple of deck shots to get a feel for things...


-
Very interesting approach to building the hull and its already a beautiful result, can't wait to see how the rest of the planking goes together!
- 208 replies
-
- 2
-
-
- le soleil royal
- 104 guns
- (and 2 more)