JPett
-
Posts
881 -
Joined
-
Last visited
Content Type
Profiles
Forums
Gallery
Events
Everything posted by JPett
-
 Ahoy Micheal Nice touch. The level of detail you are adding to this kit is incredible, How you could do such fine work and still find time to be "sooo irritated" at yourself amazes me PS: I am looking forward to see what you do with your mill.
 -
HMS Victory by JPett - Corel - 1:98
JPett replied to JPett's topic in - Kit build logs for subjects built from 1751 - 1800
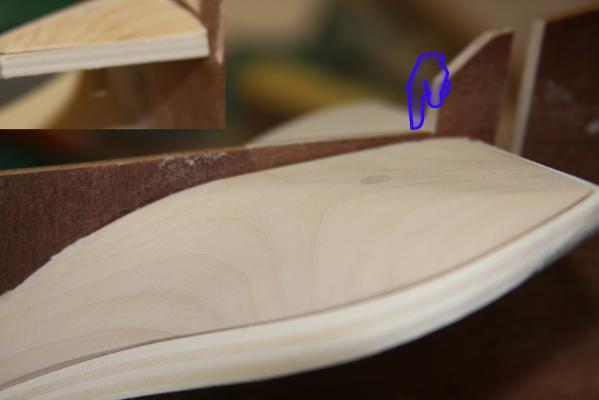
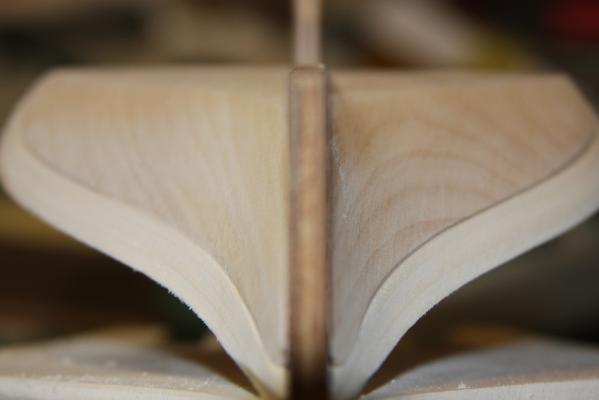
Ahoy Mates Welcome and thanks for stopping by Well after many hours sanding, my little closet shipyard is a complete disaster and will need a complete cleaning. I think I am finally at the point where I can glue the rear fillers on. I have decided to post some pics before I do just to be safe. Please feel free to speak out if you see anything I missed or worst; did wrong. I am now using 230 grade sandpaper and hand sanding the final stage. I can feel the wood through the paper and although i do not like sanding without support this seems to be working for these last touches. I am using a piece of 1/32nd scrap as a batten and the curve is starting to settle in. I am still short on the top where I need the two layers of planking but am now reducing the height of the filler. There is nothing left to sand so I can only "ASSuME" that I must reduce the first layer of planking here. For anyone following; it took me 12 to 15 hours to hand sand these. I am sure there are those who could have powered these down in about 2 hours, sadly I am not one of them. The shape was too complicated, their importance too high and my confidence too low. I used my Pipe sander and always tried to think of how a plank would lie across the area as I sanded. When I was unsure I used my batten and tested. Here is a link to my sander http://modelshipworld.com/index.php/topic/8017-simple-sanding-jig-for-complex-shapes/?p=237878 Next is a complete cleaning of the shipyard. This may take a few days. Hopefully I will be gluing these on shortly and finishing with the final sanding of the bulkheads and all the fillers. Running some tests with battens and then it's gunport supports. I have learned a new method to do these so hopefully it should go a little faster then the first ones. I kind of over thought them a bit.
-
Wappen von Hamburg by andy - Corel
JPett replied to andy's topic in - Kit build logs for subjects built from 1501 - 1750
Ahoy Andy You do work fast. Were you able to reach Xander. You realize that women can also be very good friends too. I would think she would find your work and log quite the compliment. Who knows, your wife and her might just hit it off too. -
Ahoy Joe I myself prefer the brass rod that you are using. However I recently saw a build where black Monofilament fishing line was used against a white maple deck with black caulking. It was a very good look as the treenails (for a better word) contrasted very nicely and stood proud. . Consider all the colors and diameters that fishing line comes in I am sure the possibilities are endless. Your log has inspired me to take a trip to Bass pro shops and see if they sell a "rust" or "corroded" colored fishing line.
-
Ahoy Joe Very nice I have also seen this done with Monofilament fishing line which comes in a plethora of colors and sizes.
-
Ahoy Martin Thx for the link, Beautiful Kit. It seems i may have found you in a small squall. I am sure you will weather this with your skill. If you recall i had some issues with the bulkheads on my Ratt. My suggestion is that you build a jig and mount the hull. One like I did for my Vic build. If you have top and side views in the plans you will be able to make,take, and transfer accurate measurements and confirm that you are on the right heading. I found this simple "tool" very helpful and have just recently used it to correct the gunports on my Ratt. A square and one of those pencil holder things is also very useful. If you need pics let me know. I will post some links. Well I am here now and have a seat, a drink, and my snacks. I am very much looking forward to following you on your journey .
- 467 replies
-
- 1
-

-
- fly
- victory models
- (and 1 more)
-
Ahoy Mog Welcome back to the shipyard Here's to being on the driving end of the scalpel
-
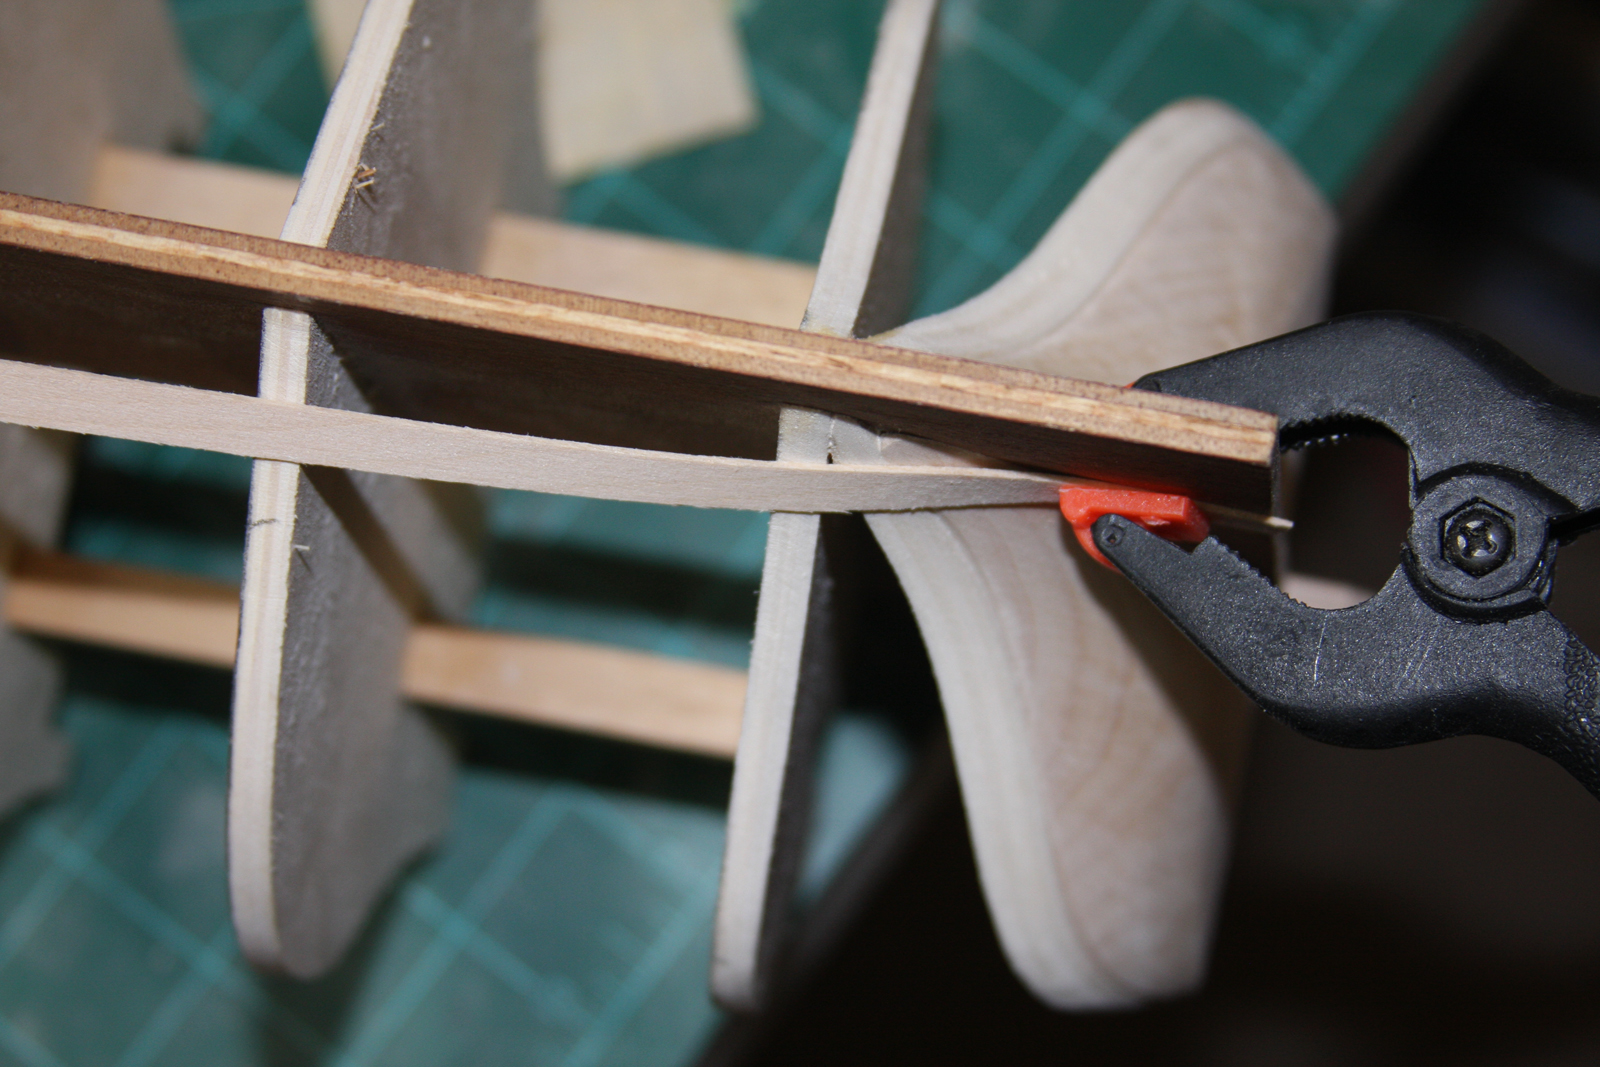
Ahoy Mates I use "the Original Titebond" PVA for most of my shipbuilding needs. I also paint or dye my wood with a water soluble oil paint and then treat it with an oil based wipe on poly (WOP) I am concerned about the long term holding strength of using PVA on a 'treated" surface to bond small details. I lightly sand any areas to be bonded and follow up with another coat of WOP which may or may not aide in the bond. One surface is also always untreated wood. My fear is that after a few years will these parts "pop" off as i have seen PE do (I no longer use CA on PE for this reason) causing a difficult repair? On larger pieces my plan is to include a treenail or two but some parts are just too small or thin. In the pic the ladders and trim were all attached over treated wood with the method described above. Currently the bond seems very good and neither can easily be removed. I did move all of them by scoring the seam and then soaking the area with water. The steps taken and required were no different then those needed to "de-bond" a wood to wood joint and the bond seemed very strong.

- 1 reply
-
- 2
-
-
Ahoy Dragzz You will learn a lot building these little wooden ships. The least of which will be how to build little wooden ships
-
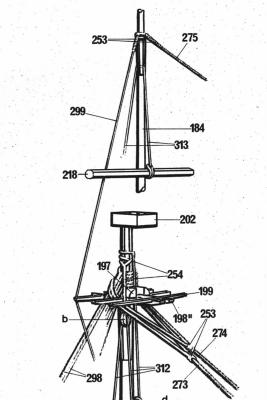
Ahoy Andy I am not at the rigging stage, nor have I ever rigged a model ship, but I have done rigging in the real world and also own Corel's full tilt version Hope these help

-
Ahoy Andy I am with yea on the breaking up some of these tedious jobs. I have an old computer monitor mounted in my shop and one of those internet WiFi boxes plugged into it. Netflix is worth every penny. Nothing like popping in the shop and watching an episode of Breaking Bad and chopping away at some of these tasks.
-
Ahoy Ben It is simply amazing to watch your progress and what it takes to build POF. Thx for sharing
-
Ahoy Dragzz I think this is a very good idea. Planking your Victory will be a major undertaking. Having never planked a ship before this might be an easier introduction and any experience gained here will only make your Vic better. Smart move PS: Vic is my mistress. The Ratt is my main squeeze. I take what I learn there and apply it to my Vic.
-
Ahoy Mike I am with you on this. While a big part of woods beauty is the diversity; there is a point where it goes to far. In most other fields; products with less desirable traits are sold as seconds. Expecting this from our wood suppliers is not asking for the stars.
- 969 replies
-
- 2
-
-
- hahn
- oliver cromwell
- (and 1 more)
-
I would actually like to know if there are any POB ships on display in a Museum. I think we just may have figured out who is really the "bass turd" child here.
-
Wappen von Hamburg by andy - Corel
JPett replied to andy's topic in - Kit build logs for subjects built from 1501 - 1750
Ahoy Mates I am using Google Chrome. It offered to translate the log. While not perfect I can now actually read and understand most of it. Only a few words do not translate. -
Ahoy Kenneth I would run some test. You have plenty of scrap wood to make a few extra carriages to try some different approaches.
-
Ahoy Joe Your work is impeccable. You have really taken this kit to a new level.
-
Wappen von Hamburg by andy - Corel
JPett replied to andy's topic in - Kit build logs for subjects built from 1501 - 1750
Ahoy Andy Found this today. it may or may not be of use http://www.modelships.de/Wappen_von_Hamburg_I_1/Detailansichten_Wappen_von_Hamburg_I_1.htm -
Ahoy Scott That blue you have chosen is beautiful. Those close ups really show what an excellent job you have done so far.
-
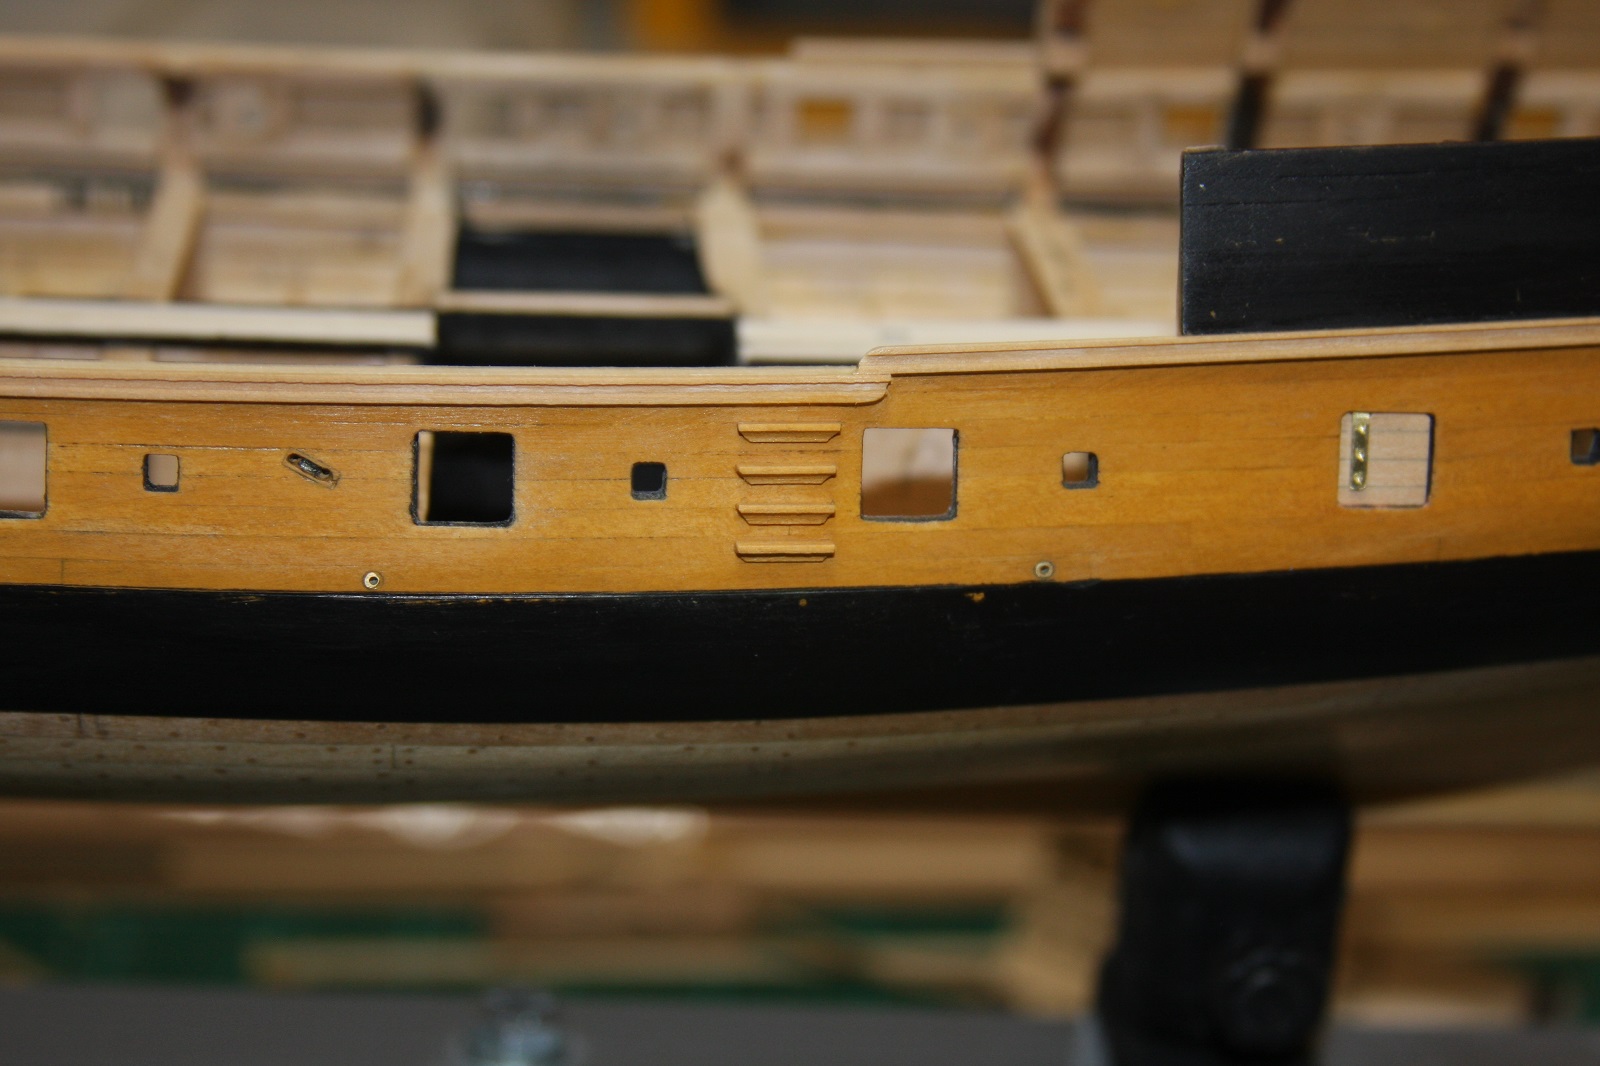
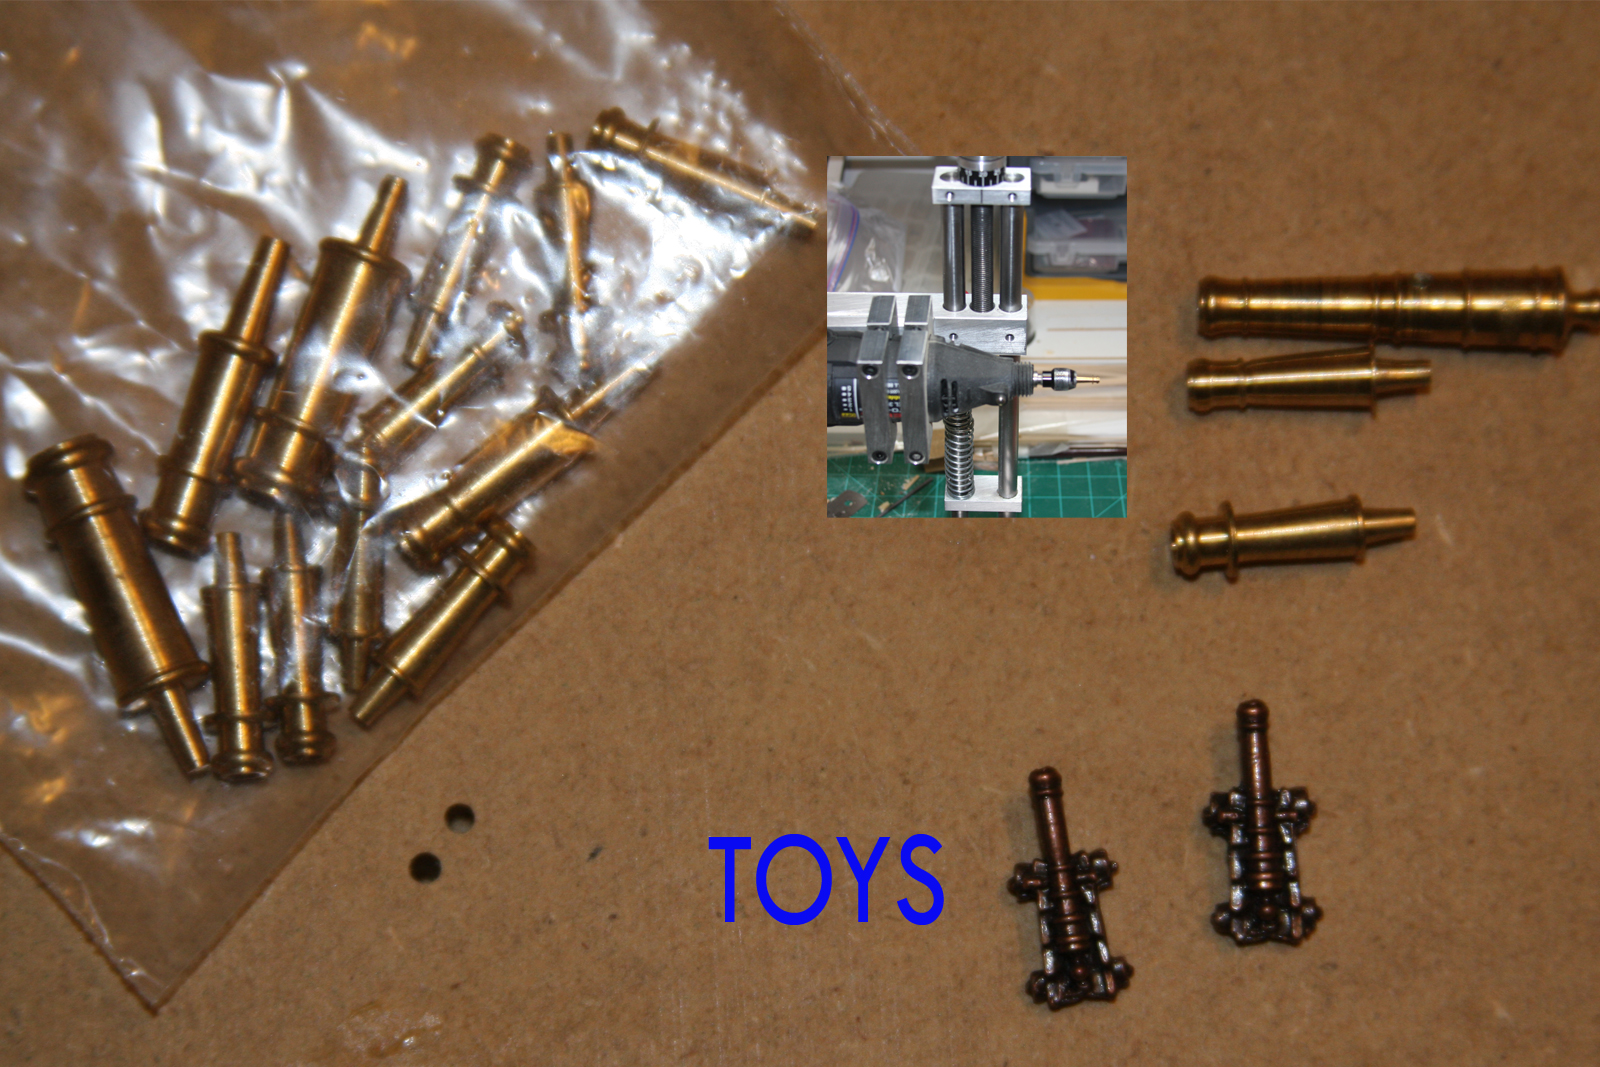
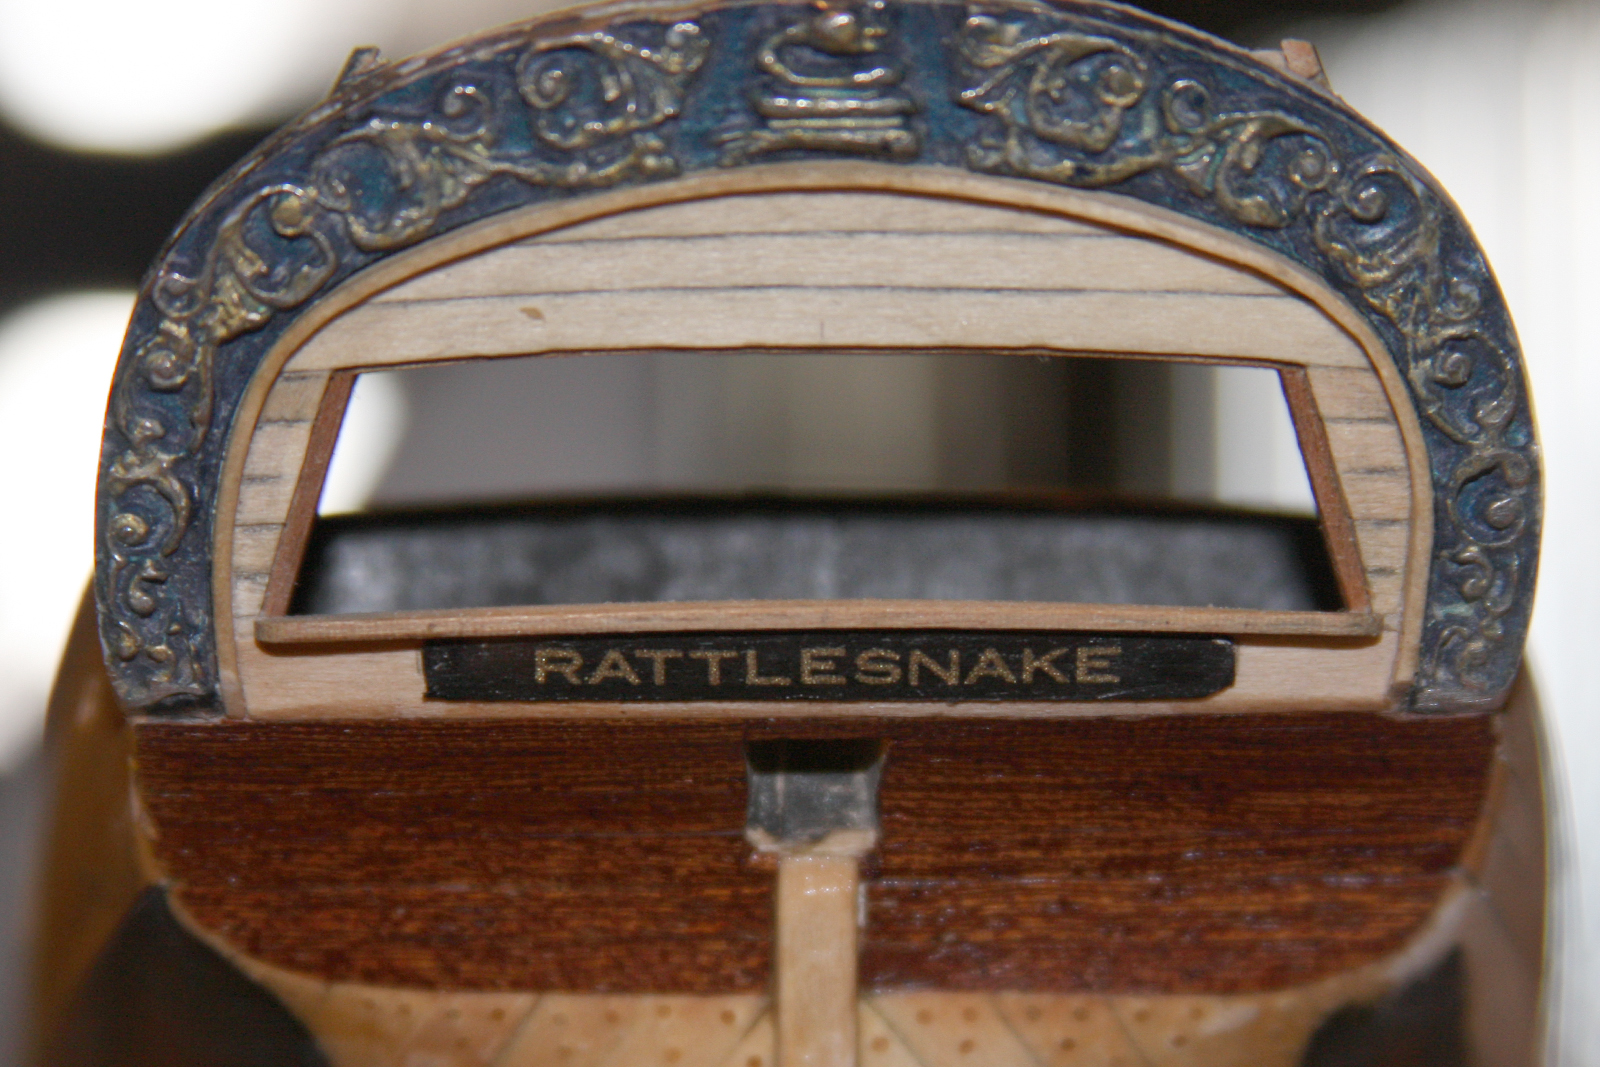
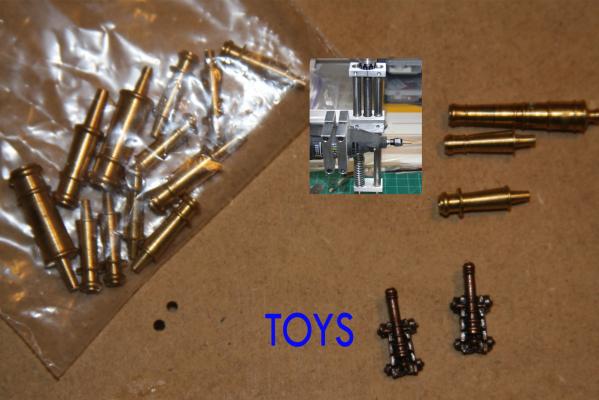
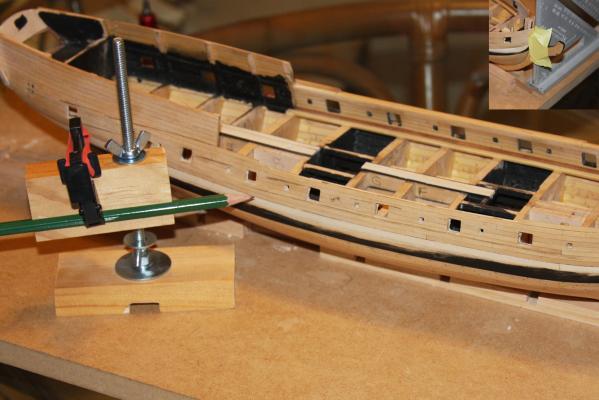
Ahoy Mates Russ; Coming from you I consider that compliment an honor. It was your help that was instrumental in me getting this far along in my build. Thank you, it is people like yourself who make MSW what it is JS: I agree, clutter is a big problem "lol" I will try my best to avoid it. My decks will only be completed topside. Martin: Yours came out so good. I miss your updates. I did a search for your next build. Please PM me a link to it Ben: Thanks for checking in. Anytime I feel overwhelmed by my build I stop by yours for some inspiration. That truly is an amazing project you have going on there. You are doing an incredible job, thx for posting. Sam: Yea I was not a happy shipwright after the storm. Augie: Rear Admiral "Sir" I am hoping that you and yours are enjoying yourselves. There is a line forming to see your next post. I think some are even camping out. One of them is wearing a Moose hat. I think its Sjors. Bill: Thanks, it is good to see your back in your shipyard too. Popeye: Yea I like that color best. Mother is the only one who makes it. She's a natural. Back to the Build Well we got our cannons. Our new sponsor "rocks" and I received them two days ahead of schedule. Sadly they are very close, I even put one in my Vanda Lay to try and get some conformity but I could not. If anyone wants them please PM me. You must have a active build here on MSW and promise to make a small contribution to this site through Paypal. It does not need to match their cost, I don't need to know what it is, and don't want any for myself. I will also pay to ship them to you USPS. I am however very happy with the toys I got I used Woodland Scenic transfers to do my badge. They were very easy to use and I am very happy with the results. Don't let anyone tell you they are hard to use: They are easy, just don't cut them out, use them straight from the sheet, The other letters on the sheet aide in registration, and follow the instructions to the "letter". I used a gold metal flake which the camera does not capture very well. You will have to trust me when I say it looks really good in person. I can see I will be repainting the artwork and need to correct the port side of the placard. That image is over twice the actual size too. . I also finished the lower transom. As I mentioned before but I think those comments were deleted in the great crash, this Model Expo mahogany is not easy stuff to work with. I am glad to be done here. I would however use this wood again, now that I know it's limitations and how to work around them. Just not here I am having a really hard time with these ports. It was hard enough doing the port side. Matching them on the starboard side has turned into a major undertaking for me. Slow would be a compliment, Progress is so slow to the untrained eye "stopped" might be a better description. Galaxies are spinning faster in my telescope. I spend more time measuring, checking and postulating then sanding, cutting or building. I have however come up with a plan. I had to throw my other lady out of bed to do this, and she was not happy about it. Truth be told I should have; and highly recommend that anyone building any ship make a jig. Even if it is a flat bottom ship. You just can not beat a "constant" for making/transferring measurements from plans or side to side and a jig does this for you in spades. Considering they can be made for under 2 dollars it really is a no brainer. Well happy building Mates. I am hoping that my next post shows my lady ready for a night out on the town. The thought of me ripping off the starboard side gunwale planking is a post I prefer not to make.

-
Wappen von Hamburg by andy - Corel
JPett replied to andy's topic in - Kit build logs for subjects built from 1501 - 1750
Ahoy Andy Somebody always has to go first. I nominate "YOU" As for your quiz I will add "G" It is an unusual subject, a very large kit, a huge commitment and not for the weak at heart -
Ahoy E Could you use a strip of basswood and fill the off center cut out and then cut a new one. I am assuming it curves around the hull so you might need to soak the basswood then form it first. Use pins to hold it in place and after it drys glue it in. You could do it in sections too. Then just make a new one. You should be able to get the basswood locally. Hobby Lobby, Micheal's, or a hobby store.
-
Ahoy Macymae It is on their site http://www.modelexpo-online.com/images/docs/MS2130/MS2130-Bluenose-Parts_List.pdf MS2130-Bluenose-Parts_List (1).pdf
-
Ahoy Dragzz Belts are what you get when you divide up the hull for planking. From the wales down you should have at least 3 maybe four. Creating them will prevent your planking from wandering plus make the job easier by breaking it up.