HOLIDAY DONATION DRIVE - SUPPORT MSW - DO YOUR PART TO KEEP THIS GREAT FORUM GOING! (Only 24 donations so far out of 49,000 members - C'mon guys!)
×


gjdale
-
Posts
4,891 -
Joined
-
Last visited
Content Type
Profiles
Forums
Gallery
Events
Everything posted by gjdale
-
 Pffffffffffffffffff!!!!! .....oh, that was for Sjors....... Lovely work Augie. She's looking quite splendiferous! (translate that one Sjors )
- 2,191 replies
-
- 1
-

-
- confederacy
- Model Shipways
- (and 1 more)
-
Simply wonderful details Remco. I do think though, that you should show the drawers of the wardrobe open, just to prove they do. Wait for it.........................................
- 1,215 replies
-
- 1
-
-
- sloop
- kingfisher
- (and 1 more)
-
Nice to see an update Robbyn. I totally understand how life can get in the way sometimes. Looks like your new hull is taking shape nicely - well done. Be careful on that bike of yours - just had a phone call from an old friend this evening. He's in hospital after crashing his bike in the Snowy Mountains on the weekend. Not the way he'd planned to experience his first ever helicopter flight!
-
Nice work Toni. If you need more crew members, you could always sub-contract Doris!
-
Congratulations on a truly fine model Len. Whether you subsequently come back and rig her or not, she remains a real beauty. What's next for you then?
-
Very nicely done, as always, Danny.
-
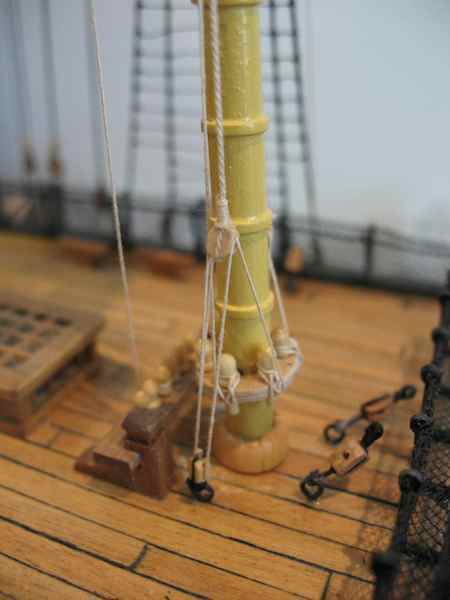
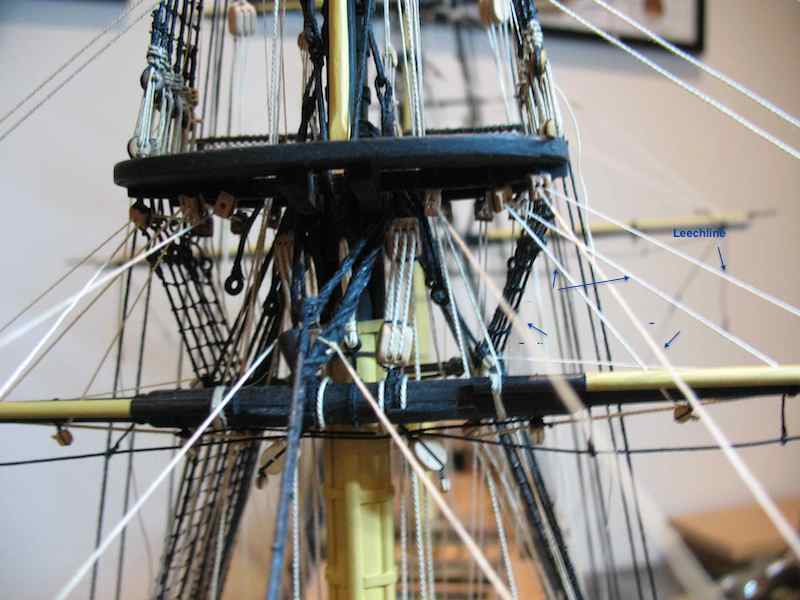
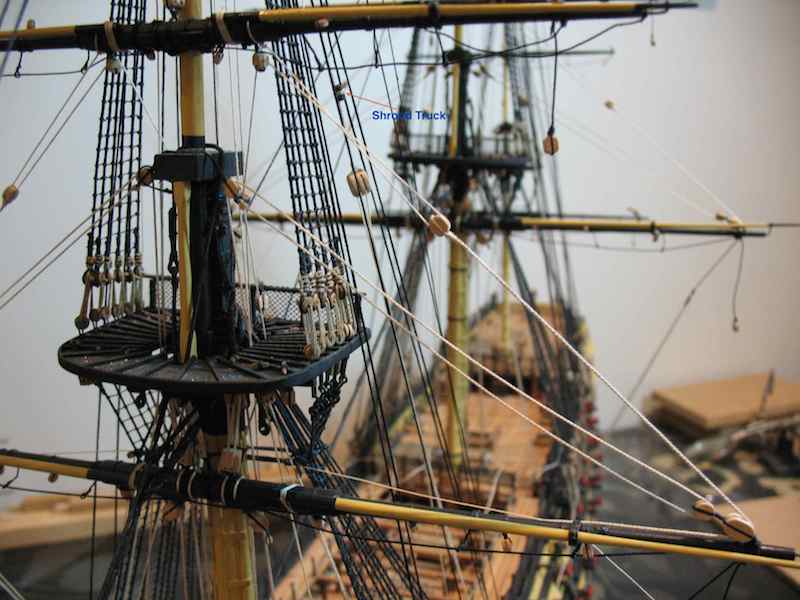
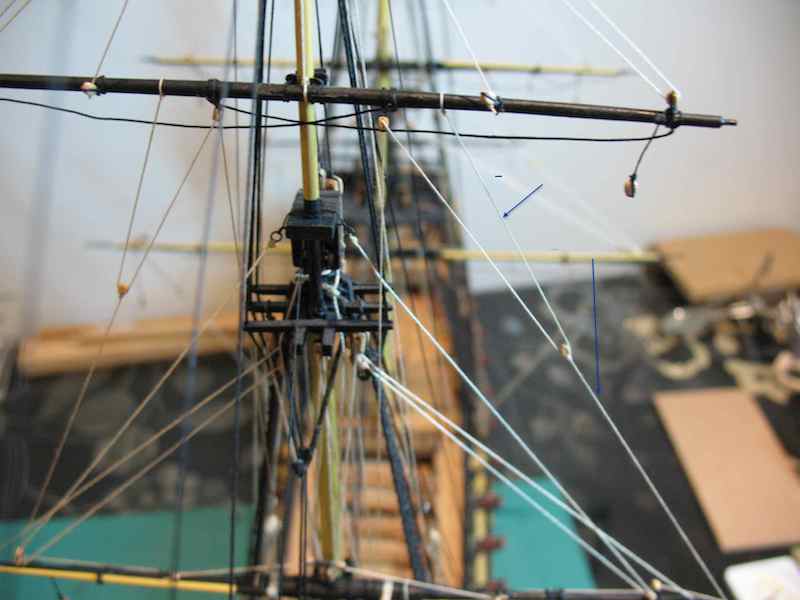
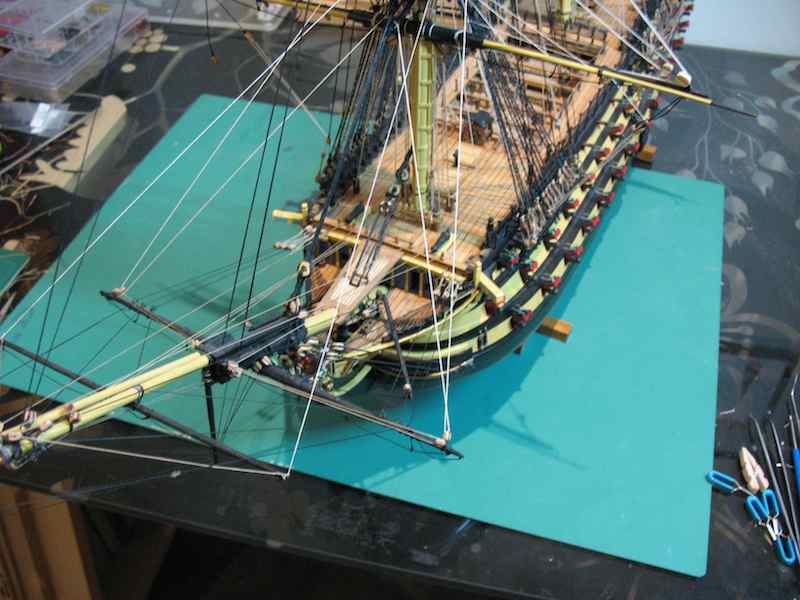
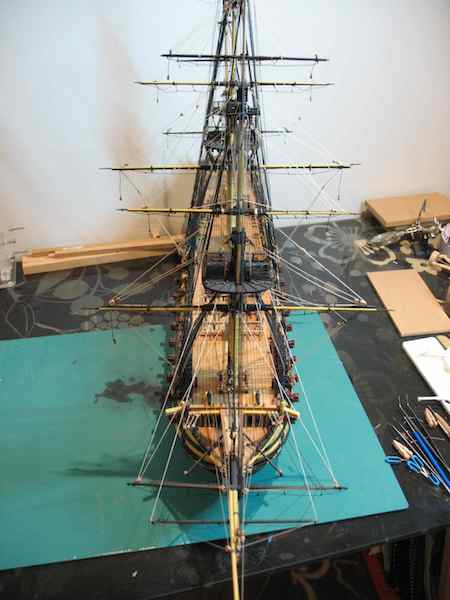
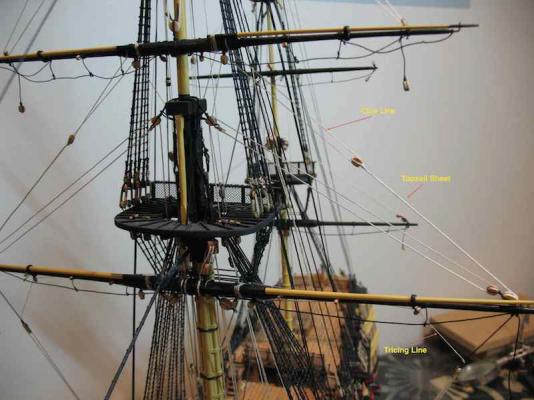
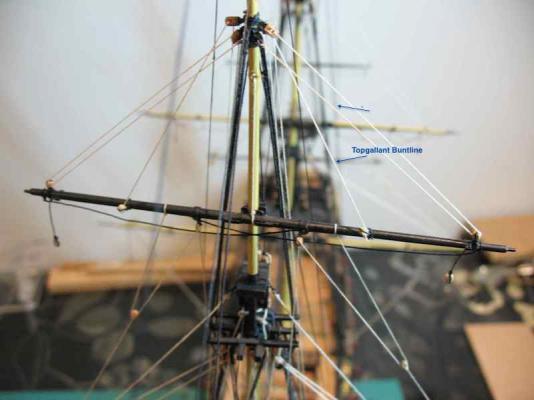
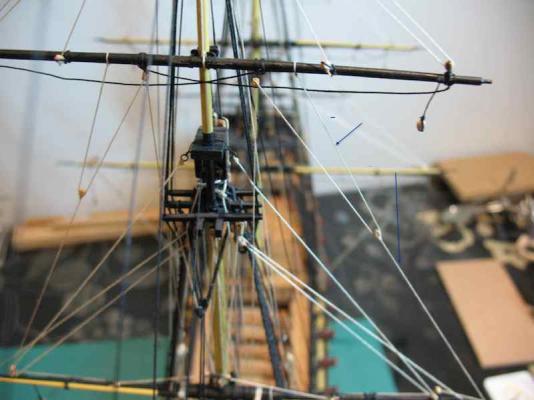
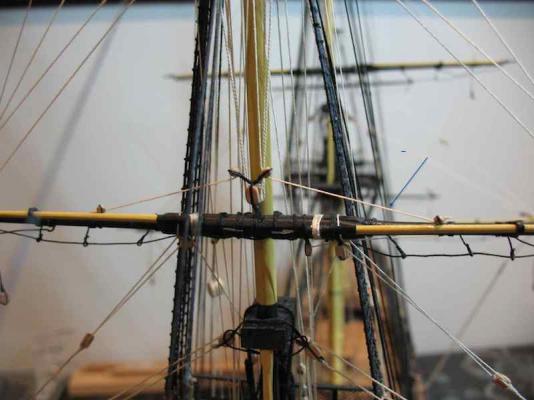
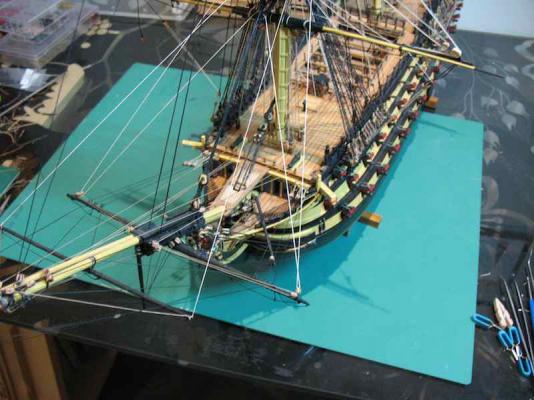
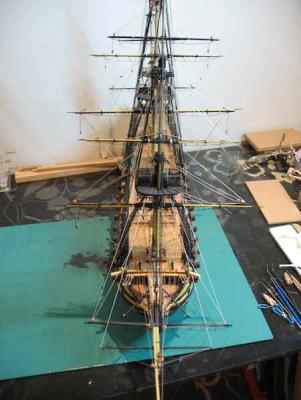
Thank you Patrick and Marc. I seem to have finally made a bit of progress attaching string this weekend! First up, here's the Mizzen Pinrail with lines attached. The mast cleats that I removed from here have been relocated to the Belfry, because reading ahead, I realised that I was going to need these and as usual the kit hadn't provided for them. This weekend I have managed to fit: Topsail Sheet and Clue Lines to both Fore and Main lower yards. Leech Lines and Bunt Lines (Fore Lower Yard) Spritsail Yard Brace Spritsail Topsail Yard Brace Topsail Yard Reef Tackle (Fore) Topsail Yard Buntlines (Fore) Topgallant Sheet and Clue Lines (Fore) Topgallant Bunt Lines (Fore) The kit plans aren't too bad, once you figure out which line you are looking at. The only real issue is the belaying points - because the kit omits both shroud and mast cleats, it takes a while to figure out where the lines really need to go. Longridge has been indispensable for this. I also have to acknowledge Gil Middleton's excellent log. On one occasion, he was able to save me when even Longridge let me down! Thanks Gil. Pics - starting with Topsail Sheets and Clue Lines Edit: I put a number of labels on these pics, but when I resized the pics, I lost most of the annotations. Topsail Buntlines: Topgallant Sheet and Clue Lines: Topgallant Buntlines: A close up showing the underside of the Fore Top - it's getting quite busy under there! And finally, a couple of overview shots:


-
Beautiful! It wouldn't surprise me at all if that pump actually worked!
-
Really, REALLLY, nice work there Bob! Your pictures show just how cramped it would be working around that stove.
-
Very nice Vivian. I love the extra details and the "worm's eye" views. Great job!
-
Sounds like a great idea Patrick, but have you read the MSDS for this stuff? It looks particularly nasty - I hope you're taking suitable precautions including ventilation and eye/skin protection.
-
Sweet! Glad to hearing you're warming up over there, just as were starting to cool down over here.
- 2,191 replies
-
- 1
-
-
- confederacy
- Model Shipways
- (and 1 more)
-
Looking very nice John.
-
You're doing a fine job there Patrick. What I can't get over is how immaculately clean you manage to keep your ship. The First Lieutenant must be working the men extra hard!
-
Thanks B.E. - it's all your fault really Thank you too Lawrence.
-
Thank you all for the kind words and also the "likes". It's not so much the faces, Bindy, as the language - enough to make a true sailor blush!
-
Nice touch with the hammock battens Toni.
-
Just be extra careful not to bump or snag those masts or you'll end up as I did (twice) with a break right across that drilled hole! Such events are fixable though
- 525 replies
-
- 1
-
-
- cutty sark
- mantua
- (and 2 more)
-
Those stern bends sure look tricky Sjors. Looks like you've got it covered though. Progressing nicely.
- 1,616 replies
-
- 1
-
-
- caldercraft
- agamemnon
- (and 1 more)
-
Beautifully done Timmo. She is looking superb.
-
ancre LE BONHOMME RICHARD by Jeronimo - FINISHED
gjdale replied to Jeronimo's topic in - Build logs for subjects built 1751 - 1800
I'm with Wacko too - just speechless!- 662 replies
-
- 2
-
-
- bonhomme richard
- frigate
- (and 1 more)
-
Just wonderful, as always, Remco.
-
That's a mighty fine looking rear end there Augie!
- 2,191 replies
-
- 1
-
-
- confederacy
- Model Shipways
- (and 1 more)