
Supplies of the Ship Modeler's Handbook are running out. Get your copy NOW before they are gone! Click on photo to order.
×


amateur
-
Posts
3,456 -
Joined
-
Last visited
Content Type
Profiles
Forums
Gallery
Events
Everything posted by amateur
-
I guess you know of the ships drawings in the dutch naval aechive in the internet?
-
Speaking of Uwe, where and when did we loose him?
-
hi Piet, sorry Surabaya is again in second place, :), but the Java will be a worthy number one:) Jan
-
Holding bulkheads while drying
amateur replied to Don Quixote's topic in Modeling tools and Workshop Equipment
Why should you nee one? After carefully fitting and checking, glueing should be possible without too much problems. I have seen people using jigs (with various results), but more often people clamp something square (such as a bunch of lego-blocks) between bulkhead and keel. something like this one (I borrowed this from the internet) (notice the building board to keep the keel strainght.) Jan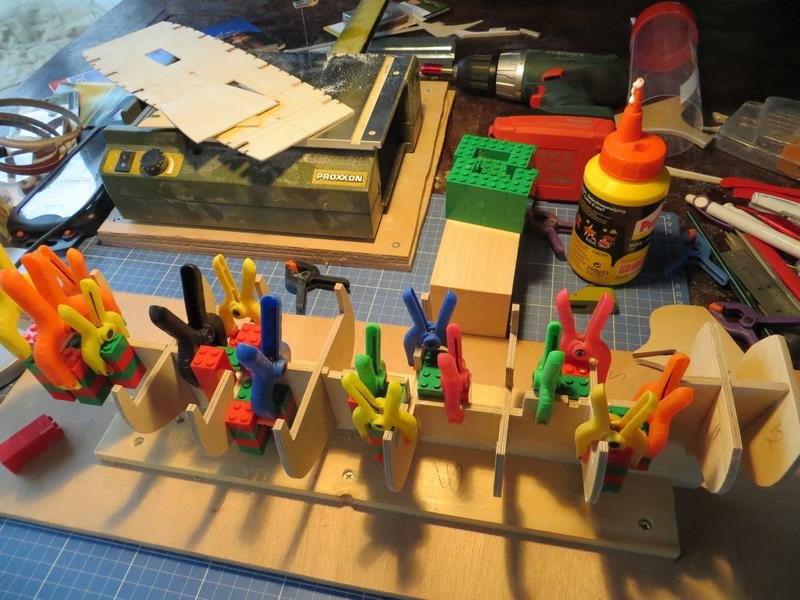
-
I have seen steelwool/vinegar used , but the effect is very much dependent on the type of wood. So extensive testing on amonts used is necessary. Not something you want to do on the realstuff Jan
-
Nothing in Kane on this subject? His thesis suggest that side-wheelers had a sharp bow, like in the scan above. Jan
- 599 replies
-
- 4
-

-
- sidewheeler
- arabia
- (and 4 more)
-
This one turned out wonderfully. I guess your next one will even be better. Don't start without warning us. I want a front-row seat Jan
-
No offence taken, I know the model is not th actual ship, however.....looking at a modelof a ship with a history, I can't but think of that history. That's why I think the presentation of these ships should be done with some respect to the original. And yes, calling a sub a cigar isn't unusual, no problem with that. Jan
- 46 replies
-
- 5
-
-
- o16
- pacific crossroads
- (and 2 more)
-
Hey guys, O16 became the war grave of some boys that gave their life for the freedom of others. Not something to present jokingly. Jan
- 46 replies
-
- 5
-
-
- o16
- pacific crossroads
- (and 2 more)
-
Hmmm.... not completely convinced by the argument. Nice colours, by the way. Jan
- 46 replies
-
- 6
-
-
- o16
- pacific crossroads
- (and 2 more)
-
Interesting build. Will definitely follow thisone! jan
- 599 replies
-
- 4
-
-
- sidewheeler
- arabia
- (and 4 more)
-
General guide to how rigging works.
amateur replied to gthursby's topic in Masting, rigging and sails
The answer depends on the type of rig, not so much on the era. The basics didn't change too much over time, the exact rigging (eg number, or type of blocks) however did change. But it is difficult to explain 'in general' without going into technical terms..... Also: a general description most probably does not answer your 'obscure lines' You could try to place a picture of the 'offending lines', and we'll try to answer. Jan -
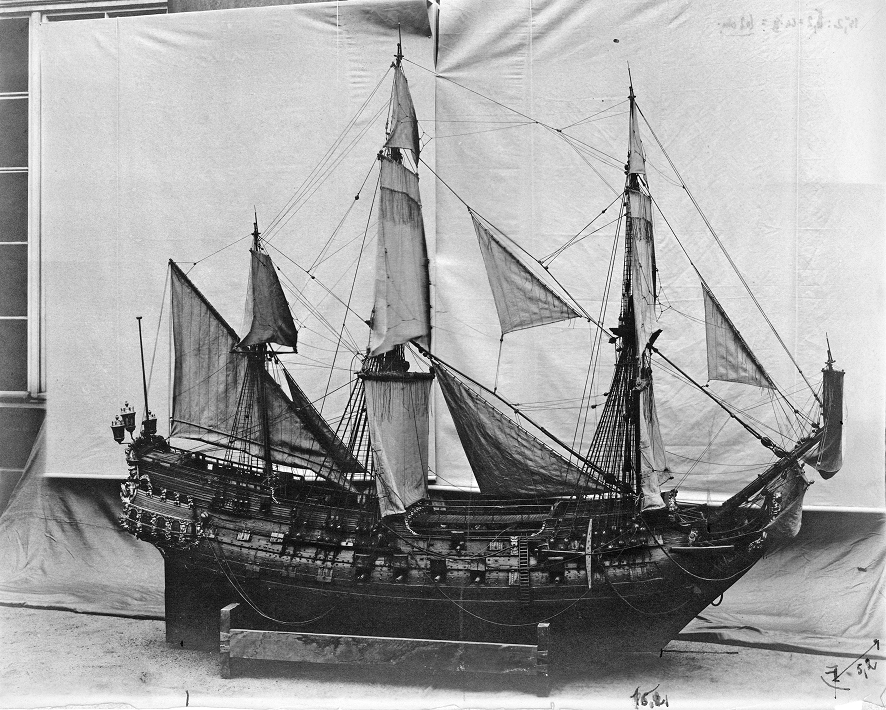
There is quite a lotoffotographic evidence onthis model. try to get hold of a book by Heinrich Winter, titled: hollaendische Zweidecker 1660/70' (make sure you dont pay too much, and that the drawings are included) and have a look at a tread here in msw where Peter is working on a model in1:1 of the original model of the model (not the ship itself:) ), look for hohenzollernmodel, and you'll find it somewhere in the scratchbuild section of the forum jan
-
Is Model shipsways Mayflower still available? Smaller than Syren, less complex (whiloe less gunnery), same designer, and an instructionbooklet that is equally instructive. Jan
-
Nice work (don't forget to paint your last piece ) silly question: what are the grooves in the masthead (or actually above the masthead) for? Jan
-
I have seen references to a brand called dc-fix. Jan
-
Hi, That is not only in Australia. Same here. Jan
-
they are colourpictures, and some of the deck-planking is missing. Oterhwise we could think that it is a picture of the original. I very much like the detail and atmosphere of the model. Could watch for hours to those pictures. Jan
- 3,618 replies
-
- 3
-
-
- young america
- clipper
- (and 1 more)
-
L is also out of allignment. perhaps you shouldn't try to cut, but use a rasp or afile to get the deck in allignment, a file goes over a few frames at the same time, so you can see which one is too high (and has to be files down), and which one is too low(and has to be filled. mind: when the problem is caused bu a centerslot that is not exactly square, you will have the same job to dowhen fairing the outside ot the frames. Jan
-
In Dutchshipbuilding of this period, the sheer of the decks was lessthan the sheel of the wales, gunports following the sheer of the wales result in problems (check the aft round gunport: no way you could get a gun into that one when you place it accordingly to the Coreldrawings) the drawing by Ketting shows how it was doen in the model in theRijksmuseum: the sides perpendicular to the waterline, the sills followig the sheer of the decks. You could do perpendicular ports, but you couldn't do porst that follow the sheer of the wales (on the other hand: repositioning the ports while you already fitted those black u-profile might get you in some trouble... another remark: Corel does put a gun into every port that can be seen inthe ship. When you check Kettings drawing, you''ll seethat there is no deck on which a gun could be placed (especially the small ports in the staterooms werenot intended to have a gun, they were intended just for what they are: windows and ventilation. Jan
-
Hi Steve, My guess is that these sheaves are not attached to the mast, so they won't change position when the mastis lowered. Also, there is no need to get the reep attached to the mast: it is taken directly to the main capstan on the aft deck, (as indicated in th efigure Kees posted. btw. on that picture, also the positions of the various fisherman are indicated (starting from the youngest one, on the bow of the lugger) Lowerin gthe mast is for not getting hit by the wind (which should get the ship in potentially large problems, as the Vleet is quite a long (and heavy) netting which you certianly wouldn't loose..... Retractable bowsprits ar equite common in Dutch fishing ships: I guess to get the center of gravity as low as possible, and as close to the mast as possible. The thing you see above the fishermen is the sail that is usually attached to the main stay. That was hauled up (as far as I was told) to prevnt being fauled by the vleet, (which was handled on the deck just below) Jan
- 193 replies
-
- 5
-
-
- wilhelmina vii
- fishing
- (and 1 more)
-
I'm no expert, but isn't that first strake above the main wale a bit awkward: it disappears in one long, very narrow taper, while at the same time it is heavilycurved inward. How would that strake have been fastened? Jan
- 2,623 replies
-
- 3
-
-
- heller
- soleil royal
- (and 9 more)