gjdale
-
Posts
4,894 -
Joined
-
Last visited
Content Type
Profiles
Forums
Gallery
Events
Everything posted by gjdale
-
 You never cease to amaze me with your detail work Remco! Beautifully done Sir!
- 1,215 replies
-
- 2
-

-
- sloop
- kingfisher
- (and 1 more)
-
Joachim, These spars are simply called "boat booms". On arrival at the anchorage, the order would be given, "Out boats, booms, and ladders", meaning the boat booms and ladders would be rigged and the boats launched. Lovely work, by the way.
-
Yes, very sweet joinery work there Rusty.
-
Augie, Very sorry to hear of the mishap, but even more sorry that we won't get the whole photo-essay on how to recover from a major mishap. As others have said, that would have been both beneficial and heartening for the less experienced. I look forward to seeing the completed repair job anyway.
- 2,191 replies
-
- 3
-
-
- confederacy
- Model Shipways
- (and 1 more)
-
Fantastic Robert! Those gun carriages look just superb. I've experimented with copper and LOS as well and found as you did, that it's much easier to work with than brass and selenium solutions. We all have EdT to thank for that I think.
-
Nice to see an update again Sjors. For a "training" ship, she is looking pretty good to me!
-
Great to see you started Bill, and lucky that there are only front row seats here. I look forward to enjoying the ride with you.
-
Thank you Anja for your efforts in this, and thank you Sjors for both agreeing for this to be done and for staying the course through this difficult time. I look forward to the resumption of your log, and the continuation of my friendship with you both.
-
Augie, I am so glad to read that you are not leaving us. You are clearly a man of considerable honour and character and I respect you all the more for your post above. i look forward to the resumption of your log and the continuation of our friendship.
- 2,191 replies
-
- 1
-
-
- confederacy
- Model Shipways
- (and 1 more)
-
Sorry Sam - must be "extreme" macro to show fuzz on Chuck's thread!
-
Very nice Gil. And thanks Danny for the index - very useful for those of who use Gil's log as a reference!
- 755 replies
-
- 2
-
-
- finished
- caldercraft
- (and 1 more)
-
Very, VERY, nicely done Mark. Take a bow!
-
Sam, You asked: Anybody have advice on getting rid of the fuzzies? My advice is to replace your kit supplied rigging thread with a selection of thread from Chuck (Syren Shipmodelling Company). His thread is fantastic and has no fuzziness at all. Well worth the investment in my opinion (and very moderately priced too). Cheers,
-
Thank you everyone for the kind comments and for the likes. John - the yard gantry is on pg 9, post #129.
-
Announcing the Model Ship World Ship Kit Database Project
gjdale replied to SkerryAmp's topic in Wood ship model kits
Great project Adam - well done! -
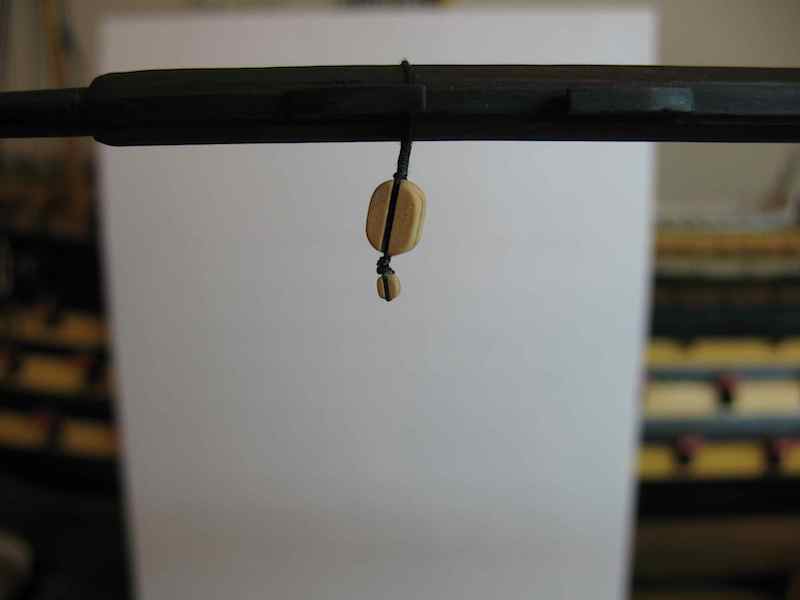
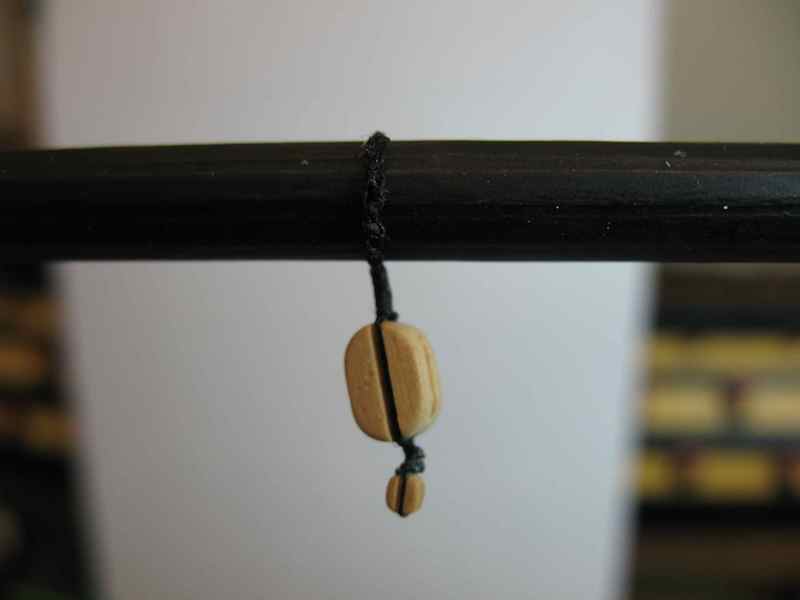
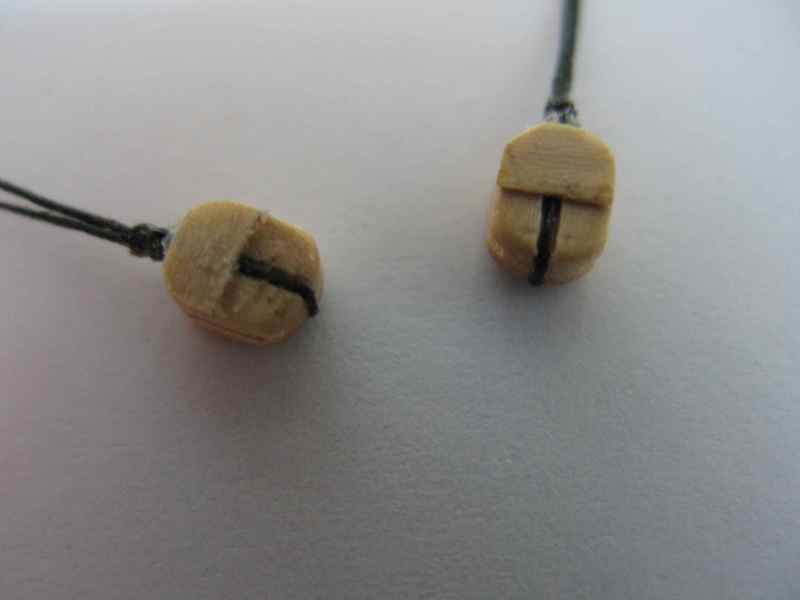
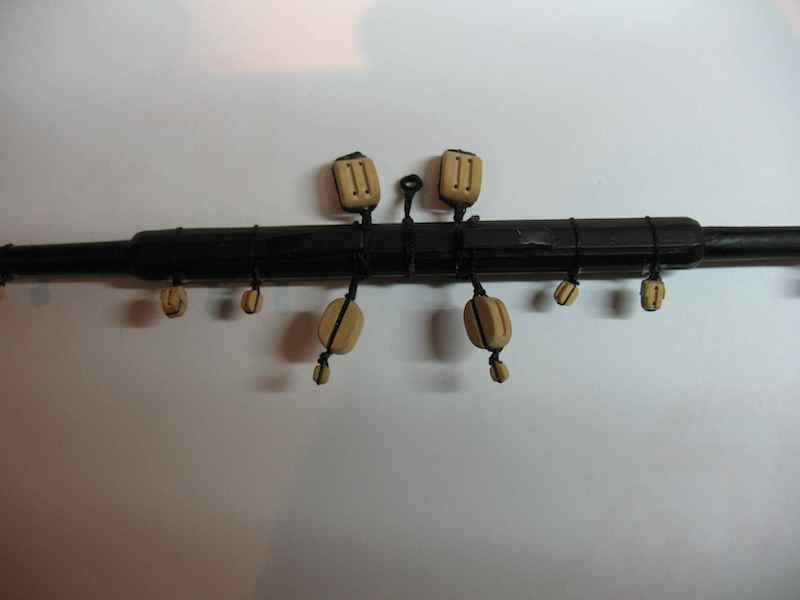
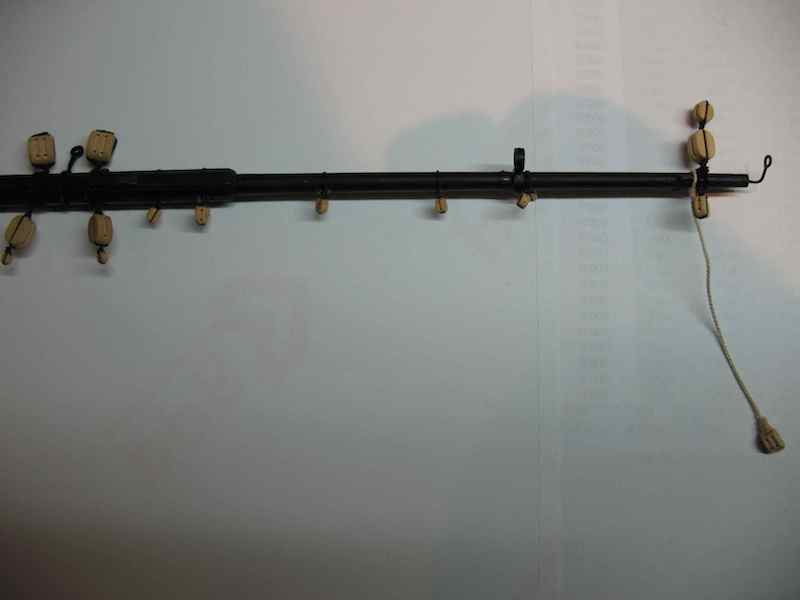
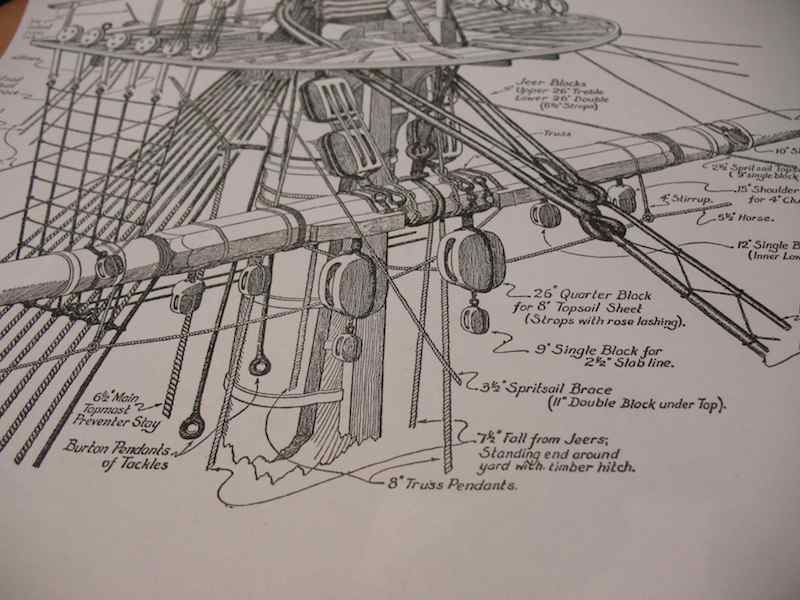
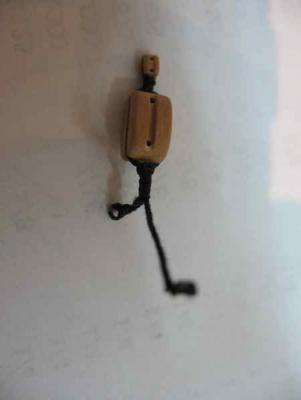
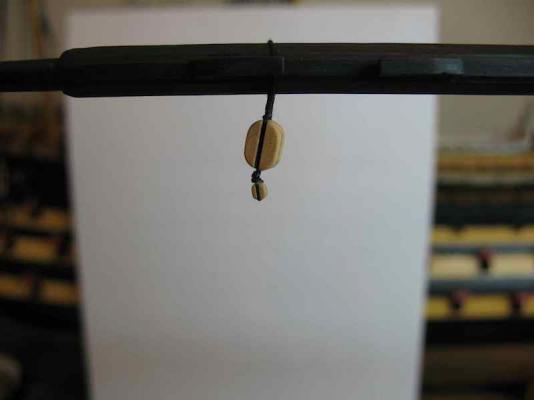
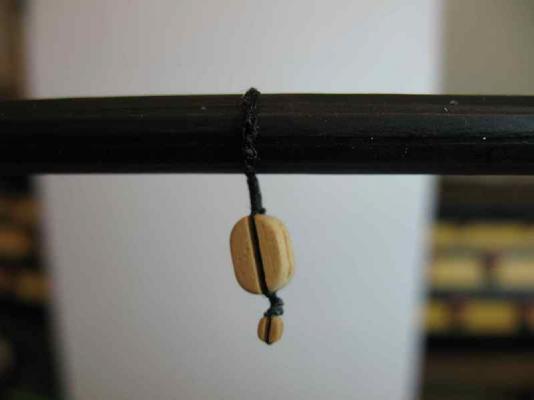
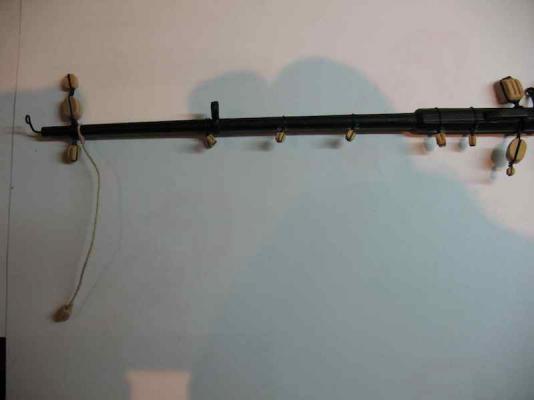
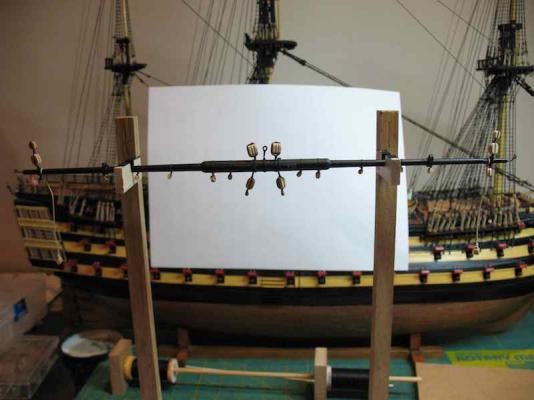
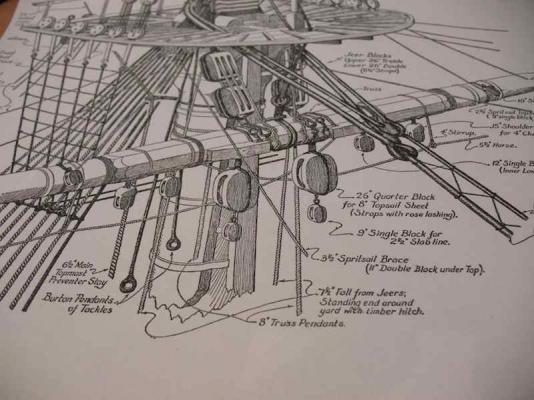
Thank you very much Kevin, Marc and Old Collingwood for your kind words. Marc - you asked for it, so here it is. I finally got some time today to start the long process of attaching all these blocks to the yards. I started with the Fore Lower Yard. My main guide for this has been Longridge and this diagram has been most helpful: In that diagram you can see the 26" Quarter Blocks with 9" Slabline blocks attached. You can also see that the Quarter Blocks are attached to the yard by the means of a collar with two eyes that are lashed together. For these large blocks, and indeed for the 26" Jeer Blocks, I decided to try to match the process. Here is a picture of the Quarter Block / Slabline Block assembly, complete with collar and eyes. The Quarter Blocks are represented by 9/32' (7mm) scale blocks and the Slabline by 3/32" (2.5mm) scale blocks. Here are a couple of pictures of it attached to the yard. I actually decided to put the lashing on the aft side of the yard instead of the fore side. Not absolutely correct, but I thought it might look neater, so "Captain's Choice" called on this one! The Clew Garnet Blocks are actually a "shouldered" block, so I improvised by adding a small piece of 1/64" thick boxwood to the outside and shaping it to match the block (a 5/32" (4mm) scale block). The photo is atrocious - I swear it actually looks pretty good I decided not to try to do the collars, eyes and lashings on the smaller blocks, so took a bit of a "cheat" with these. Having seized the blocks into their stropping (using my usual series of overhand knots), I simply tied these around the yard and did the best I could to hide the knots. Here's a few overall shots and some close-ups of the almost completed yard: This last one shows the yard mounted on my home-made "yard gantry" that I made quite some time ago in anticipation of this stage of the build. It works quite well. Oh, and there's a ship in the background too - that would be the final destination for this yard! I still need to add Stirrups and Horses (for which I need to order some more rigging line from Chuck) and then Truss Pendants, Nave Line and Studding Sail Booms. Then it will be ready to attach. Not sure yet if I will attach them one at a time as I go, or fit all the yards out first and then attach them. Plenty of time to consider that one. In the meantime, the above lot of pictures should keep even you-know-who happy for at least a week!


-
Great job Bob. But I agree that teeth extraction is a little bit of an extreme way to claim some modelling time!
- 1,477 replies
-
- 1
-
-
- essex
- model shipways
- (and 1 more)
-
Congratulations Ben - she looks great.
-
That's a shame John - the work you had done looks really nice. Do you have any dimensions available for the real thing, so that you can calculate the scale size of the components? I'd suggest trying Boxwood for your next attempt, and yes, Jeff can mill it for you to whatever size you want.
- 2,250 replies
-
- 1
-
-
- model shipways
- Charles W Morgan
- (and 1 more)
-
Fabulous Mike - a real stunner!
-
Now tell that to the nine year old John!
-
Hi John, I'm no expert on photography - far from it in fact - but I suggest you try taking your photos without flash. Either have some really good room lighting, natural daylight, or just a longer exposure time (might require a tripod). This might get rid of those disturbing white flecks. Worth a try anyway. Cheers,
- 2,250 replies
-
- 2
-
-
- model shipways
- Charles W Morgan
- (and 1 more)
-
Hi David, Your build is looking great. Just following your discussion on hammock netting, I think it does add a nice touch to the build. I have found that a material called Tulle does a nice job for the purpose, but you need to ensure you get the diamond pattern and not the honeycomb pattern. I found some in a local sewing/craft store (Spotlight over here). If you can't find any over there, I'd be happy to send you some - I've already done so for a couple of others. Just PM me with a mailing address if you'd like some.
- 439 replies
-
- 2
-
-
- victory
- caldercraft
- (and 1 more)
-
Very nice work Mike.