


mtaylor
-
Posts
26,273 -
Joined
-
Last visited
Content Type
Profiles
Forums
Gallery
Events
Everything posted by mtaylor
-
Beautiful work, Jan. I'm always amazed at what can be done with paper and card. Congratulations on having the whole fleet.
- 53 replies
-
- 2
-

-
- santa maria
- carrack
- (and 2 more)
-
Hank, Having little to no knowledge of battleships, I have little idea of what you're doing but I like it. You know and you're bringing her to life with the accurate details. Sweet work.
-
Thanks again for looking in, everyone. Don't hold your breath on the lighting on this build. It's a work in progress and I'm not making any decisions until the exterior is planked. I'm still learning my way around it.
-
We're all going to be hauled off.... excellent work and ideas, Popeye.
- 956 replies
-
- 7
-
-
- andrea gail
- trawler
- (and 1 more)
-
Just incredible that you get a non-fuzzy sanding job on the balsa. I love the lines of her.
-
I'm still looking for it, but I think what I'm looking for was lost in the crash. Someone posted a set of scales (1:48, 1:64 and 1:96) that could be printed out. I can't even find on my computer, but then again, my computer is like my workshop so the file is probably on the floor somewhere. Ah...going to ask in Nautical Discussion. It's a great tool. Print it out, glue it down to piece of wood.. and voila'... ruler.
-
Thanks guys for the comments and the likes... To bad I don't speak French... Ok.. I did try. I really did. I sat down with Belle Poule (aka Pretty Chicken) and with Google Translate and Falconer's.. got close on translating it. There's still a bunch that doesn't make sense in the rigging area and that's what I need the info on. Well... ANCRE finally came out with the English version.. I ordered it last weekend and it's being shipped "expedited"... not sure if it will be faster though.
-
We're ready when you are... hmm.. quite a crowd. I'll bring a chair and kick back...

- 1,306 replies
-
- 4
-
-
- syren
- model shipways
- (and 1 more)
-
Simply beautiful and well detailed Gaetan, right down the forelocks on the bolts. As far as I know, there's no fix for the print button disappearing. Ask the question in the Questions/Problems area. http://modelshipworld.com/index.php/forum/47-questionsinstructions-on-how-to-use-and-post-to-this-forumsite-problems-or-suggestions/ There might be a fix available. It's a Forum Issue not a PC (yours) issue.
-
Incredible details there Popeye. Looks pretty amazing to me.
- 956 replies
-
- 4
-
-
- andrea gail
- trawler
- (and 1 more)
-
No pressure here at MSW, Patrick... even though we know whatever you turn out will be great!!!!! I got my chair and

-
Ben, Show us the good and the bad. Even the bad is useful. The only other motorized galley, as such, that I've seen here was AEW's but it was a sailing galley.. static only. Still, what you're doing is vastly interesting.
-
Copper on Hermione
mtaylor replied to JagMkV's topic in Building, Framing, Planking and plating a ships hull and deck
Once upon a time, it would have a normal occurrence. In today's world, that would be the trip of a lifetime. -
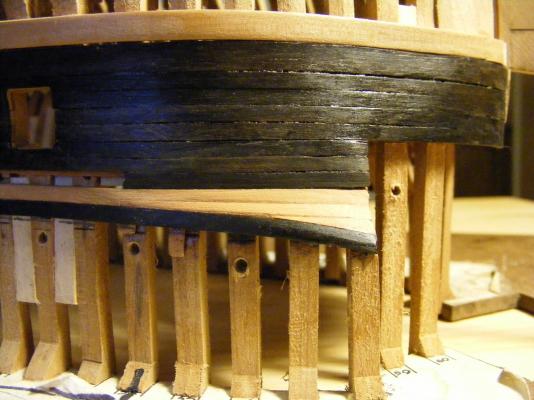
One small step for Licorne, one big step for me. I got the forward outer bulwark planked to my satisfaction. Happy Dance!!!! The planking goes from one plank to three. I got the middle one cut in as a proper stealer topmost goes under the ebony strip per the planking diagram (a different French frigate, but it showed me how it was done). Here's the pic of the starboard side, and onto the aft ones.... The pic is super macro from about 4" out. Looks better at galloping on horse back scale.

-
Sam, My LED's are wired in parallel. I put a limiting resistor on each LED and then between the LED's and the power supply, I have a pot to dim them. I've thought about LED's on Licorne... I may do some rethinking again before I turn to the interior. I'm tempted....
-
Matt, You need to hit an office supply store with drafting supplies. Otherwise, Google is your friend: https://www.google.com/?gws_rd=ssl#q=scale+ruler Edit: Nevermind those... I found this: http://modelshipworld.com/index.php?/topic/304-conversion-chart/
-
That's what I and many of the others do... cut them straight and then fair like crazy in place. The problem is that the angle usually isn't constant from top to bottom.
- 572 replies
-
- 3
-
-
- constitution
- frigate
- (and 1 more)
-
More amazing work, Daniel. It will be interesting to see what you do with these lads.
-
Congratulations. That is a sweet looking dinghy MaryO.
-
Sam... Great lighting!!!!!!!!!!!!!!! And a fantastic repair. As far as "separate areas"... behind the badges would have been the "great cabin" which was one large room. So no worries there, sir. Is the output voltage variable? I found the lower the voltage (even adding a dropping resistor in series will work) the dimmer the LED's and more candle like. Now you have me thinking about doing something like that on my Constellation. Although that means all the LED's would flicker in sync... Hmm... not this ship, not this time....

-
Well done, Jay. Frames are fun, right? Right???? er... maybe???????? Ken.. that was the "Goonies"... a Monty Python-ish group. I loved their show also.
- 572 replies
-
- 3
-
-
- constitution
- frigate
- (and 1 more)
-
Ben, Balsa really is a very soft and porous wood. You might try several coats of a 50/50 mix of white glue and water on it. Then lightly sand and coat again. It will seal the wood the strengthen it. An alternative low-budget would be basswood. A bit harder but will probably still need the diluted glue treatment. Then, if Ca doesn't work (use the thick or gel kind), use epoxy.
-
Cutty Sark by NenadM
mtaylor replied to NenadM's topic in - Build logs for subjects built 1851 - 1900
Nenad, I suggest using the MSW Sick Bay for the updates: http://modelshipworld.com/index.php/topic/6504-msw-sick-bay/ My heart goes out to you, we're having our medical issues (Admiral's) and it's taking lots of time to sort it all out.- 4,152 replies
-
- 8
-
-
- cutty sark
- tehnodidakta
- (and 1 more)
-
Hmm.... I wonder where the idea from tarps came from then? And the supporting structure? And no, I'm not ripping my completed Constellation apart to correct it.
-
As I recall, Bodnar's Cairo had the upper works on a pivot so they open. You might have a look at his build over on MSB.
