


reklein
-
Posts
1,285 -
Joined
-
Last visited
Content Type
Profiles
Forums
Gallery
Events
Posts posted by reklein
-
-
I've wondered about the white metal castings too. They are so heavy, in the case of engine modeling ,that the supporting structure is too flimsy to adequately hold everything up making the model unduly fragile. I agree about the resin castings. Not being metal doesn't make the model any less valuable or accurate.
-
-
Nice looking project. I have to comment on those odd looking rear wheels though. Were they wood or what. Wondering how I could find out more on their engineering?
- Mike Dowling, mtaylor, Eddie and 1 other
-
 4
4
-
Really nice build Rossi, great job on the sails.
- Jack12477, billocrates and Rossi46
-
3
-
-
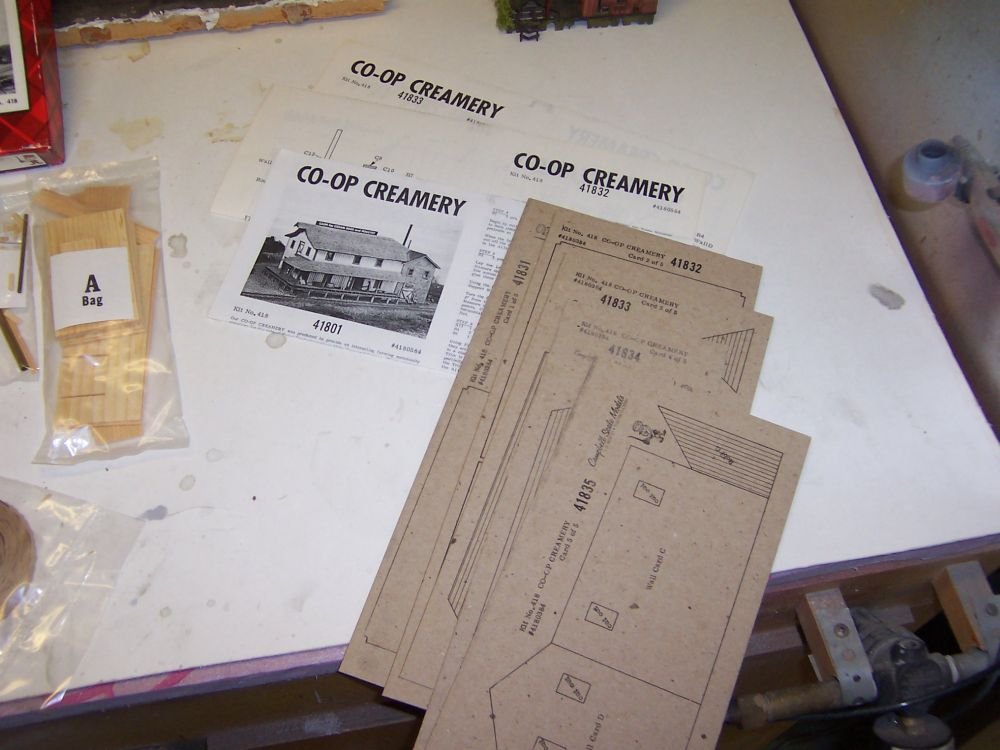
My plans are good,they even match the body former for length. Its just the templates didn't copy out correctly. For some reason I'm having printer problems and can't get the right size out of it or even to print for that matter. Error code says I'm having network problems. Material sheet says Jan. 2014. Also remember this is one of the kits I found in somebody's recycle bin. I'm going ahead with the build and will work proportionately to get things right. The instructions are excellent and will follow them.
- Heronguy, MEDDO, David Rice and 1 other
-
4
-
-
I rechecked the patterns and both side patterns match the top view patterns and the plan sheet. The bulkhead former does not match the plans or template. Not to worry though. Check your bulkhead former against you template. My plans may have been miscopied. Just have to be a guideline. Even the very first former is off from former #24. Gotta get the grass mowed will post again this eve.
-
I think Revell instructions got cheap as the years went by. It may help you to find supplementary instructions from a more sophisticated set of plans. Some of the rigging parts may have to be replaced or modified. I'm thinking of the deadeye arrangements and the pre formed ratlines. Bluejacket Constitution rigging plans are very comprehensive and may help you out if you can find a set or buy them from Bluejacket if they are not too dear.
- kruginmi and thibaultron
-
2
-
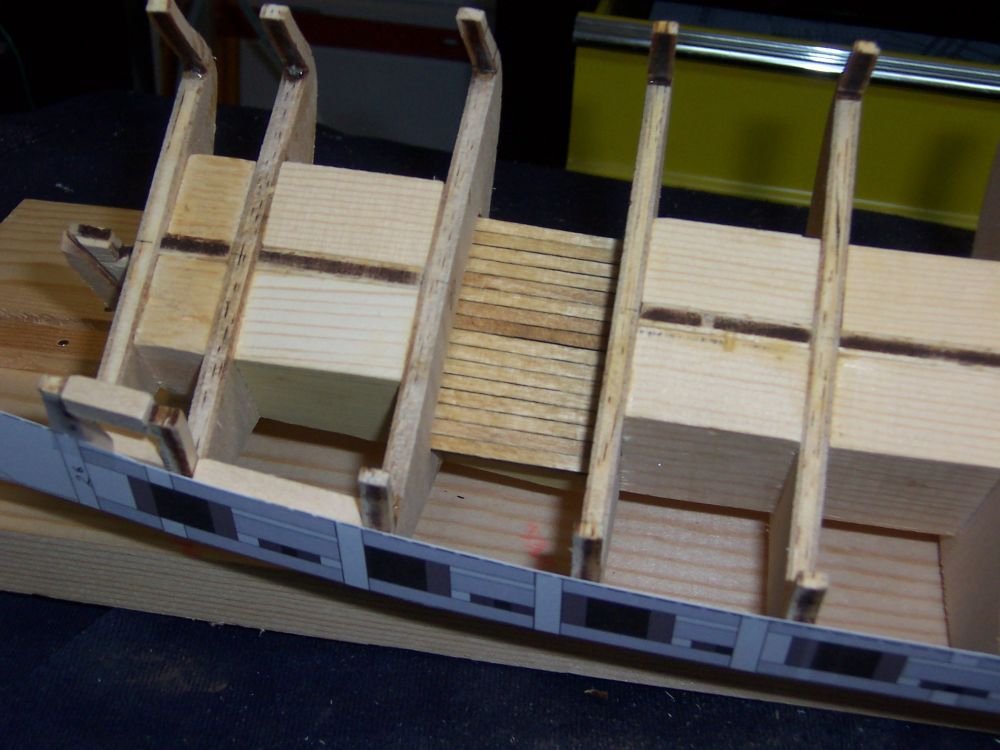
OK on the first pic, what have I done wrong? The template doesn't fit my model at all. So I guess it'll have to be a guide line. Second the below decks are planked. I used the minwax stain and pencil caulking. Works very nice. I found a nice big graphite pencil in my stash of artist supplies to make the job easy. I like to stain and paint late in the day so the project will be ready to resume in the morning.
-
I somehow got inspired to start, and once I did I can't stop. We're traveling the first half of June so won't be much then. I'll start the gunnel timbering today and see where we go from there what with yard work and getting the trailer ready to travel. So far no building board, I like to build "in the air" until I start deck work and rigging Etc.
-
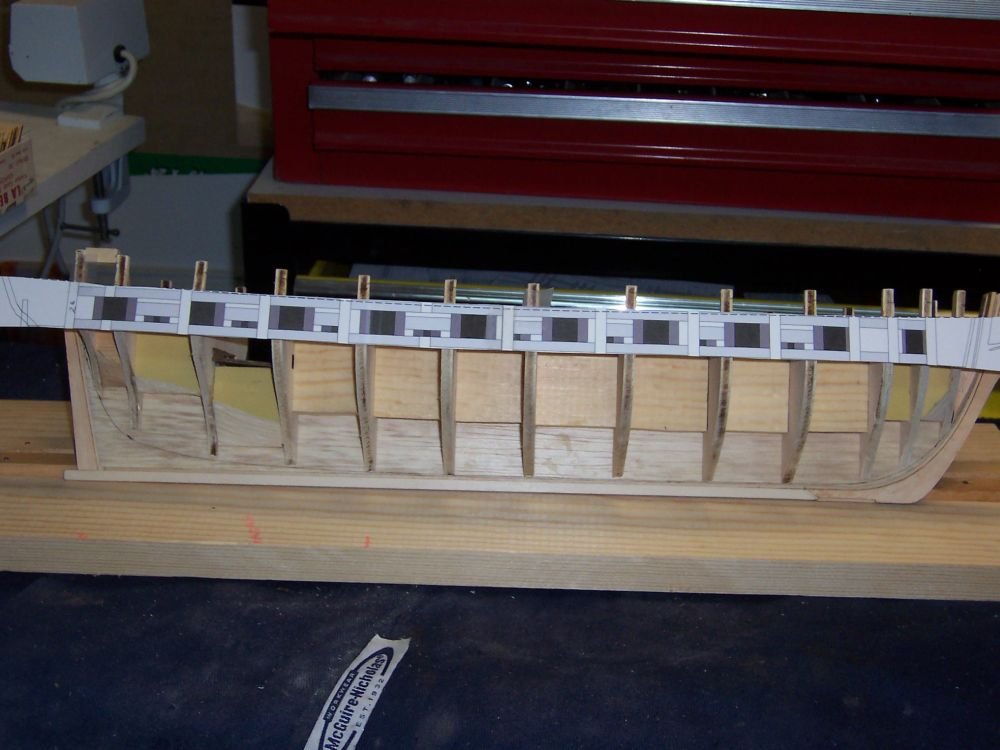
Completed the blocking. Once blocking was done the slight curve to the BF was corrected. One problem was ,I kept breaking off the stantions. Part of this trouble was due to the excessively deep laser scoring of reference lines. Only one layer of ply was untouched. Anyways I hardened all the stations with CA and reattached On to the bow fillers and fairing.OOPS! forgot a filler block. These build logs are handy for spotting mistakes.
- Ryland Craze, Elijah, Cathead and 4 others
-
7
-
I think you have a fine looking project going there. I'd recommend the PVA for rigging if you have time to wait for drying. Gun rigging looks fine, I know what you mean about blocks too large. I need to see some pics of the real rigs to see what the proportions would be. Maybe you can go smaller on the upper ,more visible decks.
-
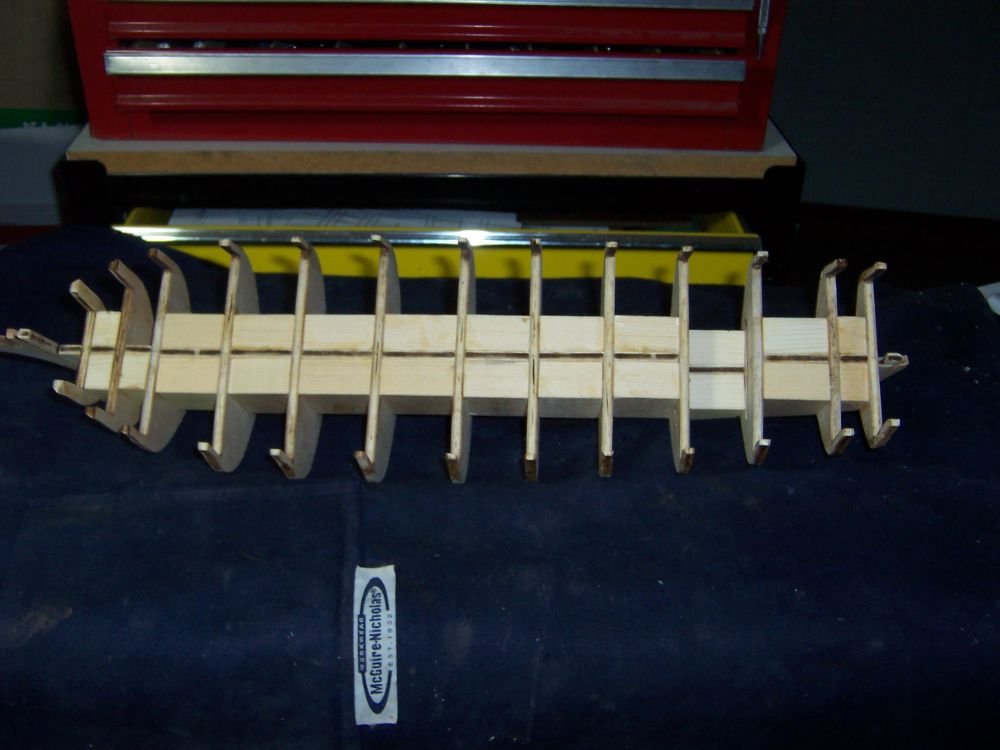
Started this yesterday, ready for blocking I think. Please disregard the photo 8203 . I dumb thumbed it.
- Elijah, Ryland Craze, jablackwell and 1 other
-
4
-
Your progress is coming along very nicely. However I do have to make a comment on the KIT quality. Why should one have to make so many adjustments on an already very expensive kit? This is not just DeAgostini but almost right across the board. In my 60 years of modeling I've always had to replace or add wood and parts to complete a wooden kit. Always it seems that something is warped or missing or not enough material has been included. Also in the Yamato's case material and instructions should have been supplied to achieve a realistice hull shape and texture. Anyways I hope this isn't taken as a rant on your workmanship, just criticizing wooden ship kits in general.
- Canute, popeye the sailor and WBlakeny
-
3
-
Vossiewulf does not suffer from tool collecting, he enjoys it.
")
- Eddie, vossiewulf, mtaylor and 3 others
-
6
-
I disagree with Canute. One of the reasons for sealing is to prevent the wood from taking stain color unevenly. Secially in the case of porous woods such and oak and pine. Pine for instance if left unsealed will be blotchy od where theres knots will not take stain at all. Also you need to seal before any paint or lines are put on as your paint will run along the grain of the wood and lose its sharpness.
- edmay, Estoy_Listo, mtaylor and 1 other
-
4
-
-
Yeah ,my bad I was thinking you were using a closed mold for a whole boat. But, I looked back and saw your method. I was trying to make 192/1 landing craft and having a terrible time with fast setting resin. The project is really coming along nice I spite of all the help you're getting from us. =)
- Piet and Mirabell61
-
2
-
Hi Danny nice job on the coach. I read somewhere that the thoroughbraces were more for the horses benefit than the riders or the coach. I think they kept the jolting wagon from jerking the horses around. It certainly would have made the ride smoother. Another word about coaches. The pounding of rocks hit on the roads had the effect of pounding out the steel tires and lengthening them thus loosening the wheels. Its amazing the trivia one picks up when researching projects.
-
Sometimes if you use a slower setting resin the bubbles will have more time to float out. With fast setting, the bubbles don't have time to float out and are trapped. Also I forgot to see if you vented your molds.
- Martin W, Mirabell61 and Piet
-
3
-
-
Household latex paint is very thick as a result of the heavy pigment and will bury any detail. On the other hand if your woodwork is rough....... Hmm. If you were to model a water feature it might work pretty good over carved foam and then about 8 coats of Modge Podge over that. Might make passable water.
-
The origins of Tailgating at sports events.
")
- mtaylor, coxswain, Old Collingwood and 4 others
-
7
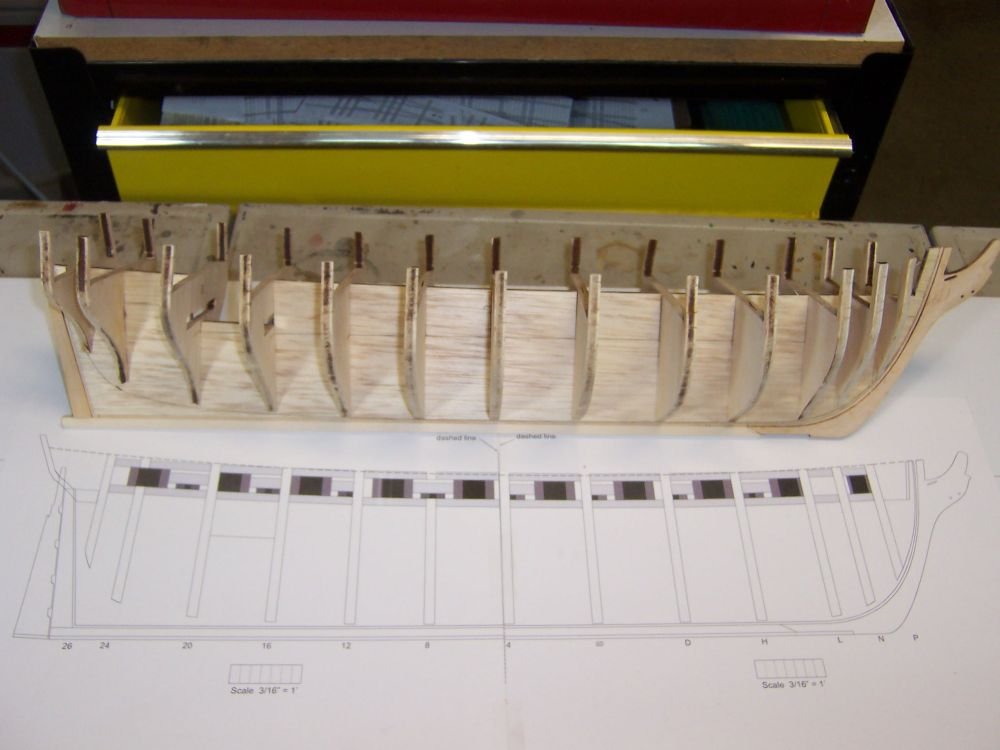
US Brig Syren by reklein - Model Shipways
in - Kit build logs for subjects built from 1801 - 1850
Posted
OK , I think I have the gunnel framing finished. Instead of religiously trying to follow templates ,I referred to the text where he says to have the gunports evenly spaced and the sweep ports centered between them. Seemed to work out quite right. Visually it'll be hard to tell until the planking is on. I had a hard time keeping the stantions on and straight even with hardening the wood with CA. But I figure that all of them will be covered by planking so I made everything fit and made sure the gunports were square. Next is the stern framing which looks like it'll be fun. Nice to be back in the shop.