-
Posts
4,126 -
Joined
-
Last visited
Content Type
Profiles
Forums
Gallery
Events
Everything posted by glbarlow
-
I guess you know to do a good deal of tapering to have the same number of planks at the bow as at midships and the stern.
- 104 replies
-
- pegasus
- victory models
-
(and 2 more)
Tagged with:
-
Nice job making all those small parts, it’s looking really nice. Sharp attention to detail.
- 263 replies
-
- Medway Longboat
- Syren Ship Model Company
-
(and 1 more)
Tagged with:
-
I’m going to leave them as is, no fixative. As you know there’s a lot of brush work with the powders to get the best definition. I don’t want to risk anything on top of the barrels, I don’t trust myself with the airbrush to not muck it up. I might to the same as you on the barge carvings though (I have it on the shelf now).
- 778 replies
-
- cheerful
- Syren Ship Model Company
-
(and 1 more)
Tagged with:
-
Thanks Rusty and BE. I frequently read both your Cheerful logs, as you can see I chose the black truck answer.
- 778 replies
-
- cheerful
- Syren Ship Model Company
-
(and 1 more)
Tagged with:
-
You're 'speeding' right along with this build - nice work.
- 164 replies
-
- vanguard models
- flirt
-
(and 1 more)
Tagged with:
-
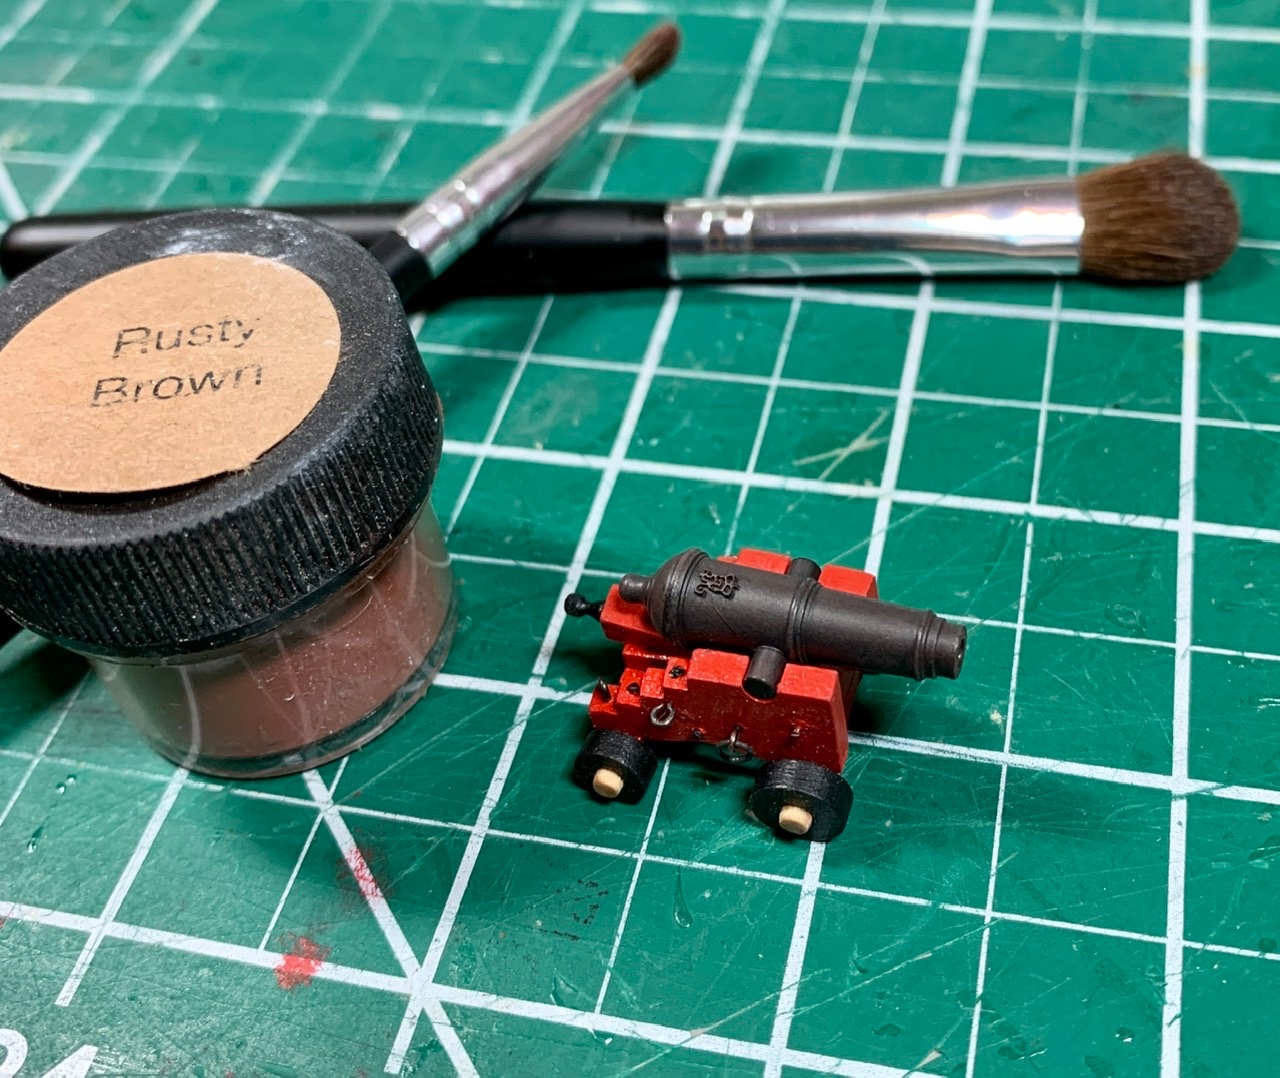
I’m not one to agonize too long. I added Rusty Brown weathering powder on the primed only carronade and I’m happy with it. Now just 11 more guns. Thanks Derek and Lou, both your comments contributed to this now duller primed only gun.
- 778 replies
-
- cheerful
- Syren Ship Model Company
-
(and 1 more)
Tagged with:
-
Thanks Lou, oddly of the hundred or so cannons I’ve painted I’ve never used primer. It’s so evenly spread I’m reluctant to add another coat of paint. Also thinking about dusting powder as Chuck does, so many decisions. 😳
- 778 replies
-
- cheerful
- Syren Ship Model Company
-
(and 1 more)
Tagged with:
-
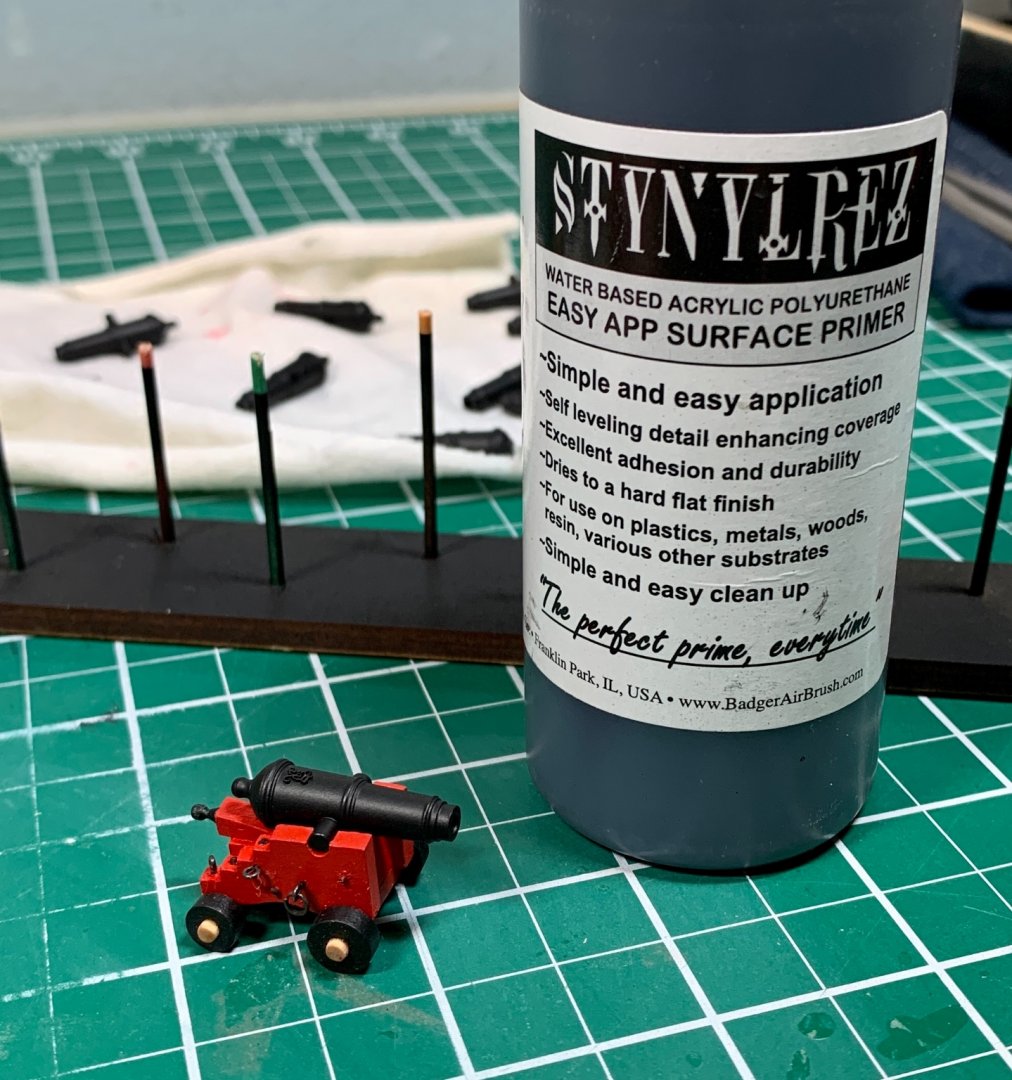
I’ve used it on all my other models, no spares, if it goes on one it goes on all. But I do have the other models to compare. This finish is dull and flat, more than the photo would indicate. A bit silky perhaps but “factory fresh” looking. It’s a quandary
- 778 replies
-
- cheerful
- Syren Ship Model Company
-
(and 1 more)
Tagged with:
-
I decided to take a rest from the hull and start the process of building the guns. More on that later. So here’s a question. I did the prep on the brass cannon then used my el cheapo airbrush to spray primer with the intention to further paint them with my Admiralty Ironwood Black and and dusting powder on that. However, I like the dull flat metal like appearance from just the Stynlrez primer and thinking to stop there. I don’t have much airbrush or metal primer experience. So the question: Am I missing something important about just stopping with the primer and calling it done, will it last and stand the test of time or is primer without paint like coffee without water (I’m sure there is a better analogy but...)? wow that's a big photo
- 778 replies
-
- cheerful
- Syren Ship Model Company
-
(and 1 more)
Tagged with:
-
Great detail in the partners, and I just decided to paint Cheerful’s hatches black. Did you use Admiralty paint Flat Iron or Dull Black?
- 642 replies
-
- winchelsea
- Syren Ship Model Company
-
(and 1 more)
Tagged with:
-
Fascinating as always. Are thos SM61 and SM62 blades? I’ve noted your using them before, do yo favor them over a good pair of wood working micro chisels?
- 261 replies
-
- muirneag
- vanguard models
-
(and 2 more)
Tagged with:
-
2nd planking, tapering is important as is plank bending. Follow Chucks video you’ll be fine. Start at the top and work your way down about a third of the way. Then go to the bottom and do the bottom couple coming up 2-3 planks then go back up to the top and finish coming down. Why? Because if you’re not perfect and have to do some filling in you’ll be doing it in a place that can’t be seen once painted and mounted.
- 26 replies
-
- First Build
- lady nelson
-
(and 2 more)
Tagged with:
-
Chuck has sheets cut especially for ripping planks. I learned to rip my own, it's quite rewarding. I don't think you're going to find sources in the US for any pre-ripped planks anymore and especially not Alaskan Cedar, I believe it's a bit of a Syren specialty. It's a topic that's been around for awhile, the US sources simply couldn't make a go of it. The Lumberyard is not a good source for wood despite the name in my experience. I ordered boxwood from there is was so bad I sent it back. There are some European sources for maple and a few other woods, but definitely not Alaskan Cedar.
-
This, as you’ll read in the log, is why I drill those holes at the very beginning of the build. The first time my model set on this board was when it was nothing but a keel, the second time when it was just a skeletal frame. The third time was for these photos. I don’t use glue, I epoxy the pedestals and the rod inside them to the base, then epoxy the ship to the rod and pedestals when the ship is ready for rigging. I also drill so the rods go past the keel into the frame, 25mm into the ship in Cheerful’s case. I will admit a certain tension drilling those holes, but it’s offset and much easier by being done early in the process. I wouldn’t want to be holding a completed model in my hand upside down doing it. I have 9 models sitting around my house, every one was mounted this same way. So far they are still tight to their boards, though admittedly I don’t sling them around to test their soundness. I also add a brass plaque to the board with the ship’s and my name along with the completion year, just in case I forget any of those three things😁.
- 778 replies
-
- cheerful
- Syren Ship Model Company
-
(and 1 more)
Tagged with:
-
The pedestals and the mounting board (as unfinished walnut which I sanded and applied WOP) both came from modelexpo.com. They didn’t fit the width of Cheerful’s keel however. I had to spend some time with my Dremel to widen the slots. You can also see I used two different height pedestals with the way Cheerful lays out. Hope that helps.
- 778 replies
-
- cheerful
- Syren Ship Model Company
-
(and 1 more)
Tagged with:
-
I don't think I could get through the fairing with tall the little steps before I fell off my chair. I'm looking forward to see your build to see how the hull comes out. It certainly is a different model
-
I’m always amazed by the small details you add, and the creative ways you come up with to add them. I knew I was saving all those old Pegasus parts for a reason.
- 261 replies
-
- muirneag
- vanguard models
-
(and 2 more)
Tagged with:
-
My model has both those names depending on what day it is.😁
- 221 replies
-
- queen anne barge
- Syren Ship Model Company
-
(and 1 more)
Tagged with:
-
Thank you. It may get another coat before I’m done. I’m glad I didn’t tree nail it and the WOP seeping between the seams does a nice job of distinguishing the planking runs. I came to like the little bit of variation in the wood color. The only thing Annapolis would want with it is target practice, but it’s a nice thought. 😁
- 778 replies
-
- cheerful
- Syren Ship Model Company
-
(and 1 more)
Tagged with:
About us
Modelshipworld - Advancing Ship Modeling through Research
SSL Secured
Your security is important for us so this Website is SSL-Secured
NRG Mailing Address
Nautical Research Guild
237 South Lincoln Street
Westmont IL, 60559-1917
Model Ship World ® and the MSW logo are Registered Trademarks, and belong to the Nautical Research Guild (United States Patent and Trademark Office: No. 6,929,264 & No. 6,929,274, registered Dec. 20, 2022)
Helpful Links
About the NRG
If you enjoy building ship models that are historically accurate as well as beautiful, then The Nautical Research Guild (NRG) is just right for you.
The Guild is a non-profit educational organization whose mission is to “Advance Ship Modeling Through Research”. We provide support to our members in their efforts to raise the quality of their model ships.
The Nautical Research Guild has published our world-renowned quarterly magazine, The Nautical Research Journal, since 1955. The pages of the Journal are full of articles by accomplished ship modelers who show you how they create those exquisite details on their models, and by maritime historians who show you the correct details to build. The Journal is available in both print and digital editions. Go to the NRG web site (www.thenrg.org) to download a complimentary digital copy of the Journal. The NRG also publishes plan sets, books and compilations of back issues of the Journal and the former Ships in Scale and Model Ship Builder magazines.


