mtaylor
-
Posts
26,273 -
Joined
-
Last visited
Content Type
Profiles
Forums
Gallery
Events
Everything posted by mtaylor
-
New and need help to identify a mystery model? Read here first!
mtaylor replied to ccoyle's topic in New member Introductions
Hi Ellen, Welcome to MSW. To answer some questions.. yes, some do quite some displays with docks, etc. Most of us don't float our boats as they're too fragile, but in the Kit area there's an index of all the logs, pick the one that says: RC which should cover most of the ones that see water. I put a link to the index below. As for card, yes again. Same for subs. Those can be kits or scratch and again, they should be in the index. For starters, if you're thinking of building on, look around the gallery and see what draws your attention. But to start, start small, maybe a small craft like a canoe or rowboat and then one with one mast. Work from there. The advantage of starting small is you'll learn much and at not a large investment in tools or kits. And by all means start a build log when you do. You'll get help from others and also make some friends. Link to the Index: -
Cutty Sark by NenadM
mtaylor replied to NenadM's topic in - Build logs for subjects built 1851 - 1900
I hope you're having a very good birthday, my friend.- 4,152 replies
-
- 3
-

-
- cutty sark
- tehnodidakta
- (and 1 more)
-
As you work, at each joint use a damp cloth to wipe up the smears and overflows. It's easier to get it off before it dries than after it does.
-
I agree with Mark. Also, I'll add, start a build log as it's the best way to get help. As for finding logs... go here and pick the "Small boats" index. It will download a PDF to your computer and all the logs are listed there:
-
I would suggest reading the articles here as a starter: http://modelshipworldforum.com/ship-model-plans-and-research.php It might give you an idea of what to look for in a kit. The common advice is start small, maybe no masts or a single mast and work up from there.
-
Wonderful build, Grant. Perhaps the best way, and this only applies if she likes the model, ask her where to put it. If she's not fond of the model, don't ask and find someplace out her sight.
-
-
Beautiful work on a type not seen much here.
-
Wow...!!!!! That model is a monster. I agree with the others that the PE is really adding to it.

-
Looking lovely, Mark. I'm glad you were able to get a good outcome. Next time you try, put the brass in a small container (I use an old glass bowl) and let the part sit in the solution. I do miss Blacken-it though as that stuff always worked perfectly.
-
Cutty Sark by NenadM
mtaylor replied to NenadM's topic in - Build logs for subjects built 1851 - 1900
Not going to like that post, my friend. Love that model parts, hate the water.- 4,152 replies
-
- 6
-
-
- cutty sark
- tehnodidakta
- (and 1 more)
-
Shop Safety and Oops Repairs
mtaylor replied to BETAQDAVE's topic in Metal Work, Soldering and Metal Fittings
That makes me wince just reading it. I hope the healing goes well, Dave. -
Lovely work, Jerry. I ran into the same issue on my build. One comment that came to me was "pick one as the ship was built in the transitional period". Reality was they were removed (if I recall correctly) after her first cruise. I never did find out why, though.
- 553 replies
-
- 1
-
-
- sloop of war
- constellation
- (and 3 more)
-
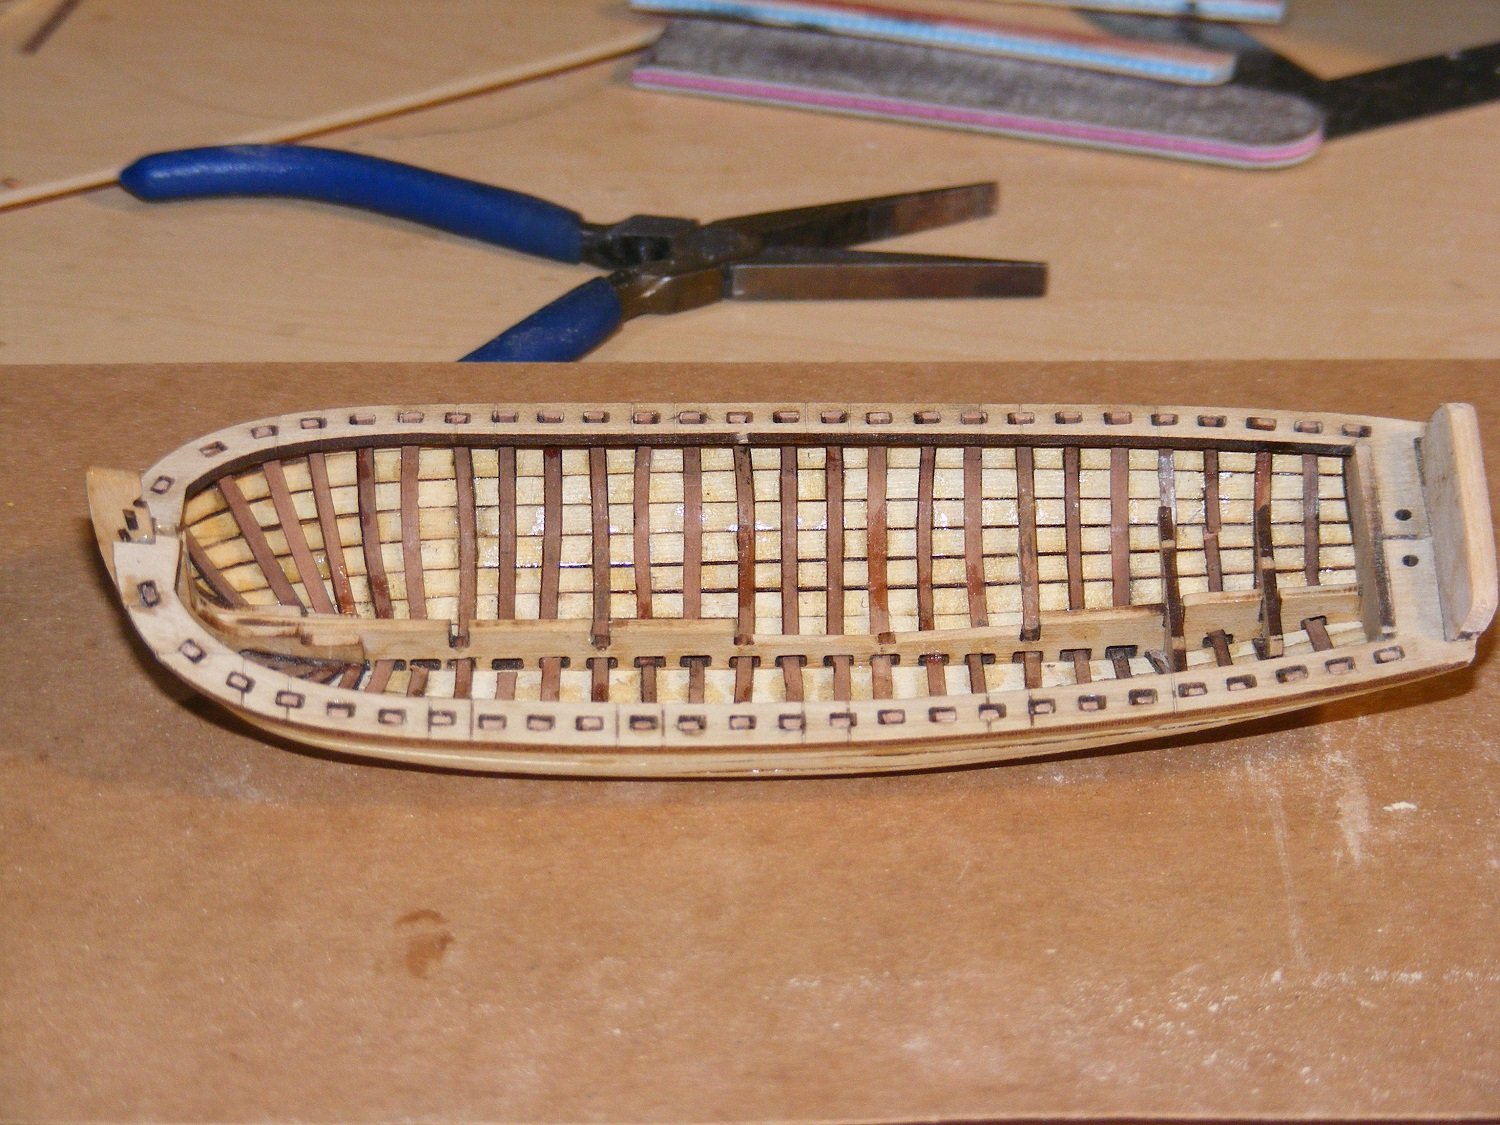
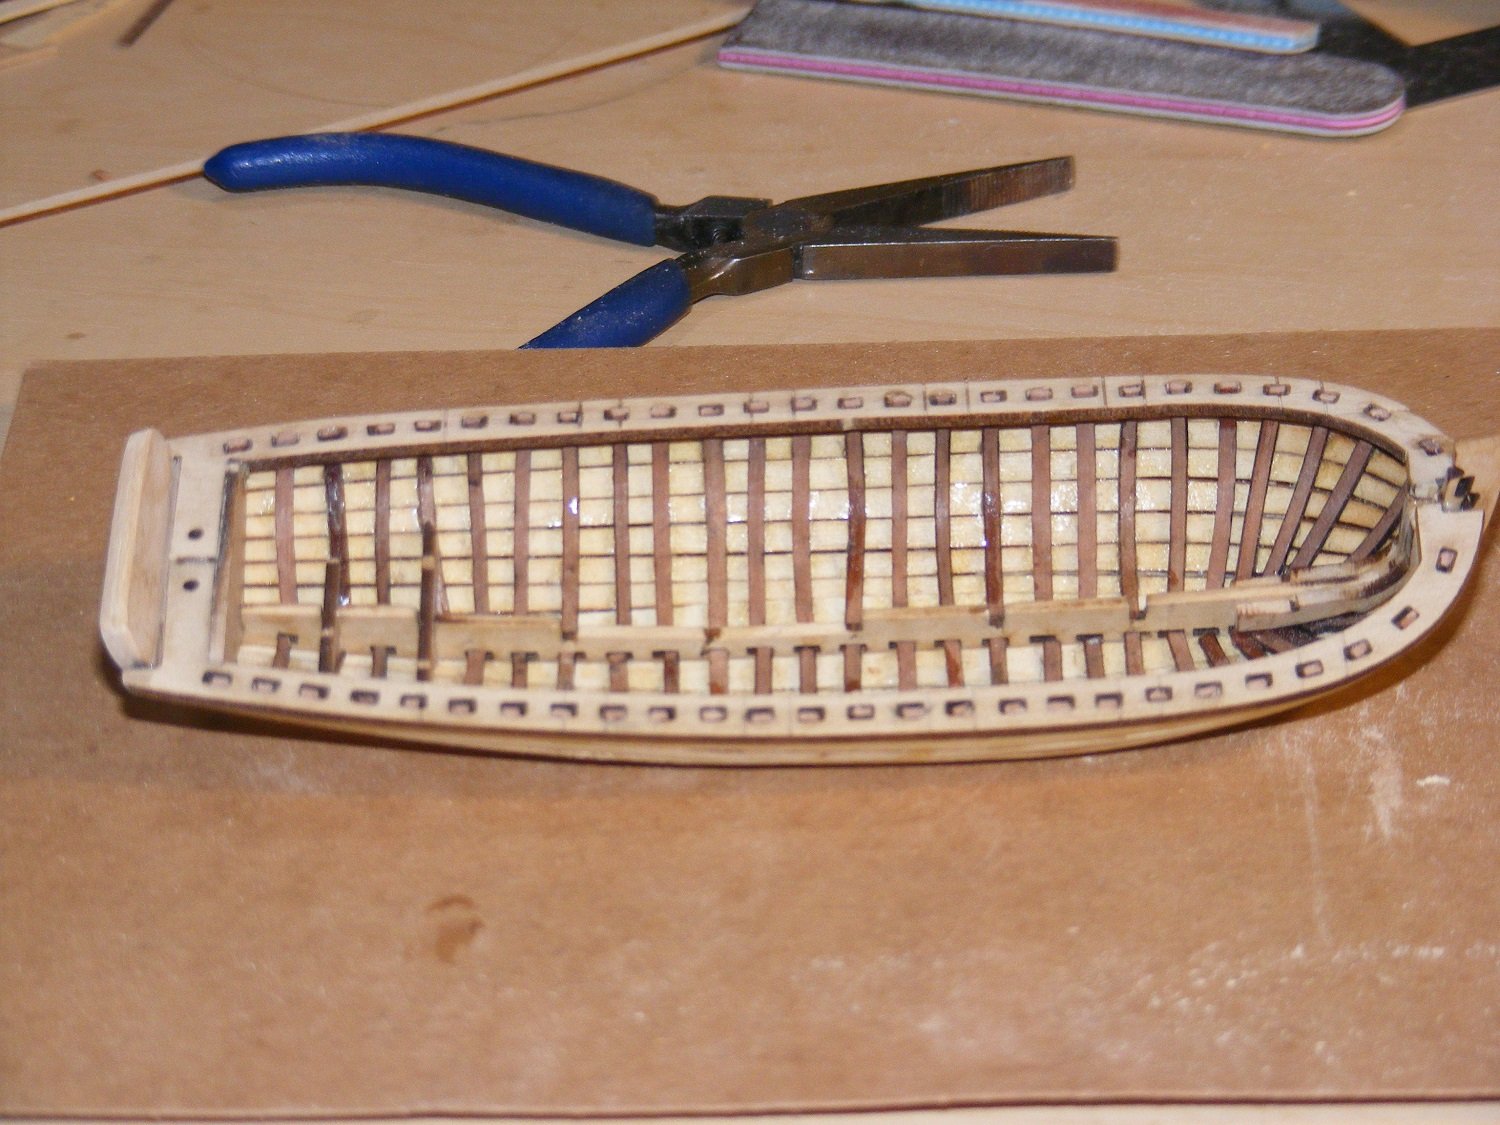
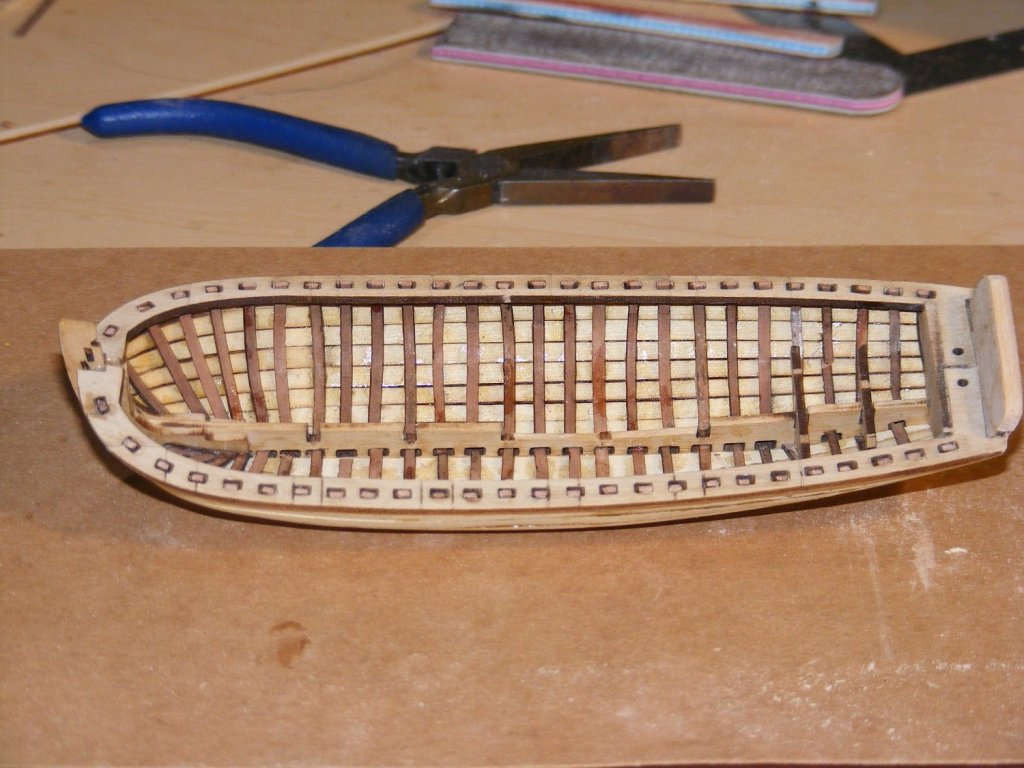
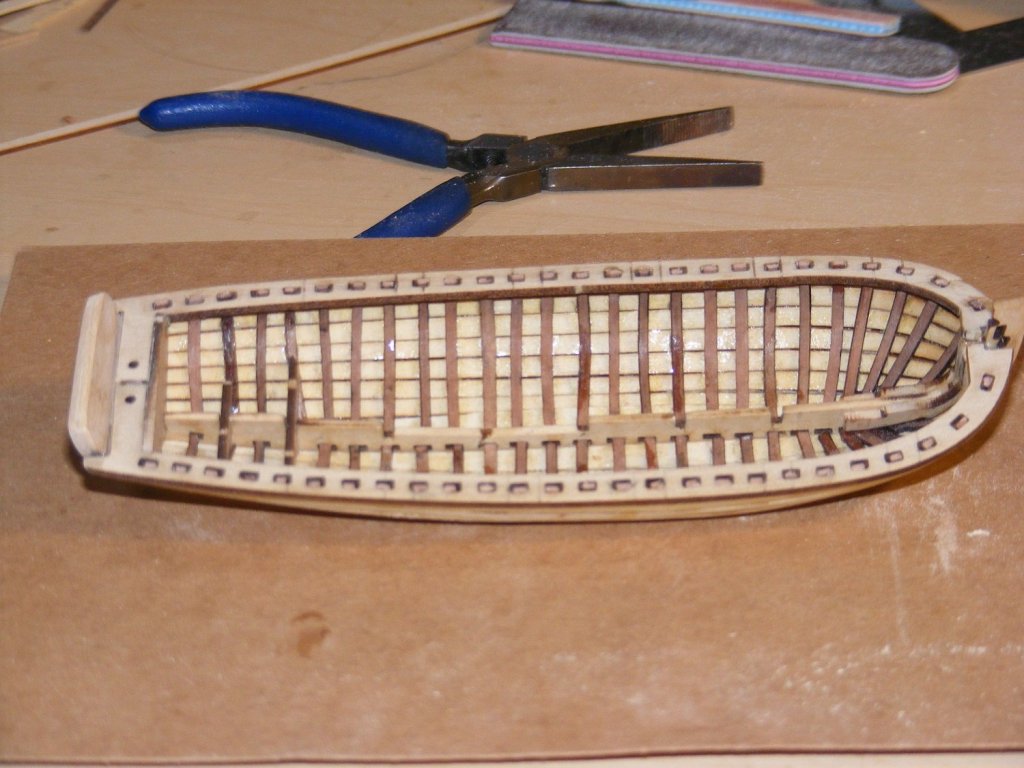
Thanks Patrick. And yes, there's still damage from getting it off the build board. For example, the stempost has some damage on the back (inboard) side and there's 4 formers down in the bilge to hold the deck up that need to be replaced. Need a bit of laser time for that but it's coming. I'm pretty confident I can make this one look presentable and not have to redo it as I though when it first came off.
-
I think probably all of us following you were holding our breath for this. It's great that it's all coming together.
-
Wonderful, Kevin. Just about to the finish line and looking great.
- 1,319 replies
-
- 6
-
-
- caldercraft
- Victory
- (and 1 more)
-
I think he will love it. Just don't tell him it's spaghetti and meatballs instead of an octopus.
- 11 replies
-
- 2
-
-
- pirate ship
- bottle
- (and 1 more)
-
It's great to see you back, Patrick. I think all of hit a mild "burnout" point at some point. Nice work on the engine room. Will the engine live there or is this the machine room for all the services?
-
Looks good from here including the beveling of the frames.
-
I'm not so sure, CDW. The 4th generation are pretty darn good while the current 5th generation is still in development. I'm reading where there's plans afoot to upgrade the F-15 and F-18 to keep them in the game.
-
Cleaning Small parts prior to blackening
mtaylor replied to src's topic in Metal Work, Soldering and Metal Fittings
The vinegar does the etching. I guess you could use vinegar in the cleaner though. Might work better. -
Thanks for the likes, comments, and support. It's slowly coming together. Still have to repair some damage and work to convert this design to make it look "French".
-
Usually (very vague actually) they were about 18 inches long. But that depends on the ship and lines being tied off. As I said... very vague answer.