DONATION DRIVE - SUPPORT MSW - DO YOUR PART TO KEEP THIS GREAT FORUM GOING!
×


Beef Wellington
-
Posts
2,249 -
Joined
-
Last visited
Content Type
Profiles
Forums
Gallery
Events
Everything posted by Beef Wellington
-
 Wow, congratulations! You should be justifiably proud of Harrier, couldn't ask for more. Hopefully we'll see Enterprize starting soon.
 -
Thanks everyone for the continued interest Pat - all I did was add a few bits of wire, credit goes to the guys that made the 3D print! Mort - Think I've already decided to leave any boats out of the waist, maybe 1, we'll see. Depends on how well I can build one of those, but I have considered putting some alongside but will also depend on how I'll display her if I ever get there. So many decisions. As for leaving of planking off, I've ruled that out as I think there would need to be other modifications as well to hide the typical kit build method deficiencies before I'd be happy, and I want to avoid getting bogged down. Christian - the paint is the Admiralty brand Red Ochre offered by Caldercraft, I like to keep it simple to ease touch ups and the colour is pleasing to my eye Vane - you definitely have me confused with someone else! Everything I know I learned from this great site, and my mind is continually thinking about how to do it better next time. There are definitely things I would do differently if I were starting afresh, but everything is a learning opportunity. There are many modelers here of a much higher standard than me. Mike - You can credit the Syren blocks and lines there, there are much more pleasant to work with than the usual kit stuff. I do like to identify a repeatable 'system'.
-
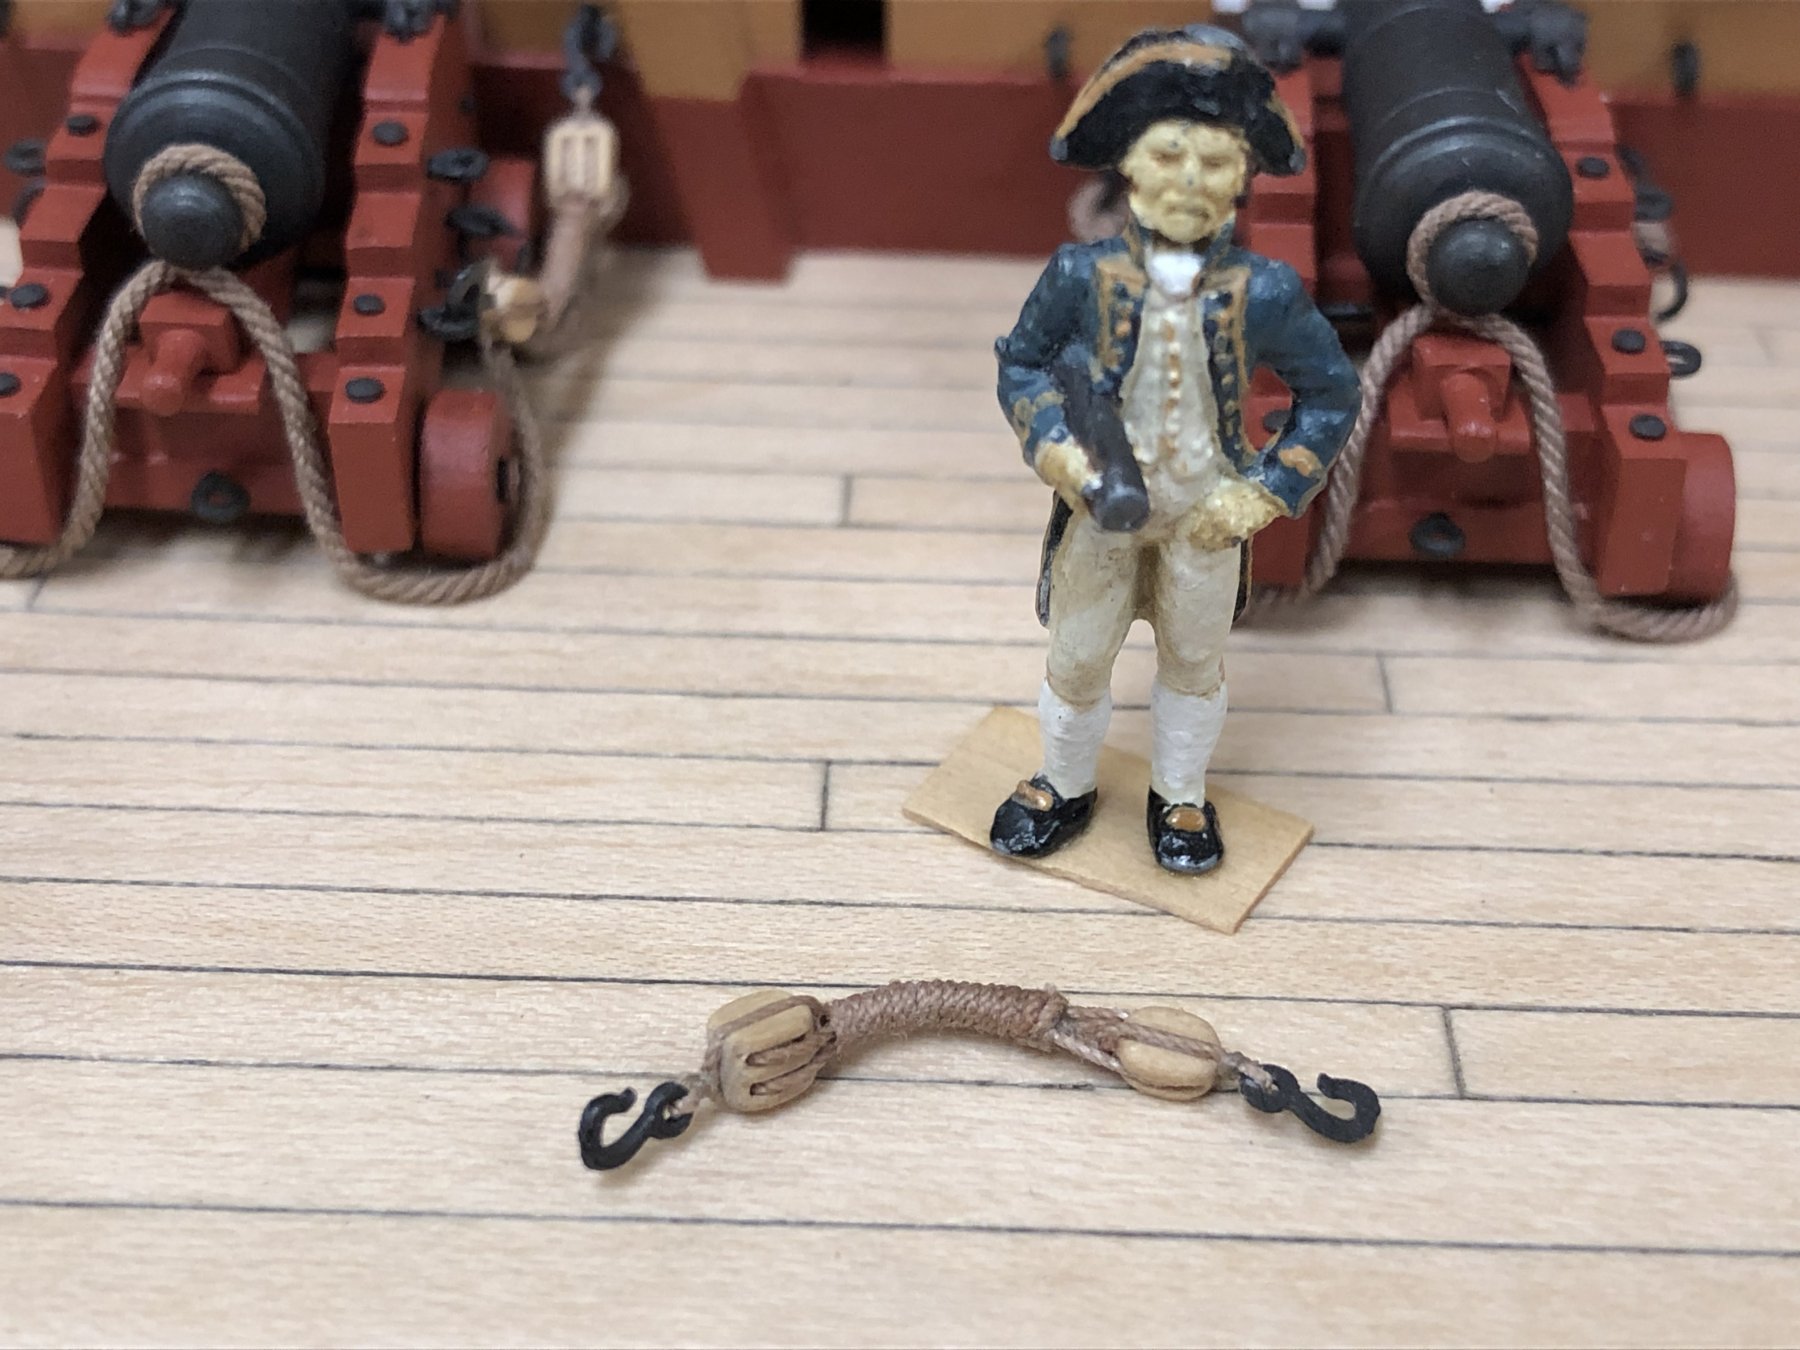
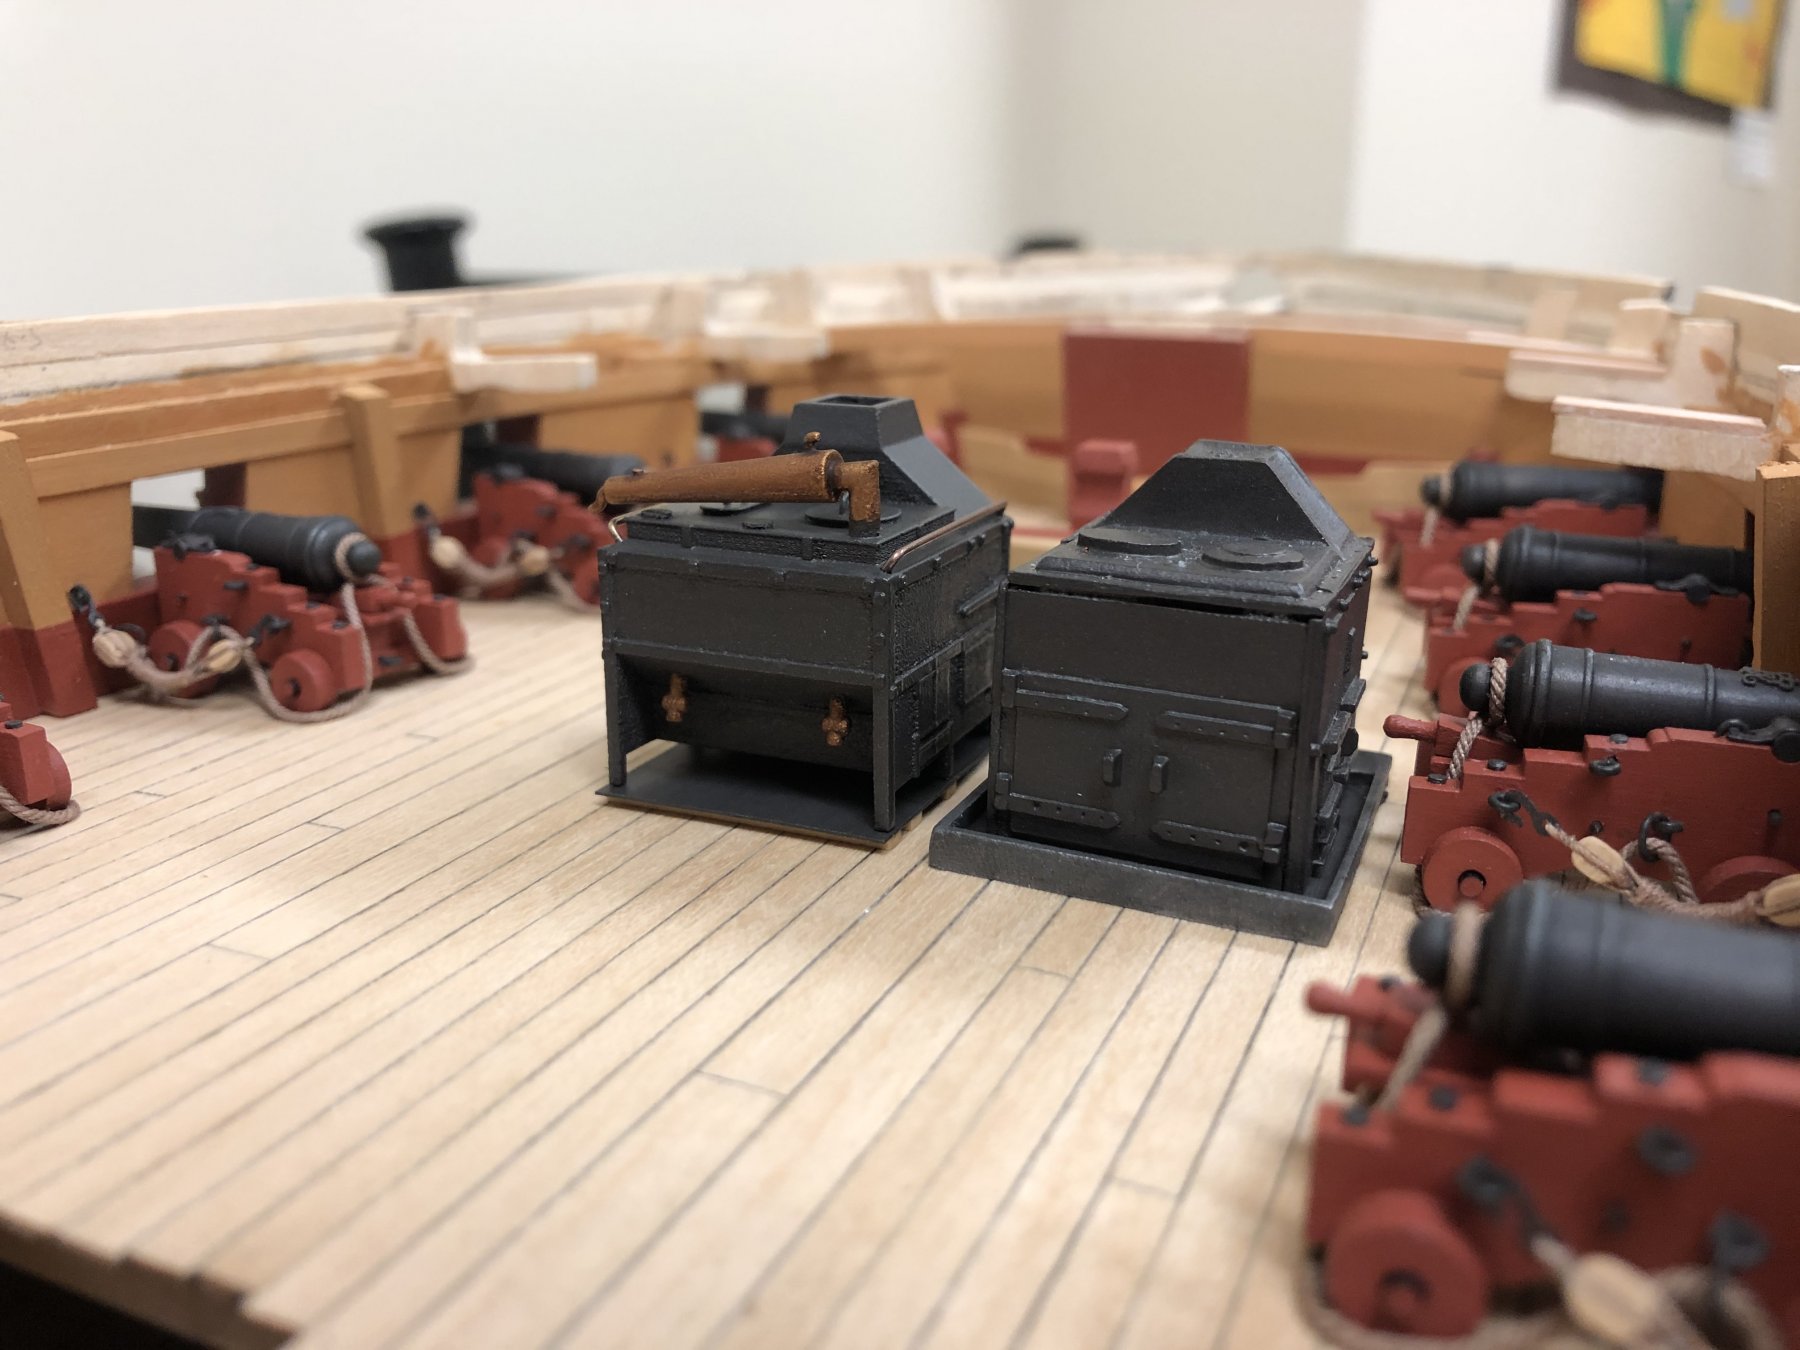
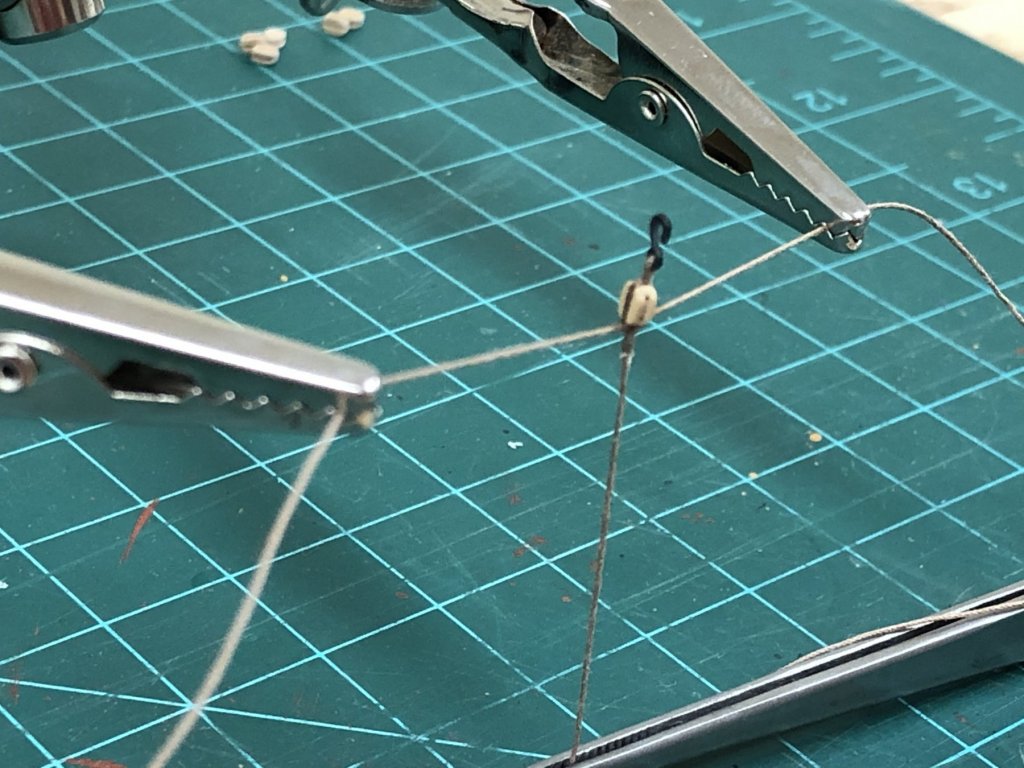
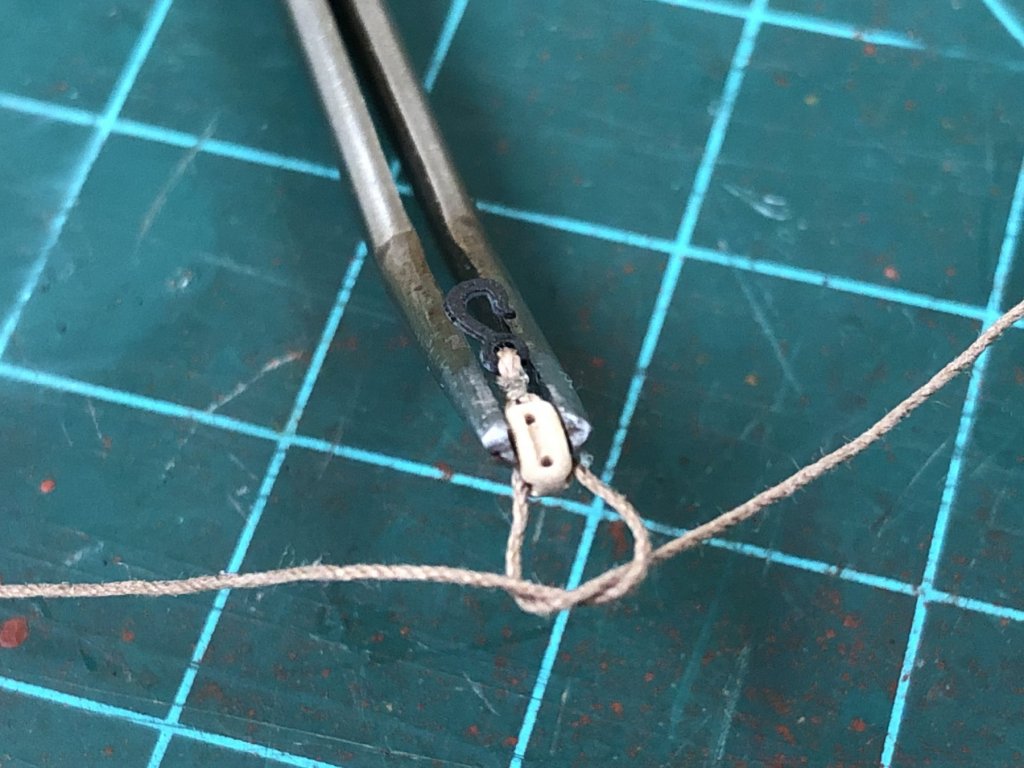
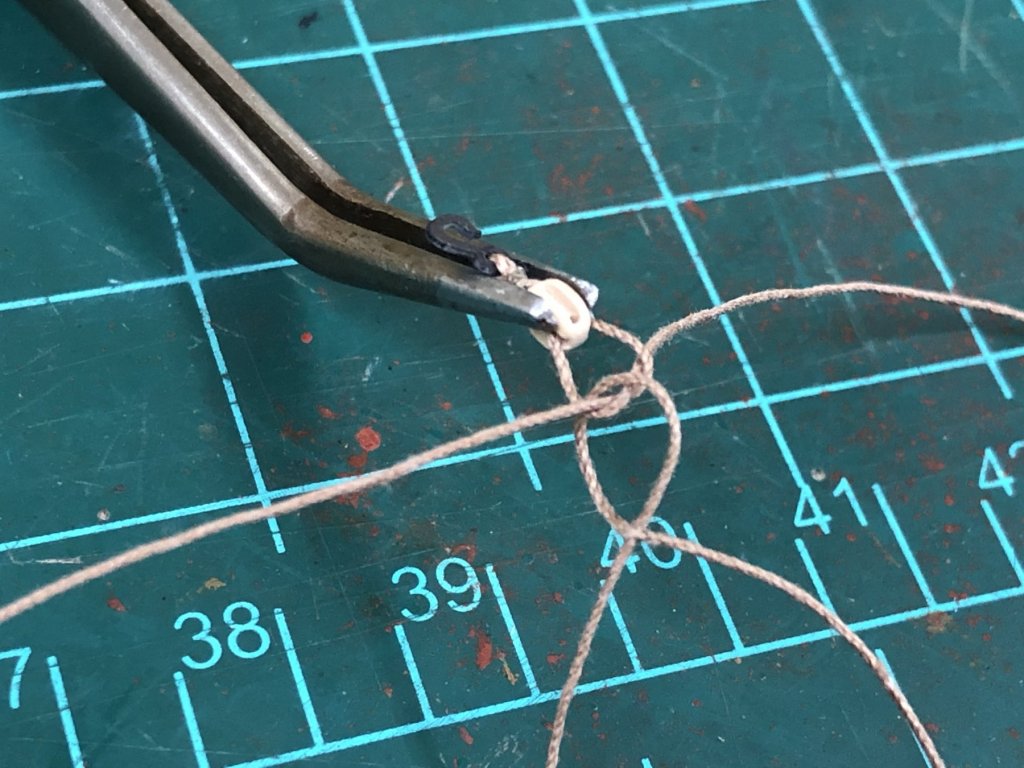
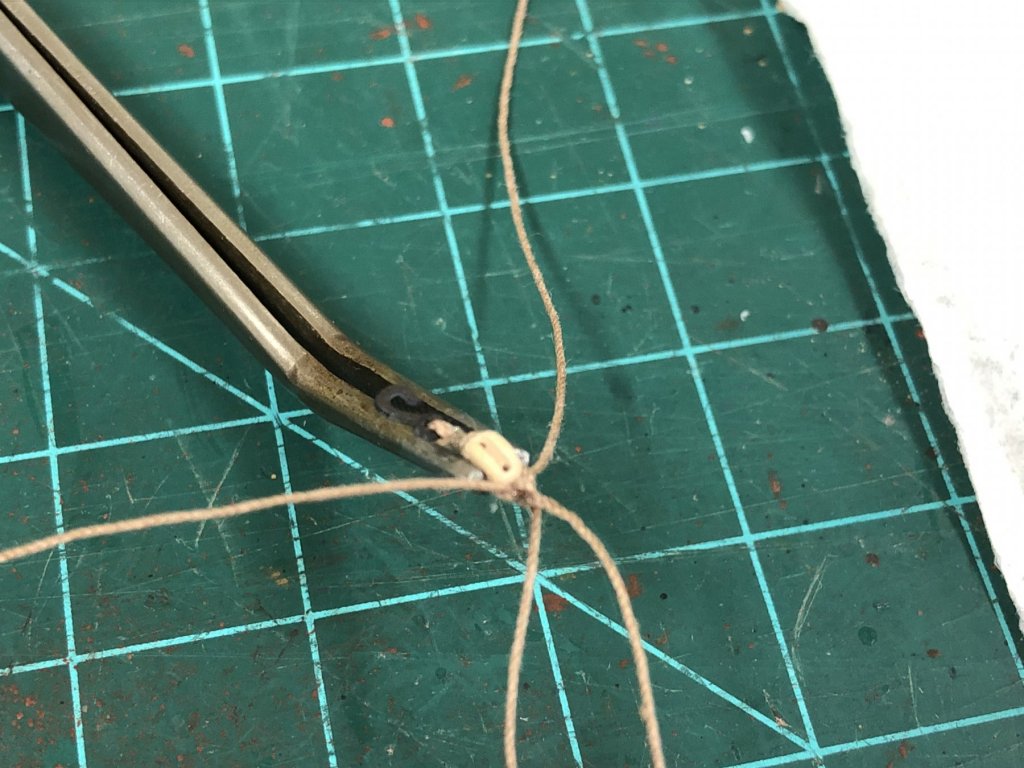
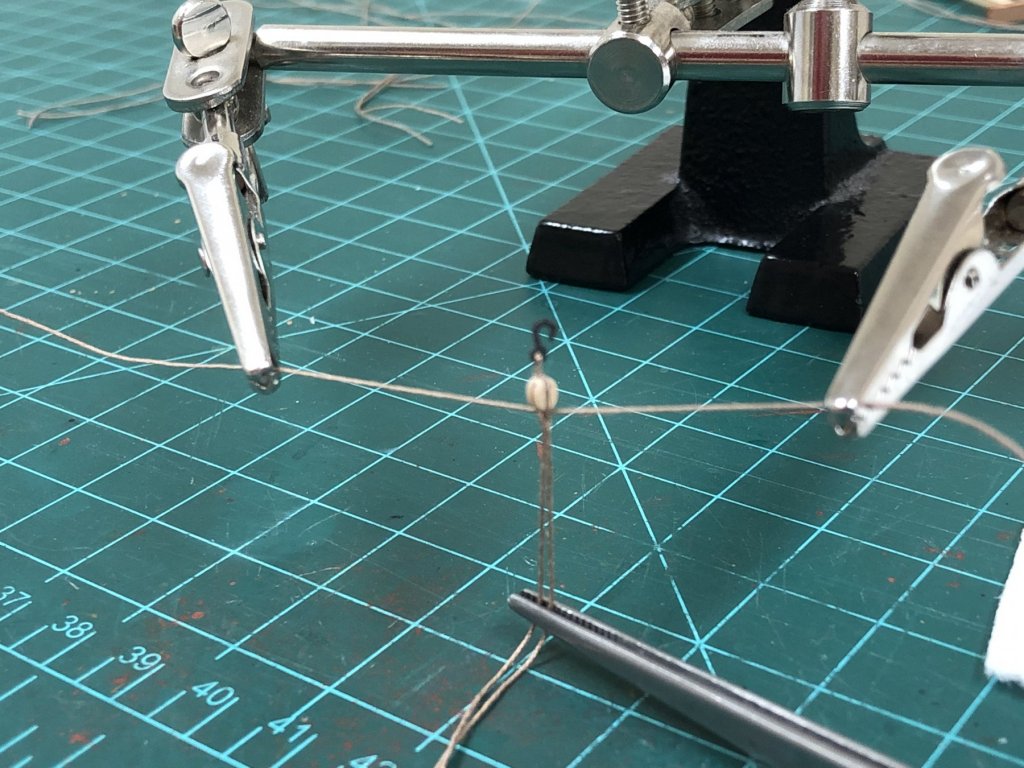
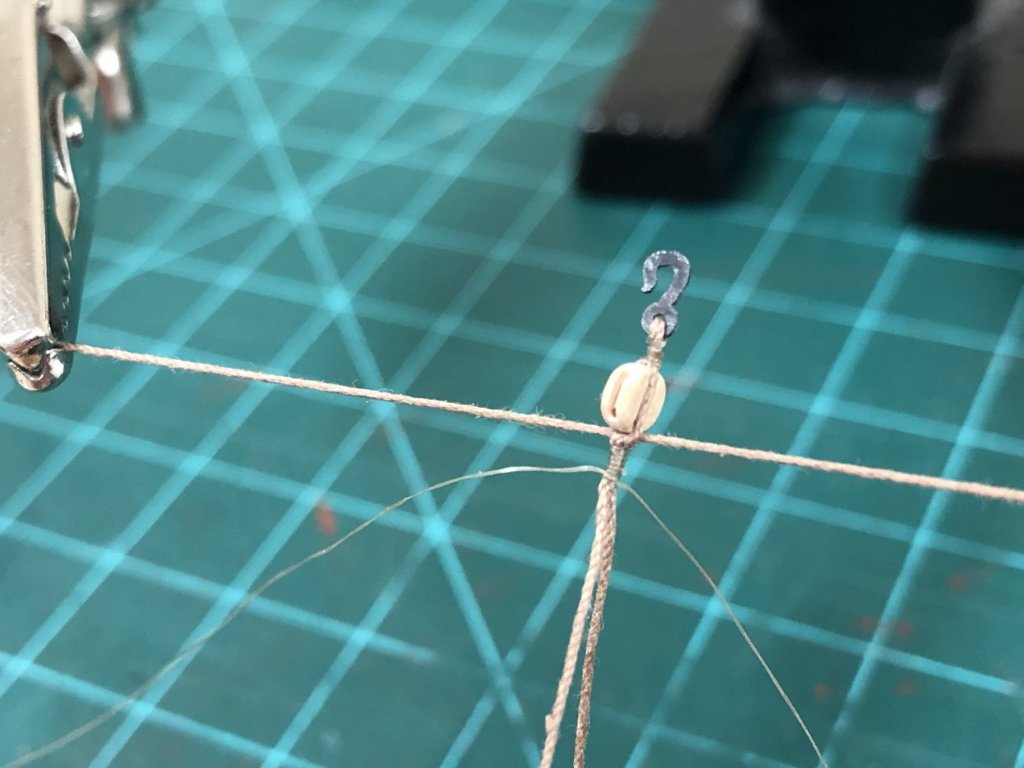
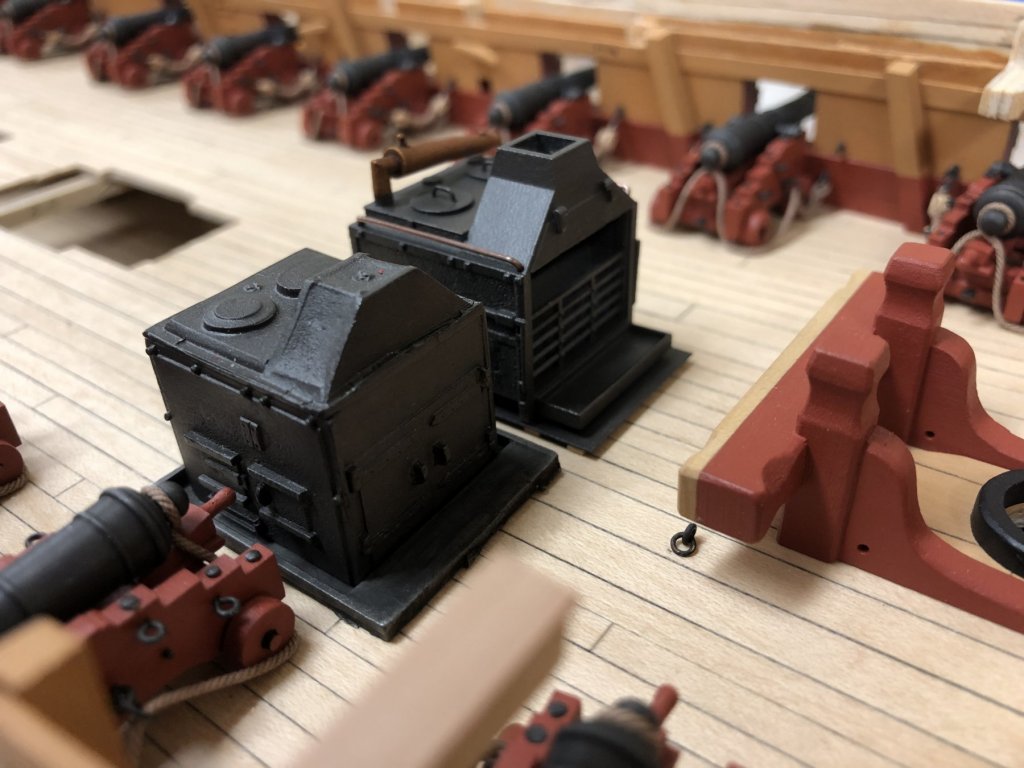
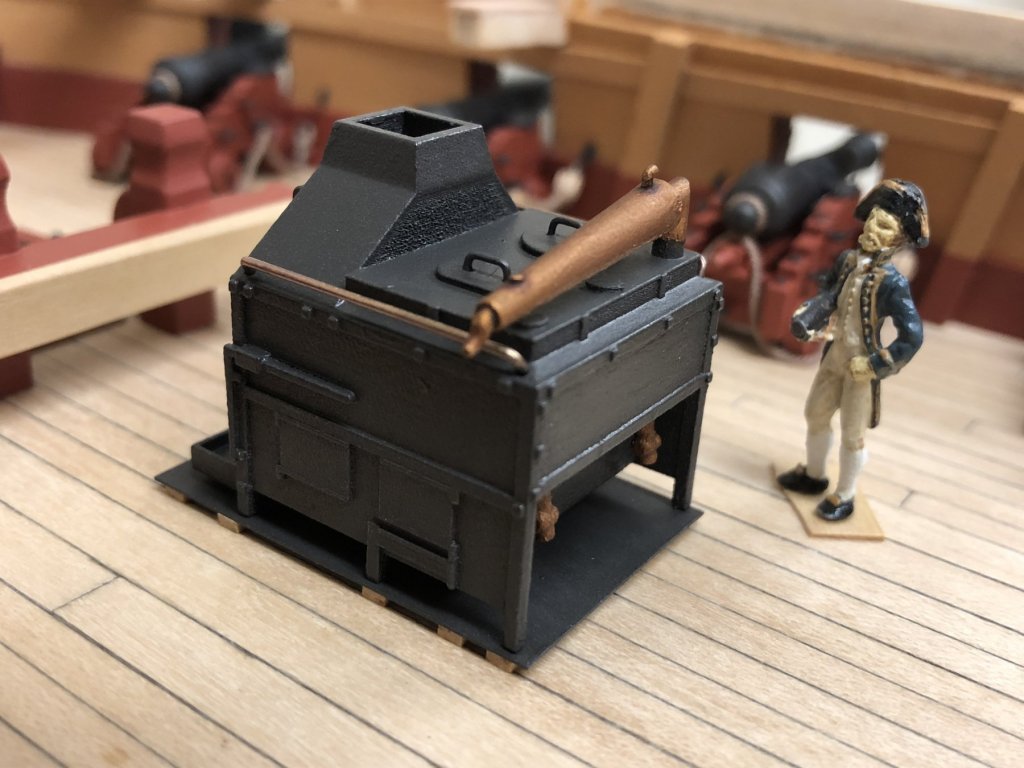
Thanks everyone, need to record a few things before moving on too much further: Tackles: Boy, these blighters take time. I will definitely not be fully rigging each gun, but will look to rig those fall into possibly the 'noticeable in the background' category. Here's the method I found works best for me. Apologies for the photos, an iPhone is really not the best at trying to photograph tiny objects suspended in the air. A hook was threaded with 0.3mm Syren line and some overhand knots tied to seize this securely. Drop of GS Hypo cement to keep secure before trimming excess. The long ends are then placed around the block and loose overhand knot tied. A length of line for the tackle fall is then inserted into the loop and then threaded back through itself as for a false splice. Pulling the overhand know tight around the block, and simultaneously tightening the false splice secures the knot around the block. Another small drop of GS Hypo cement on the false splice helps keep this secure, and placing the end of the stropping line into 'helping hands' helps keep the knot tight while the cement dries. Slightly weighting the tackle fall line (in this case with tweezers) allows the alignment if the block to be tweaked before the cement sets fully. Thin thread can then be seized around the splice to secure it, I find alternating overhand knots gives a pretty secure and easy result. Once more, another drop of GS Hypo on the seizing helps ensure this doesn't unravel once trimmed. Once completed, I use some dilute PVA glue on the stropping prior to trimming off any excess as some additional insurance as it is a frustrating experience for these to break when frapping. The tackle falls were then fed through the previously stropped double blocks, and then frapped on the service machine as per a previous post. The last turn was secured simply by feeding back through the prior turn and pulling taught. The completed tackle can then be placed where needed and some dilute PVA applied again to the whole tackle - special attention was paid to ensuring the tackle fed through the frapping was secured with glue. The entire tackle can then be removed once dry and the excess line trimmed. Its a simple matter to hook these back into position. Et voila! Stove: The stove has also been given a little more TLC and is now glued into position. Handles for the boilers were added, as well as rails which were made from brass rod. The rails were the treated with some JAX 'Brown' to darken it a little a keep it in keeping with the colour of the copper still. As described in a previous post, I've followed TFFM simulating wooden battens under the custom base plate rather than simulating tiles, they would not been seen in any event once the main riding bitts are in place. Temporarily putting the fo'c'sl deck in place shows that much of this will be obscured even if the various gratings are made removeable which I plan to do. In closing, a quick summary of the 3D printed stove. With a little work I'm happy with the way this turned out. Comparison to the kit supplied version shows the dimensions to be a little more authentic, and the detailing is much more pleasing than the approximations on the supplied white metal parts. To be fair, no work was done to pretty this up, but I'd certainly recommend this as a simple 'upgrade'.


-
Hi Vane, you seem to have quite a few kits underway, don't know how you do it! Anyway, to your question...I can only share my personal experiences... Lime - rather soft, very pale and not sure how evenly it would take stain if you were looking to colour Maple - hard, does darken slightly over time from its initial paleness to be not totally dissimilar to tanganika. Tanganika - in my Snake build I used the supplied Tanganika for the deck and it looked great. Additional orders I found to be less satisfactory, as well as the wood provided in my Diana kit, as the wood had a very non-scale red/brown grain in the pores which I didn't like Walnut - nothing more need to be said, but I think I've only experienced the really bad kit supplied stuff so maybe not fair to judge. But, my personal preference is for a lighter look similar to the contemporary admiralty models. Think its personal preference on the colour, and the colour does seem to vary a lot, the stuff I've seen tending to be darker. Best of luck agonizing over this!
- 101 replies
-
- 3
-

-
- caldercraft
- granado
- (and 1 more)
-
Now that is stunning, really nice idea on the base, and the grounded anchor is a great touch. Airing my dirty laundry, the reason my Snake is still inches from completion is because I just can't get round to figuring out options for a display base.
- 366 replies
-
- 1
-
-
- granado
- caldercraft
- (and 1 more)
-
Very nice Stergios, thanks for the photos of your progress! Rigging is looking very neat and tidy.
- 1,144 replies
-
- 1
-
-
- snake
- caldercraft
- (and 1 more)
-
Don't envy you Greg, think the monotonous tasks just vary by ship and modeling medium 😞 Question though, would the plans have been painted with a land or naval camo? Thinking greens/browns for the former, and greens/blues for the latter? I could see it being either consider the GZ's situation.
- 345 replies
-
- 4
-
-
- graf zeppelin
- trumpeter
- (and 2 more)
-
Definitely NOT the horrible Old Leopard! Your solution on the upper masts with the tenon worked out very well it seems. Great work Jim, love the full hull shots.
-
Beautiful Nils, love the photos of the outside of the hull, very nice clinker planking. How exposed will the engine be? That's a project in its own right I suspect, sadly I'm not very knowledgeable about boat engines to help answer your question, think Wefalck has done that though!
-
The Kettenkrad must have just chewed up the decking something rotten, guessing it was used to pull planes and dollies? Really, a Kubelwagen? What was that used for, heading into town at night? 🙂
- 345 replies
-
- 6
-
-
- graf zeppelin
- trumpeter
- (and 2 more)
-
Mort - so glad you've decided to start a build log, will be very interested to follow your progress. Can't wait for the pictures!
- 60 replies
-
- 2
-
-
- victory
- caldercraft
- (and 1 more)
-
This kit really looks like a gem and you are doing such a beautiful job building her. Love the colours, and the crispness of your work is exceptional.
- 315 replies
-
- 3
-
-
- master korabel
- avos
- (and 1 more)
-
Hi Nils, glad you posted in my log otherwise I wouldn't have known about your new Zeesboot project, quite the scale, I'm sure she'll be stunning and very interesting construction. Also congratulation on the puppy, we seem to have got ours both at the same time! Casper looks a real cutie!
-
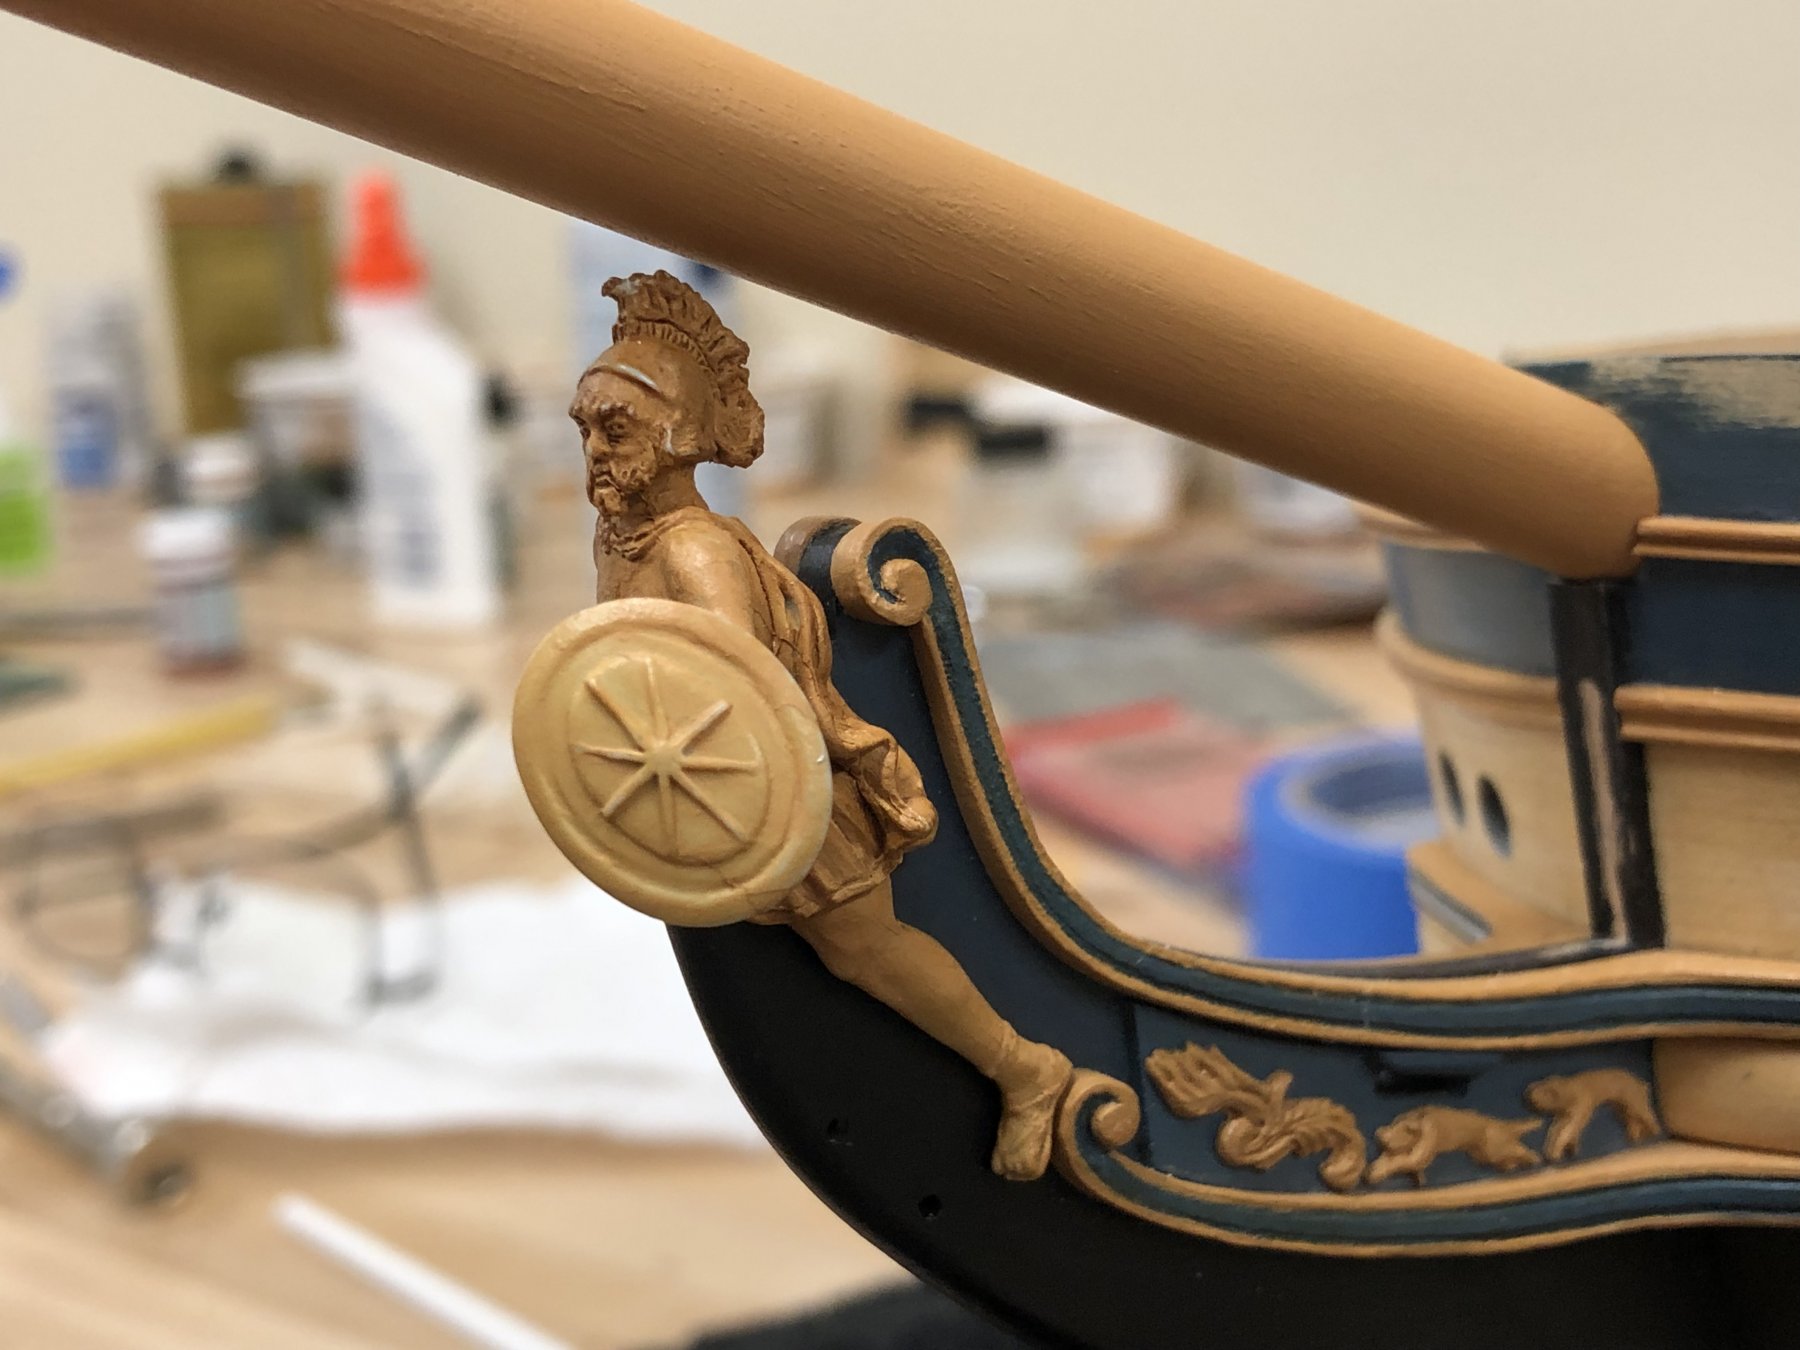
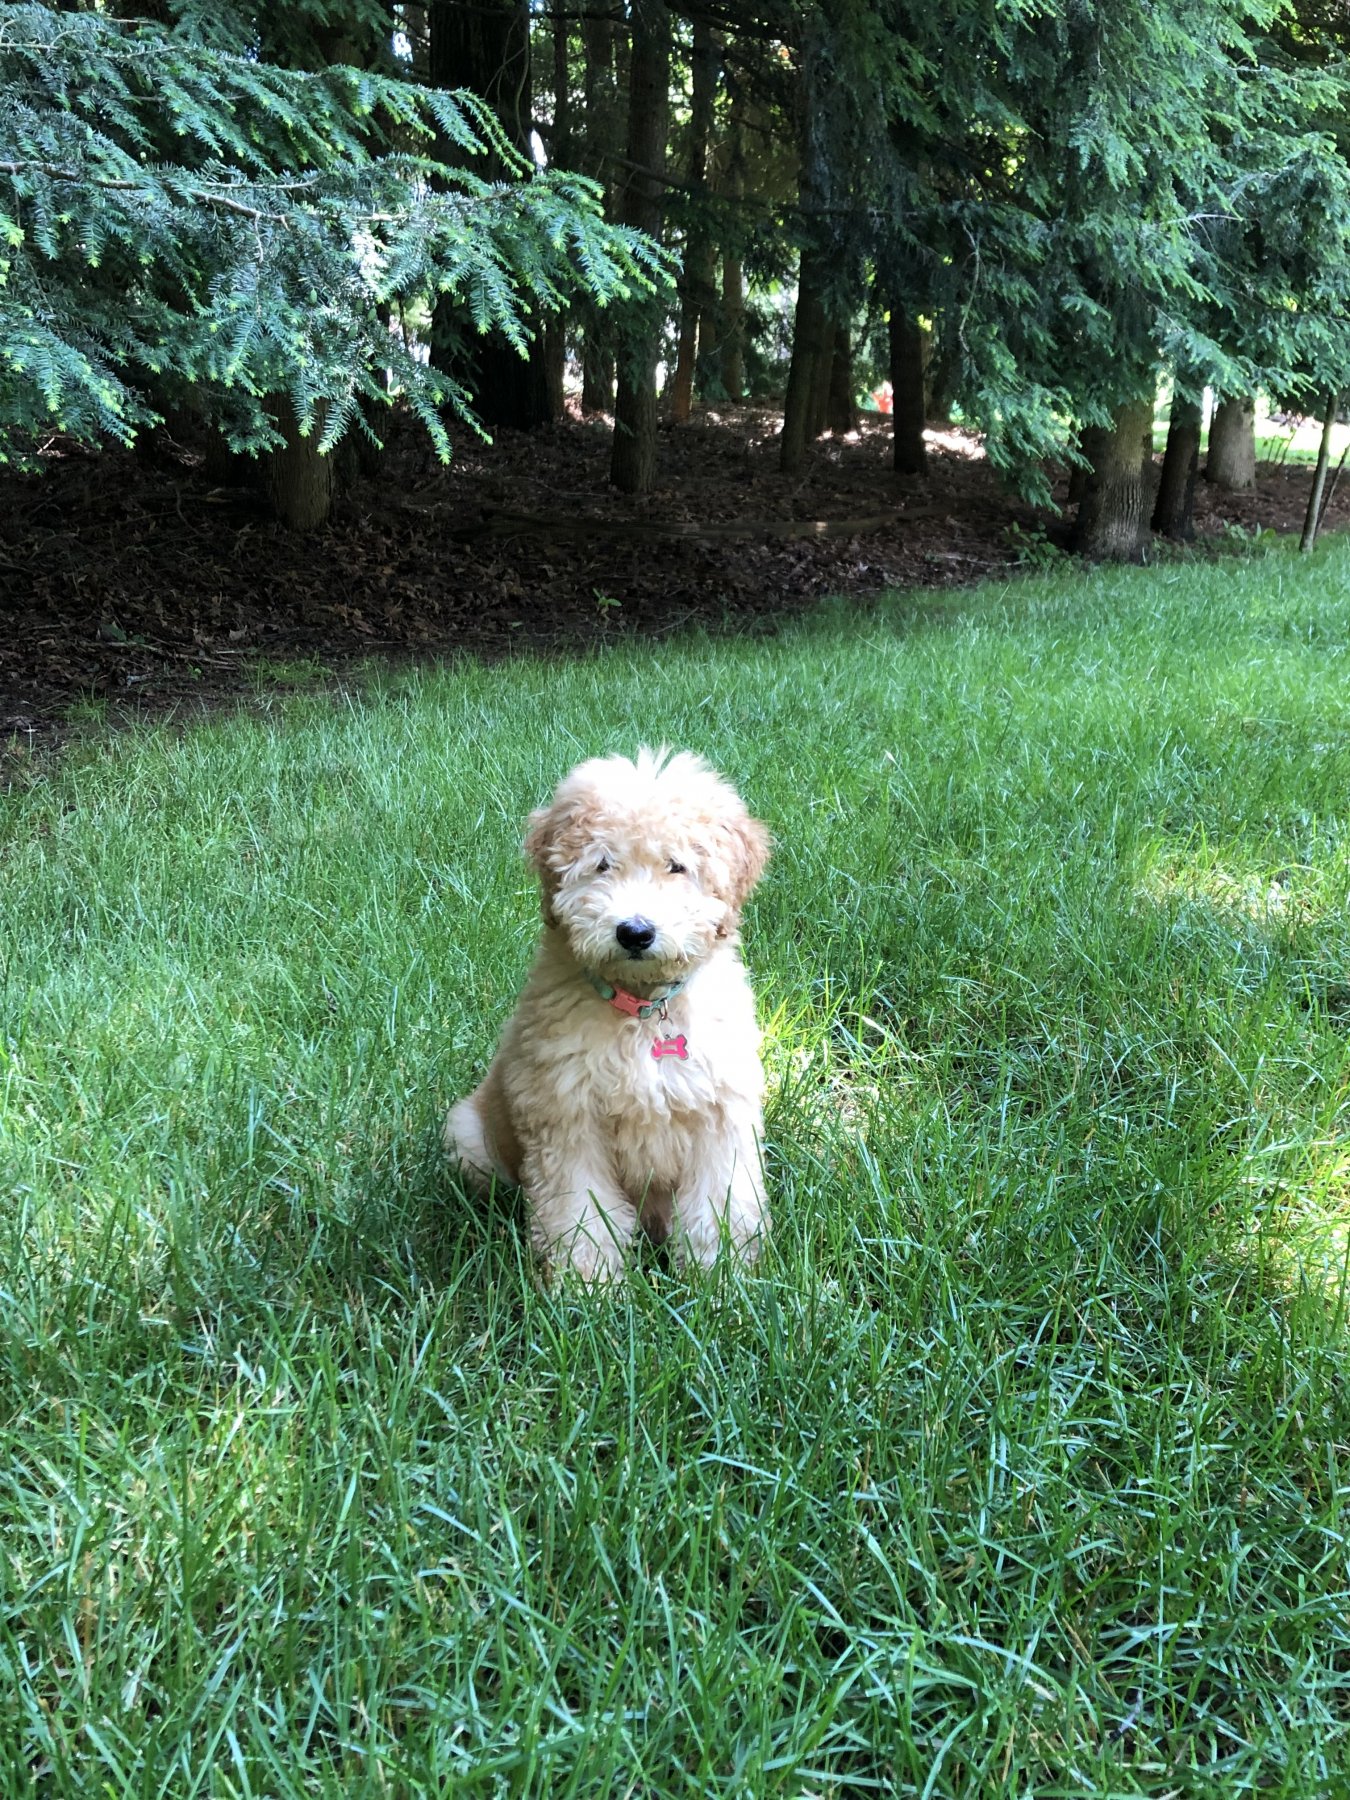
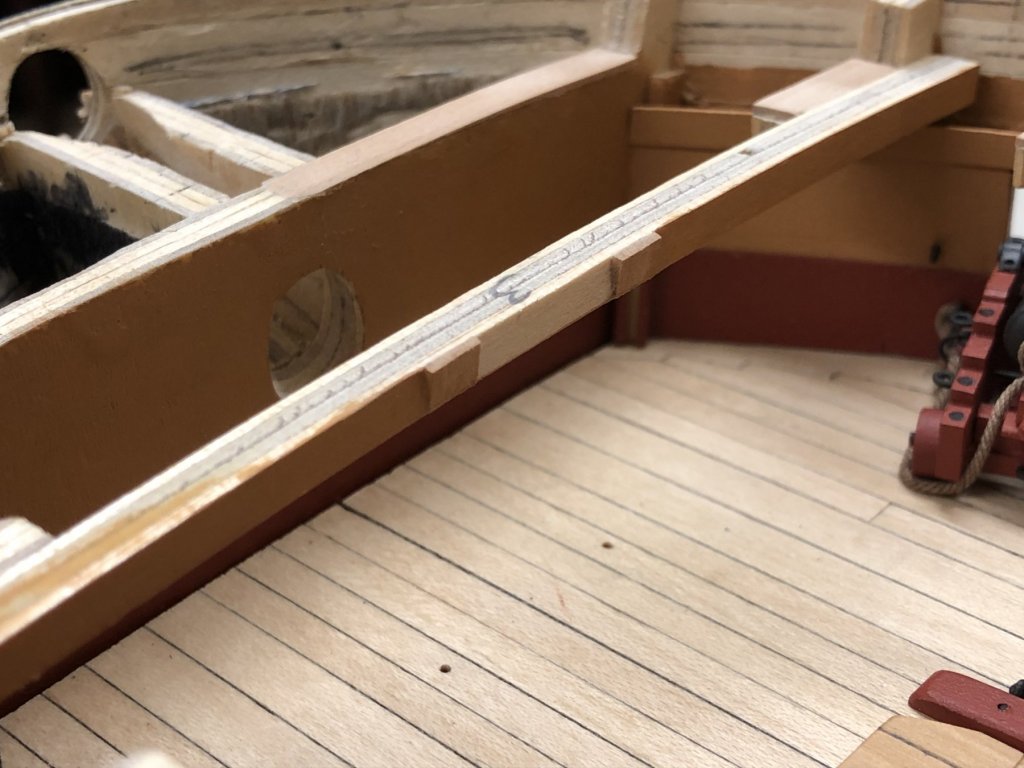
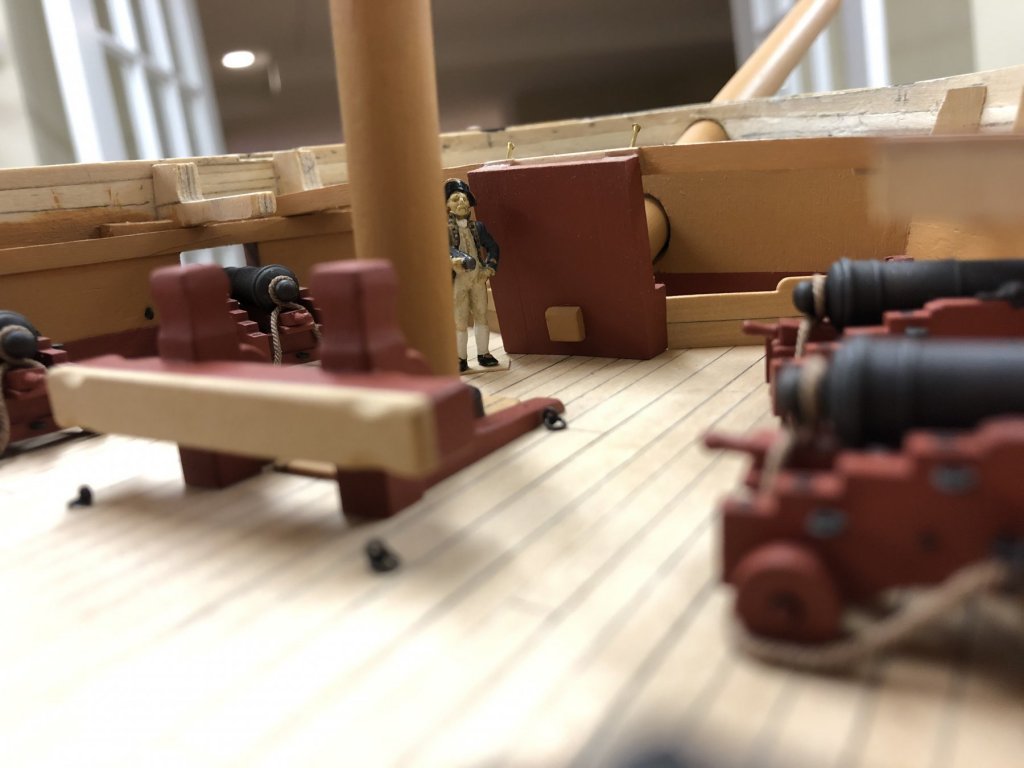
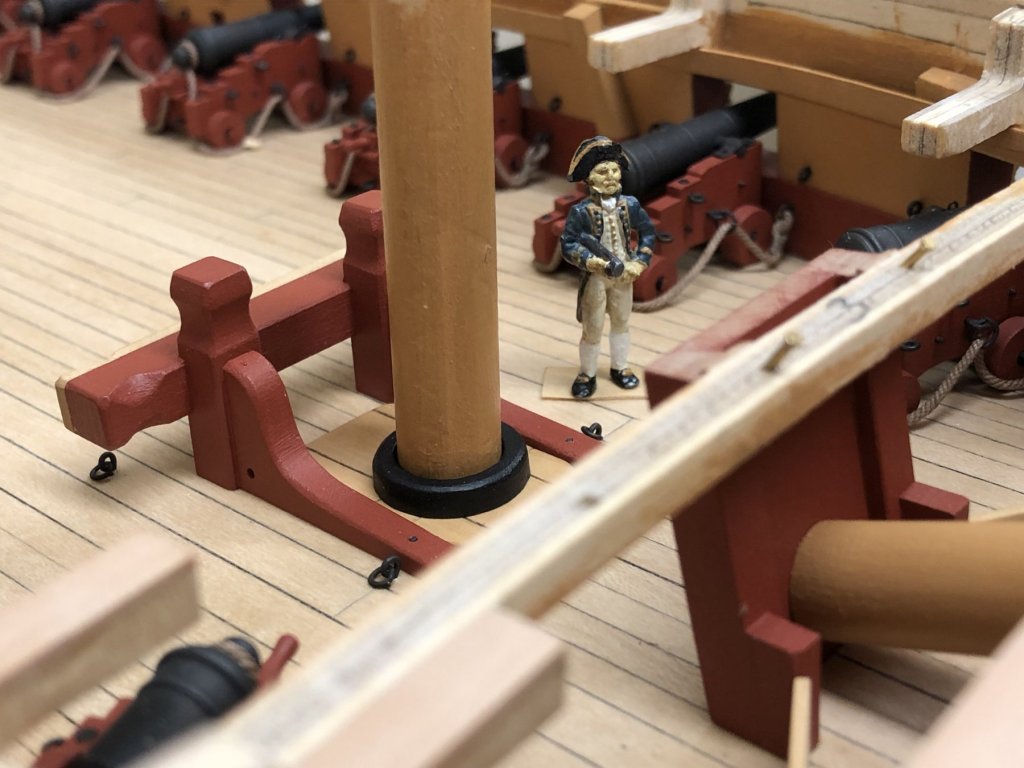
Thanks Pat, Carl, Kevin, Jean-Paul and 'the likes' for not forgetting me! Update on a modification made right back at the start of the build. I had initially planned to add a bowsprit step to achieve 2 things: a little more 'interest' on for the upper deck for those peeking through gun ports and a more robust engineering solution to the attachment of the bowsprit. Both of these are still valid, but a third reason has also just become apparent to make me very glad I decided to mod this. Bottom line, I can't quite see myself moving forward and rigging 'Jason' at this point, which would still be a long way off if past progress is any indication. However, I would like to leave that option open for the future, and this allows me keep moving forward without making any sort of final decision. Some angled 'wedges' were added to the first deck frame to match the angle of the bowsprit step which was then glued into place. A pin was then inserted at the center position of the bowsprit position. Maybe went overboard on securing this, but don' think you can be too careful, it was pinned at the bottom, PVA glue secured to the beam, and then pinned into the beam. While positioning all this it was important to keep checking the clearance over the figurehead, I'd worked through this already when making the original modification and luckily no further complications arose. A hole can then simply be drilled into the end of the bowsprit, and once the aft end is appropriately angled, this sits very snuggly and securely even without glue. The benefit is that this is removable and replaceable even with the fo'c'sl deck in place. I've made up a 'stub' that will probably be used for now, and also a dowel that can be made into a bowsprit should I also go in that direction. The fore bits are also now glued in position with a few other details which will likely be lost when the fo'c'sl goes on, but its fun to experiment. In other news, there was some months ago an addition to the Wellington family, her name is Mazie, and shes a loveable 14 week old 'Whoodle' (Wheaton terrier/poodle mix). While she has many particular skills, dockyard assistance is not currently one of them...


-
Despite the fiddliness those swivel guns came out really well! I need to start thinking about lids myself. Quick question on the KristalKlear as your lights turned out really nicely. I've never used it before but have some waiting, how did you apply it? The guidance seems to suggest building it up once in position but its hard to mentally get comfortable with that, and I don't want to mess it up and ruin the PE. Any concerns with it not drying completely clear?
- 421 replies
-
- 1
-
-
- caldercraft
- granado
- (and 1 more)
-
This kit looks fascinating, so much complexity in a good way. Nice start!
- 31 replies
-
- 2
-
-
- master korabel
- avos
- (and 1 more)
-
I think there is a definite gap in the market for this type of fully framed model, definitely would also be interested in learning more as this comes to market.
-
Sorry for hijacking here, but just to add Rob's excellent summary above. The other factor to be aware of is what the ship plans show, they could be as designed, as built, as refitted etc. Its possible to purchase the Diana plans at full scale and it amazing the amount of additional detail that can be seen, and notated on other plans (for example, the Diana plan indicates that the Jason's and Diamonds foremast was moved forward 6 1/4 inches), suggesting that specifically identified plans per the NMM may not be unique to a ship, but more to a class. Regarding the open bulwark topic, the fashion was shifting at exactly the time these were designed and built. Armament carried is a similar situation. Bottom line, even for specific ships, there is latitude to build how you would like and still be 'historically accurate' - just look at the debate that goes on about the configuration of HMS Victory at Trafalgar, and she's still in existence! I'd recommend buying the Diana AOTS book, in the historical preamble there is lots of context to the above points.
-
Lovely stuff Jesse, rigging looks very neat and you did a great job with the line you used. Glad I didn't miss the end which seems to be approaching soon 🙂
- 1,306 replies
-
- 4
-
-
- syren
- model shipways
- (and 1 more)
-
Beautiful work Greg and very interesting subject. I go away for a few months an you start, and nearly complete, this beast...
- 345 replies
-
- 5
-
-
- graf zeppelin
- trumpeter
- (and 2 more)
-
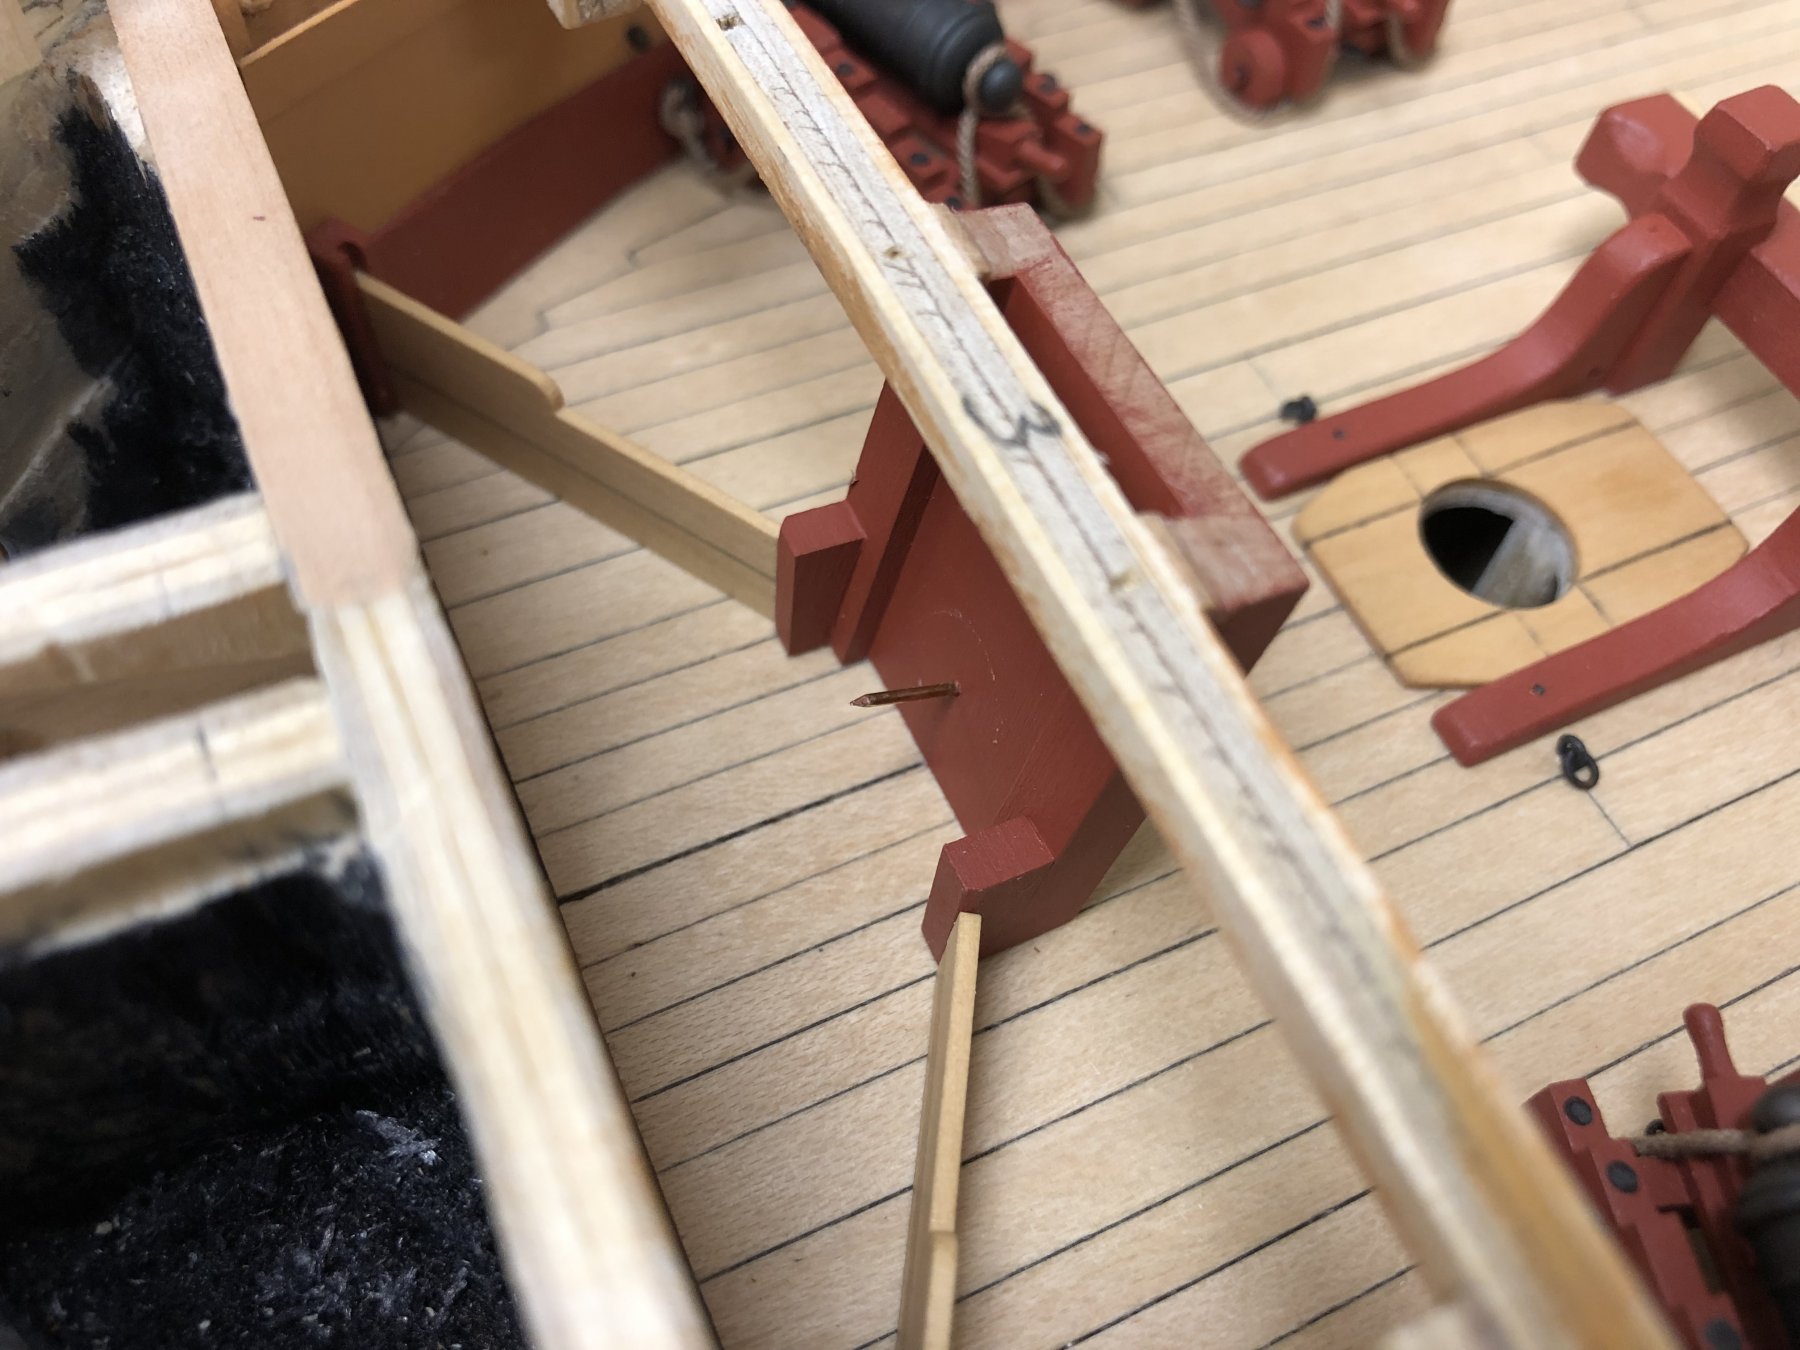
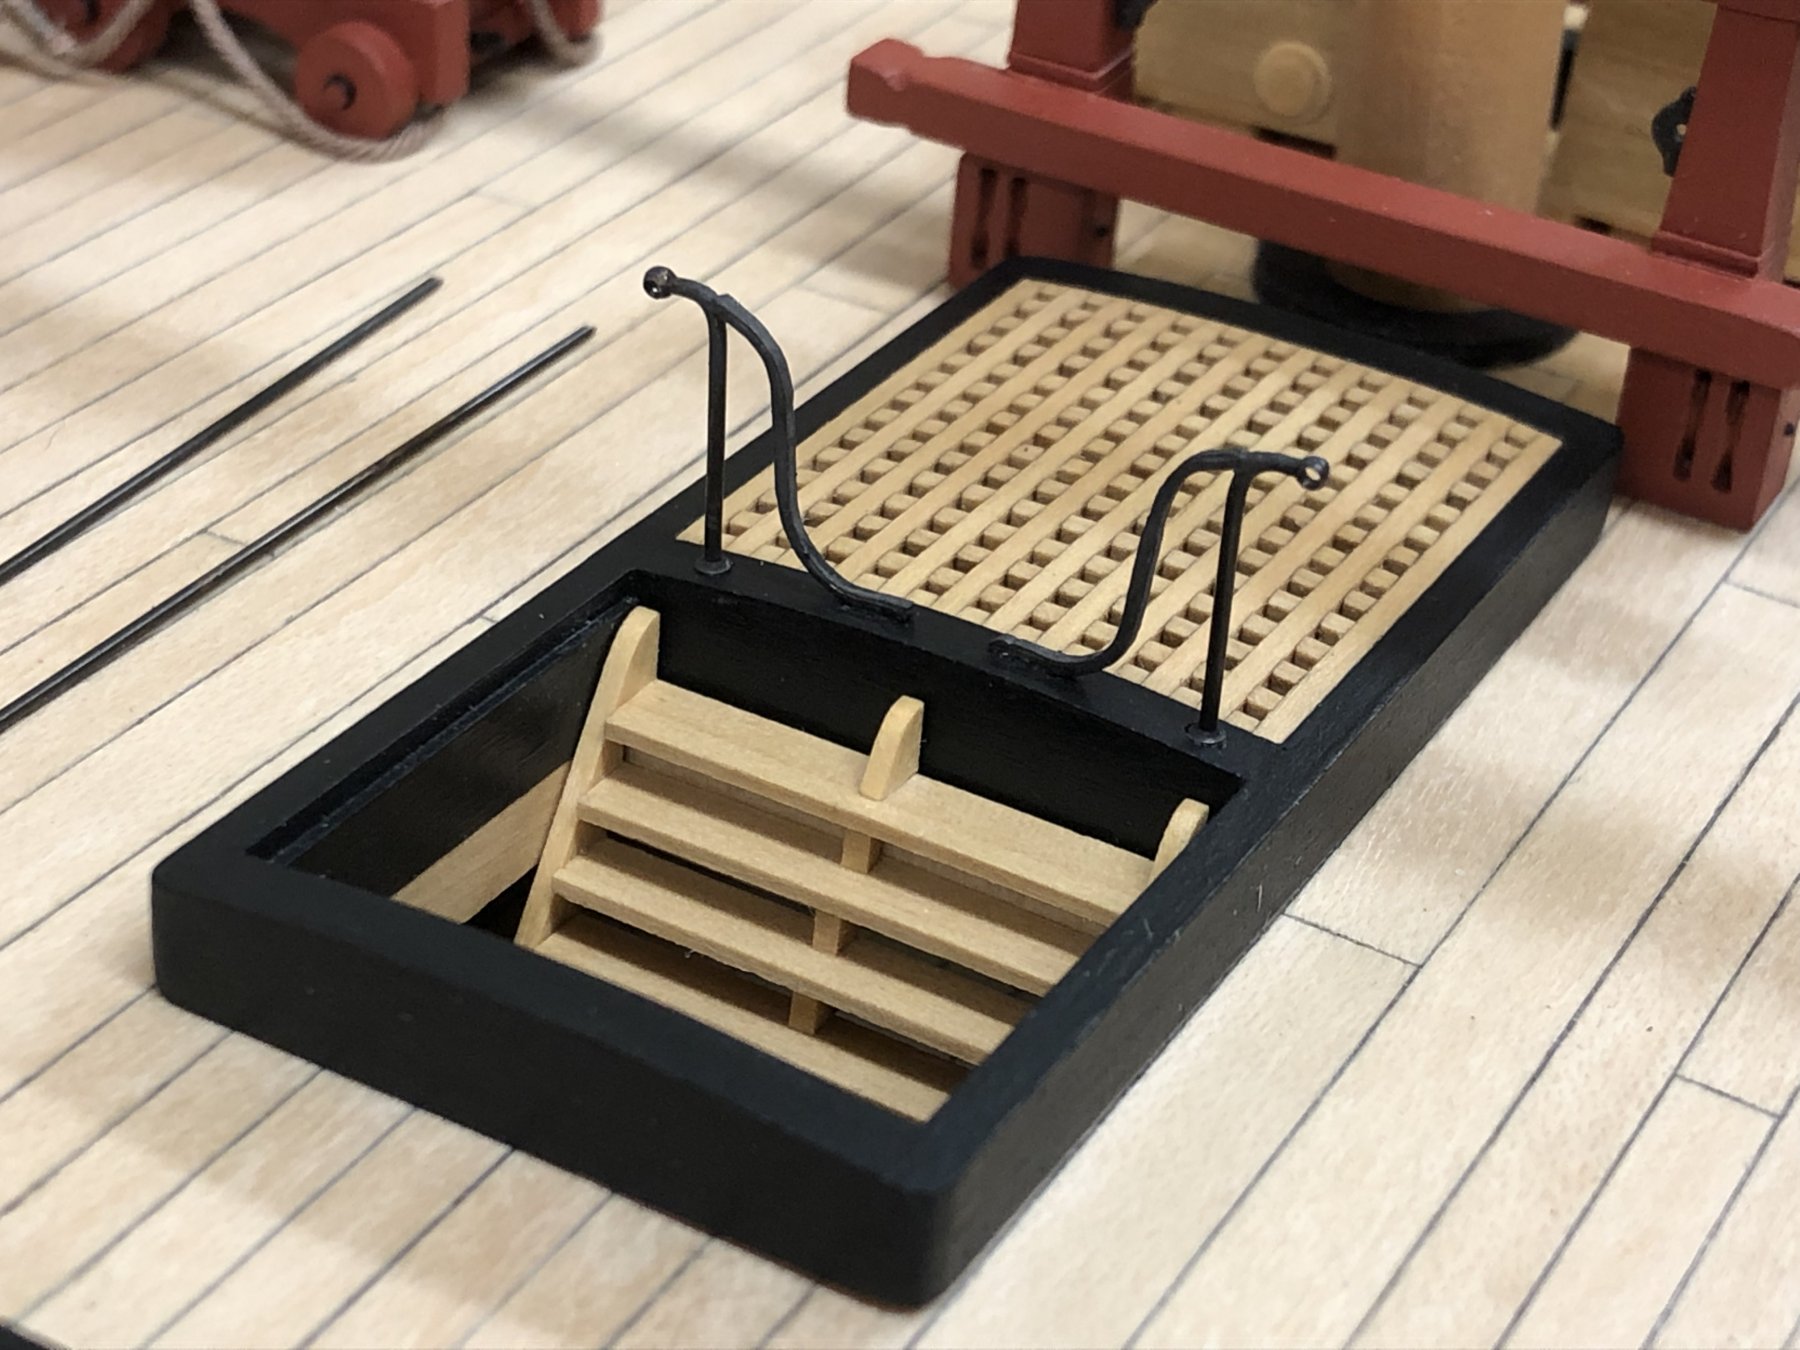
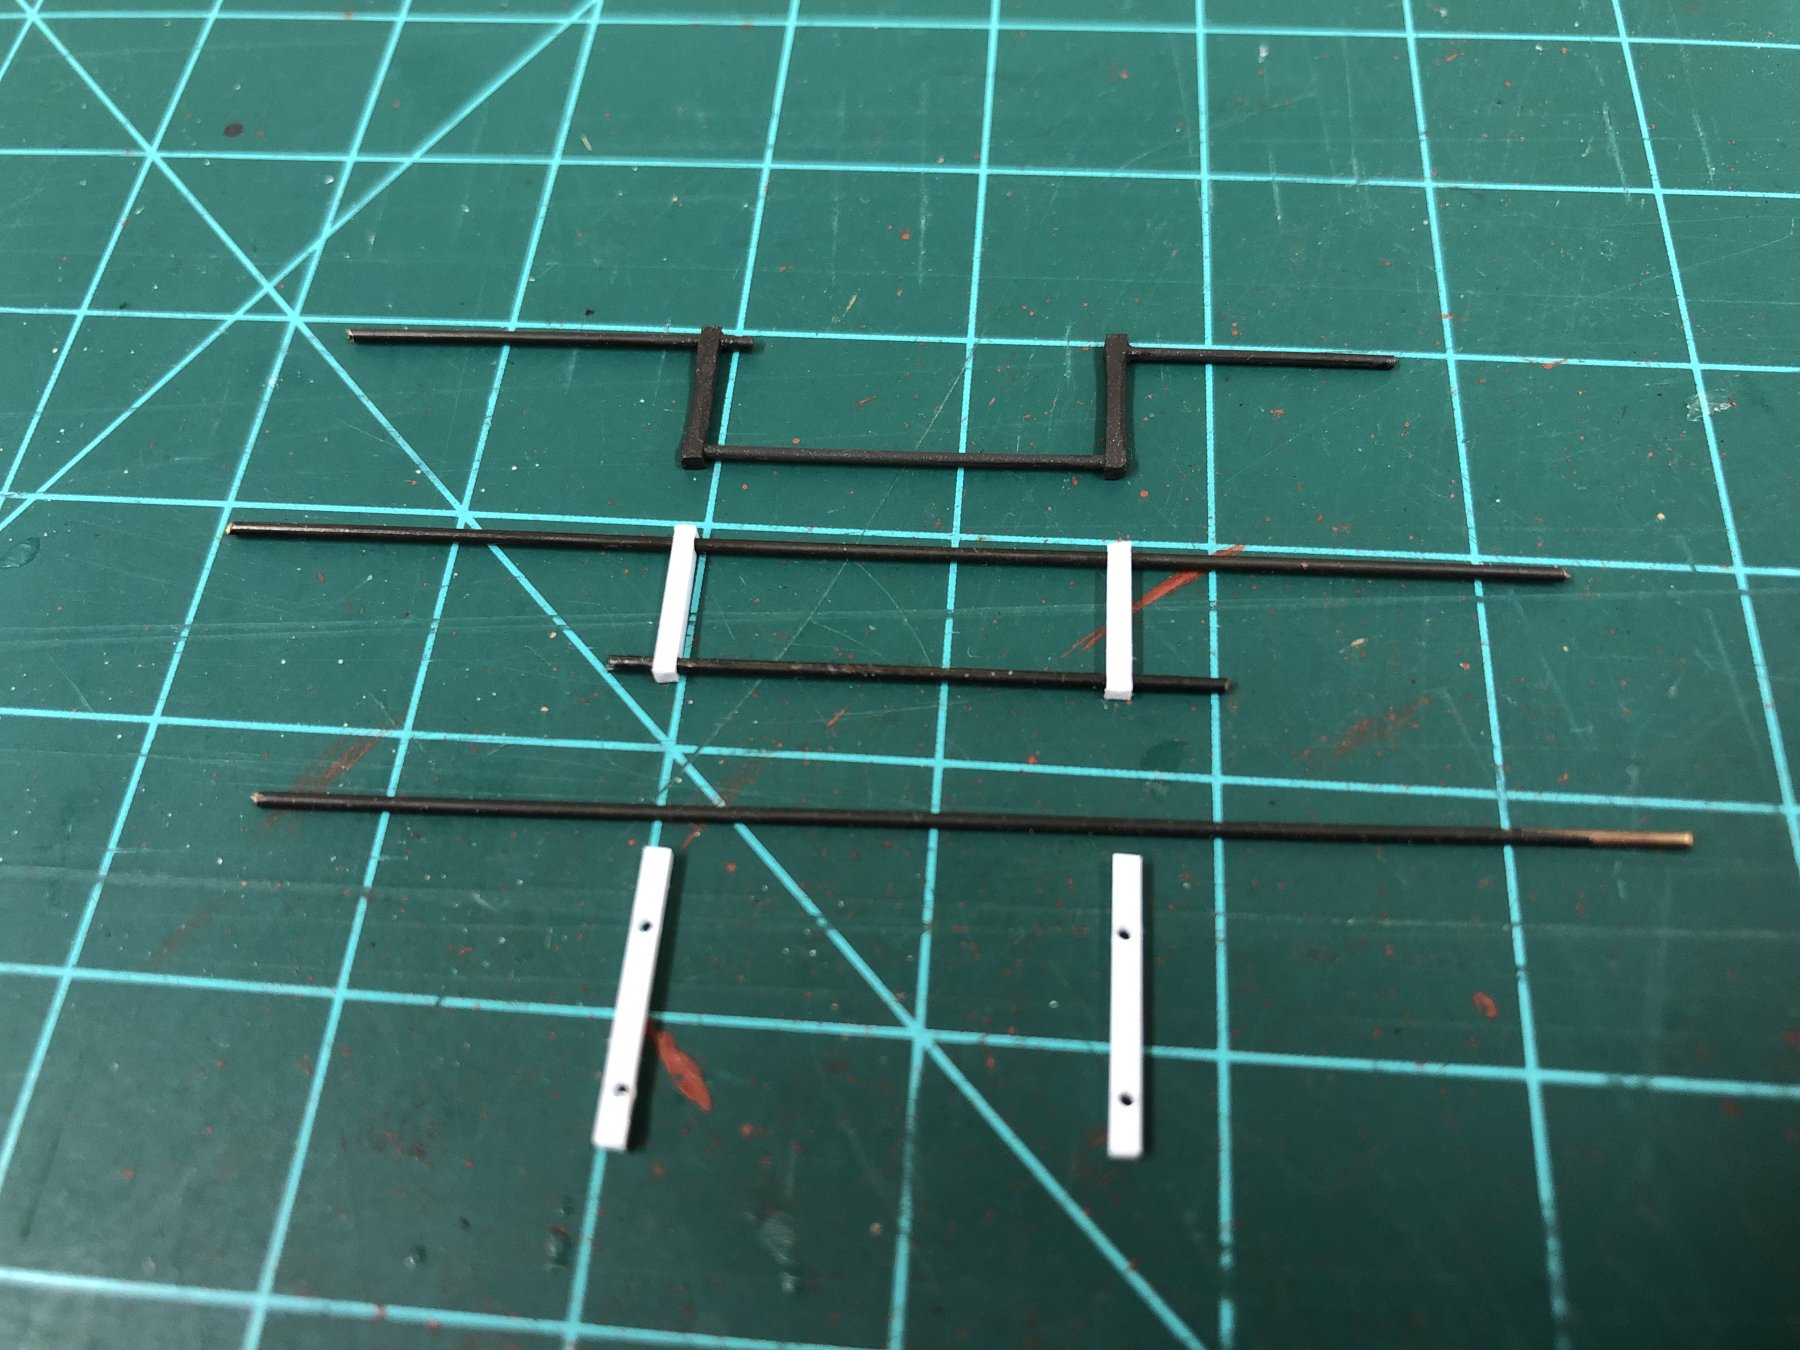
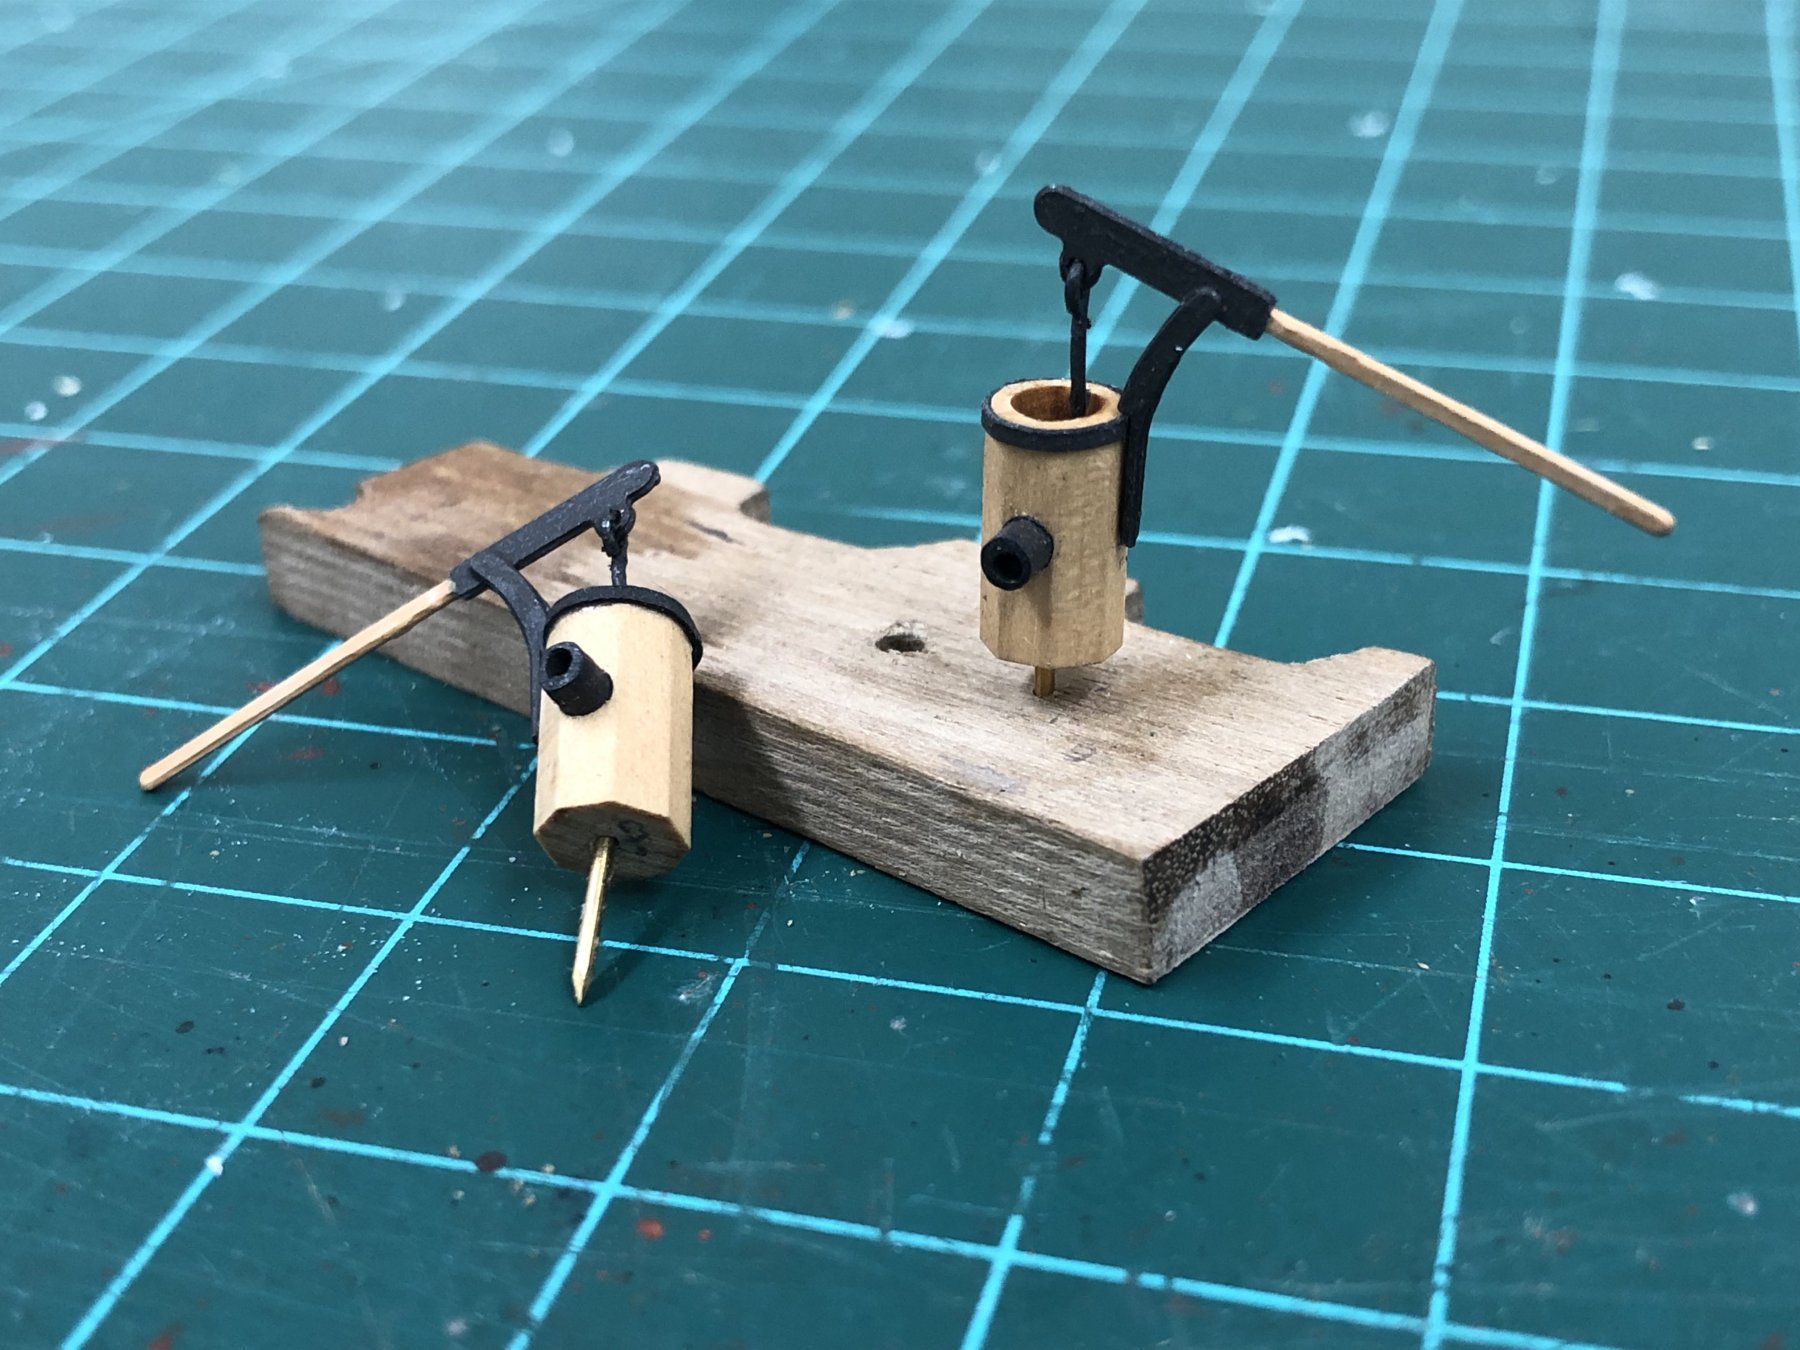
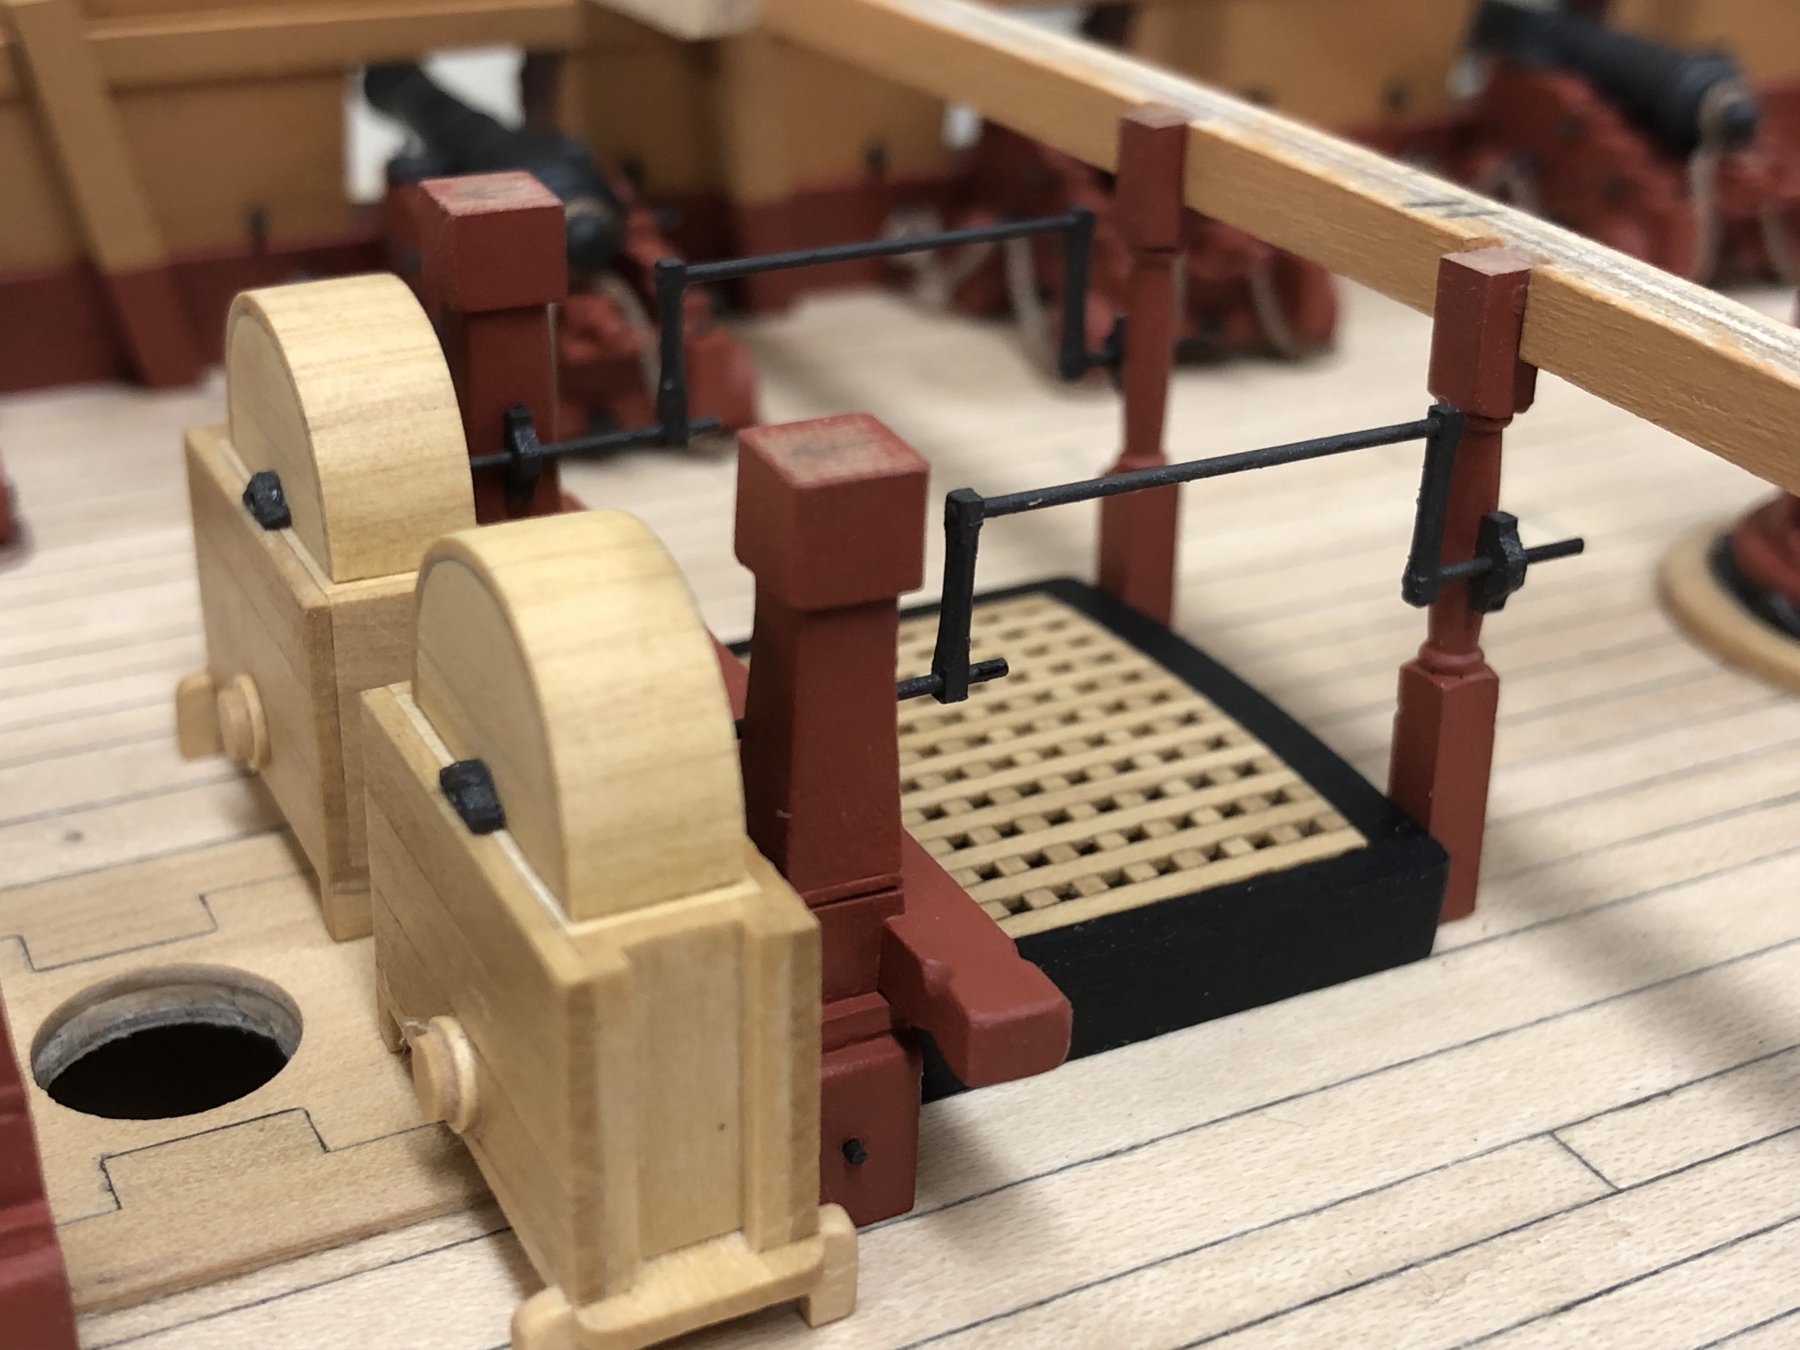
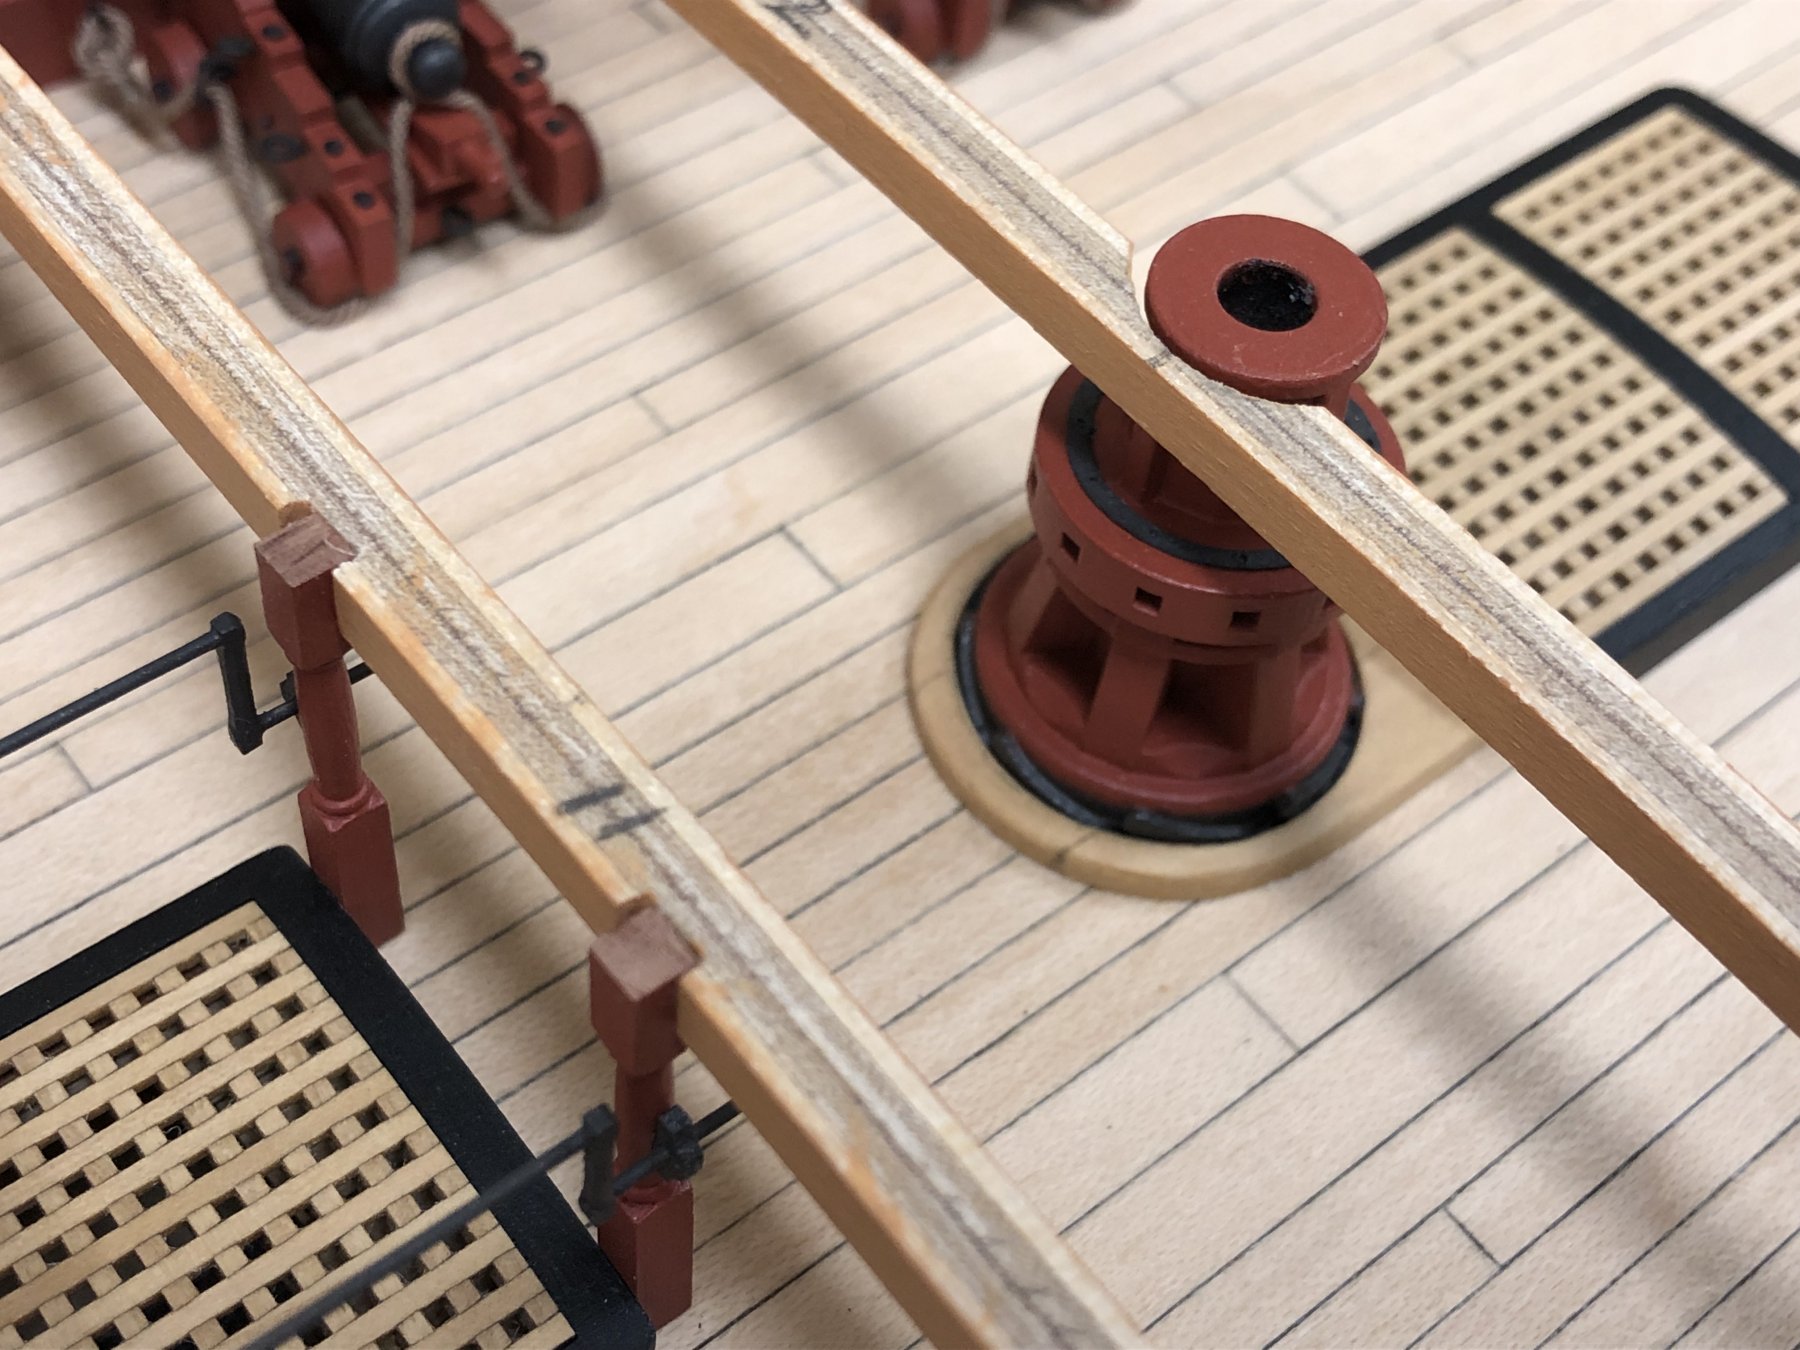
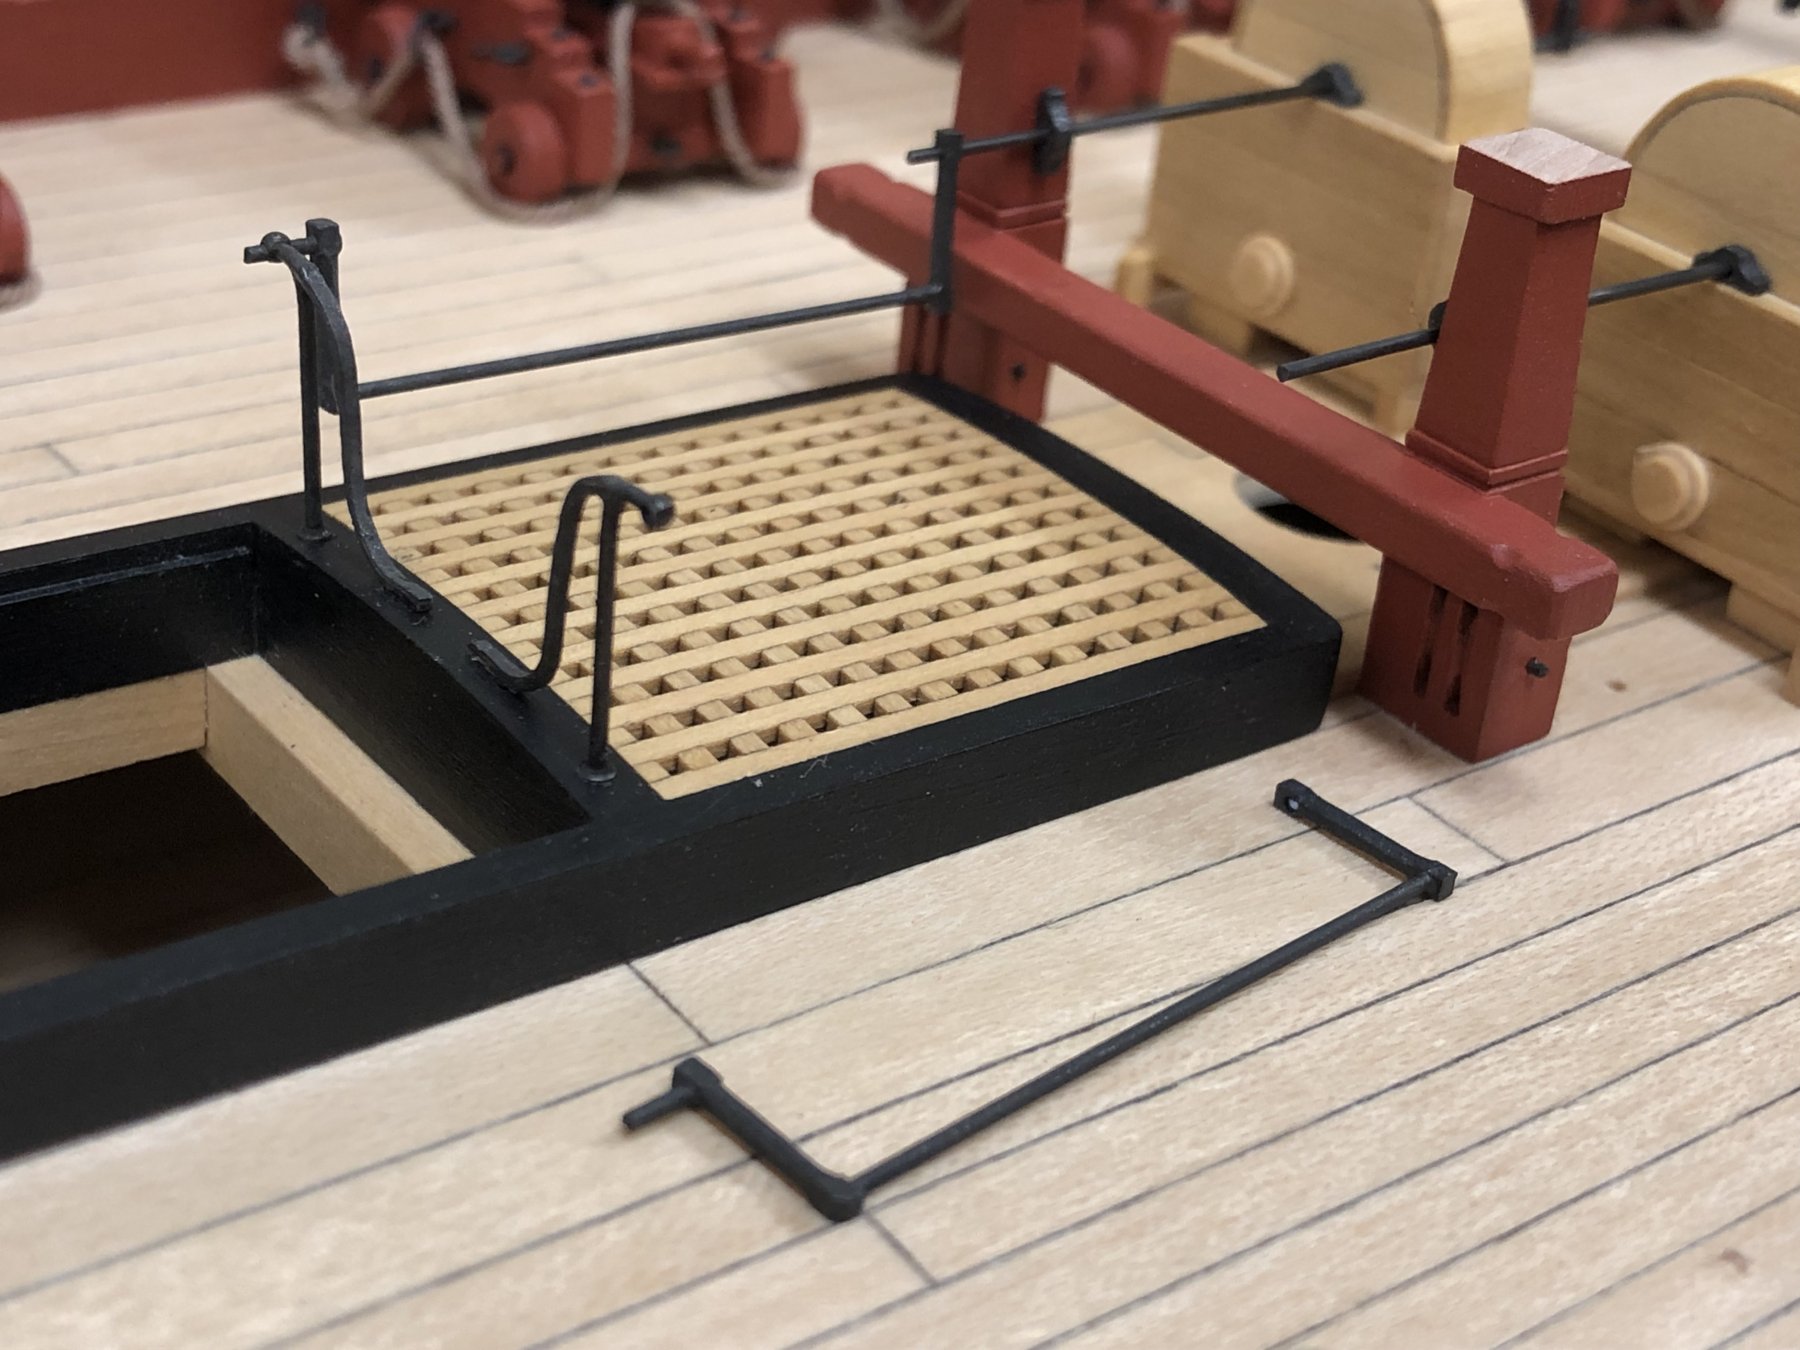
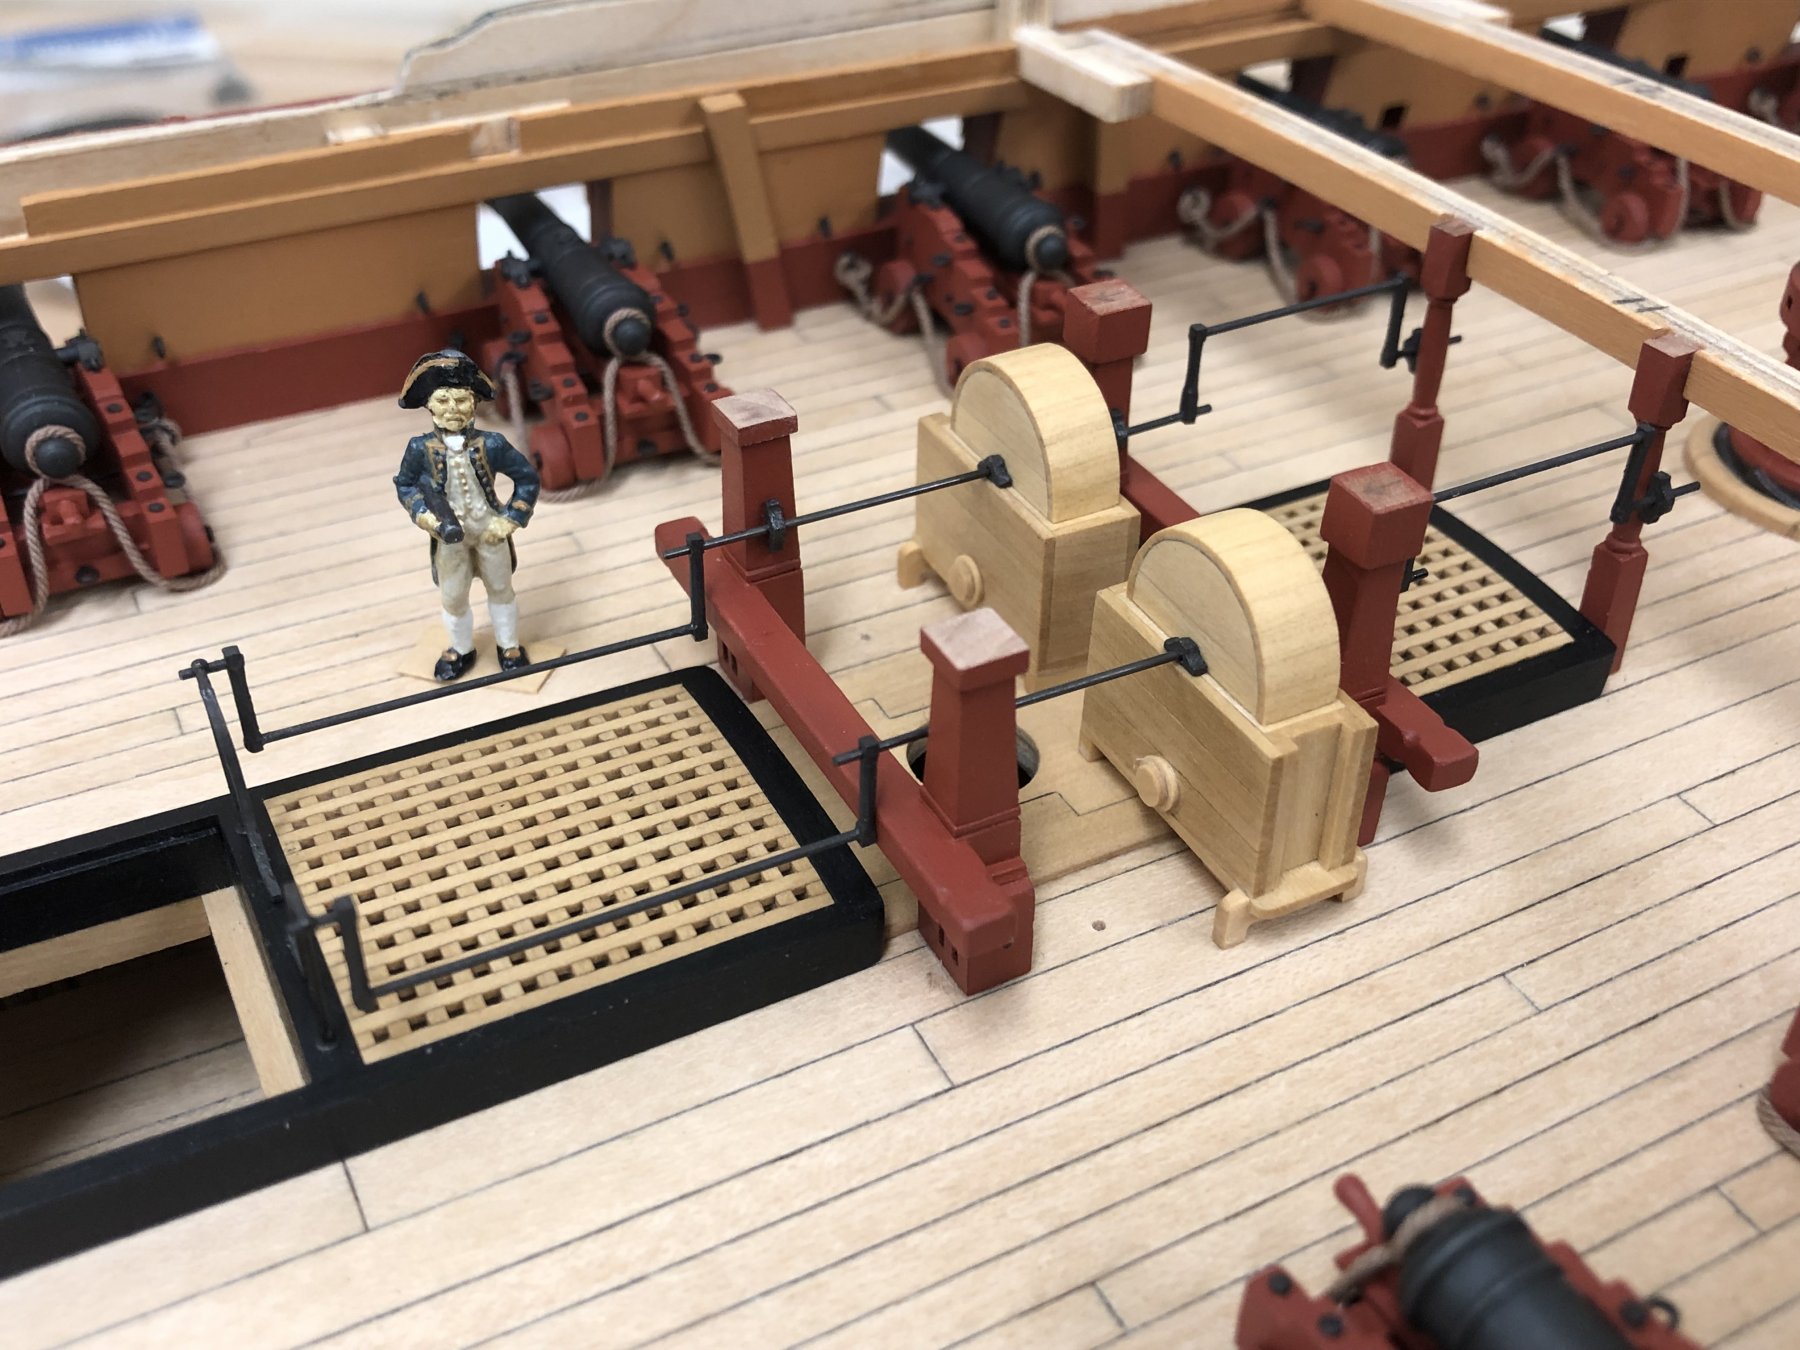
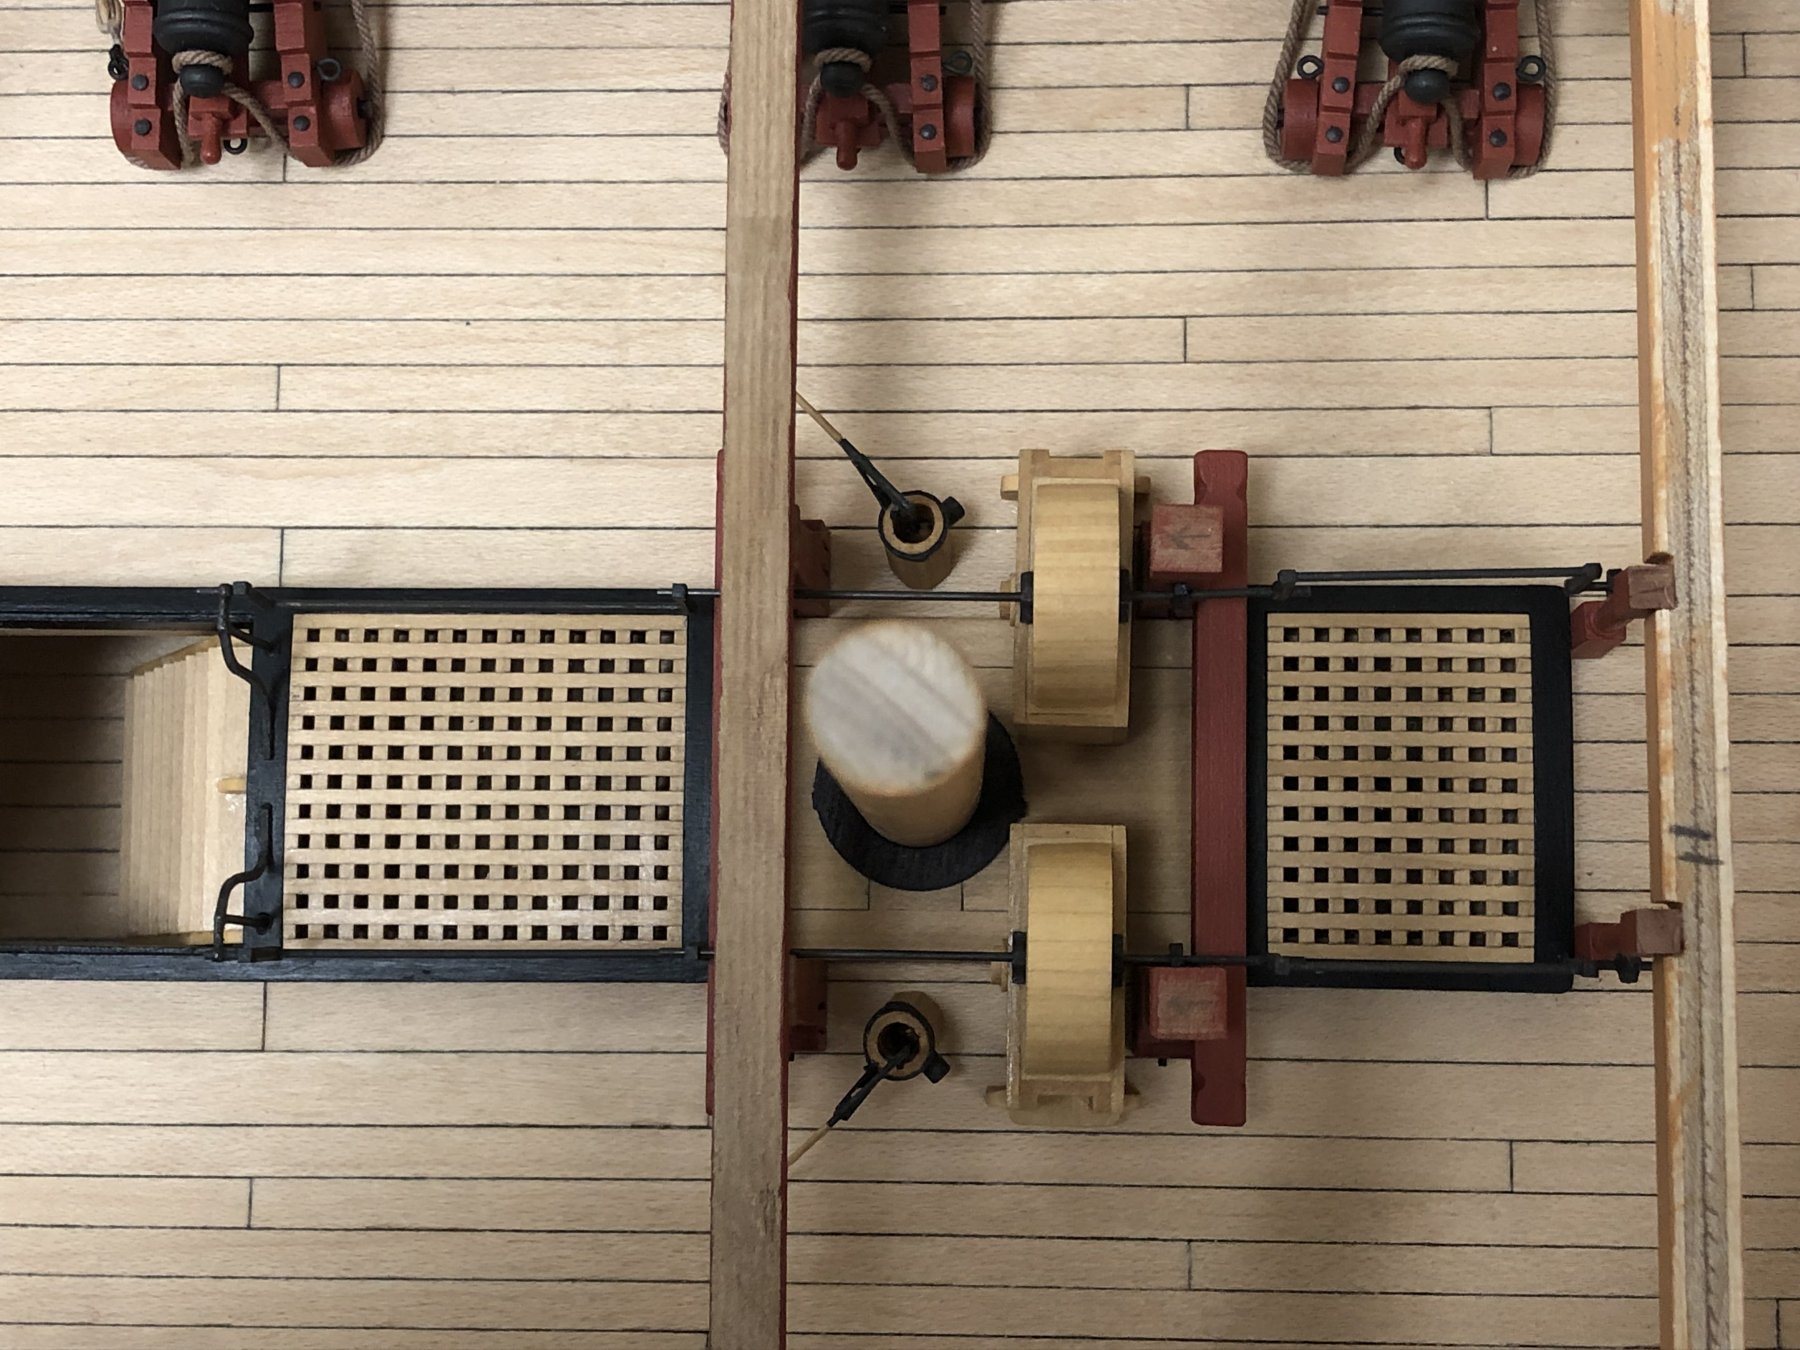
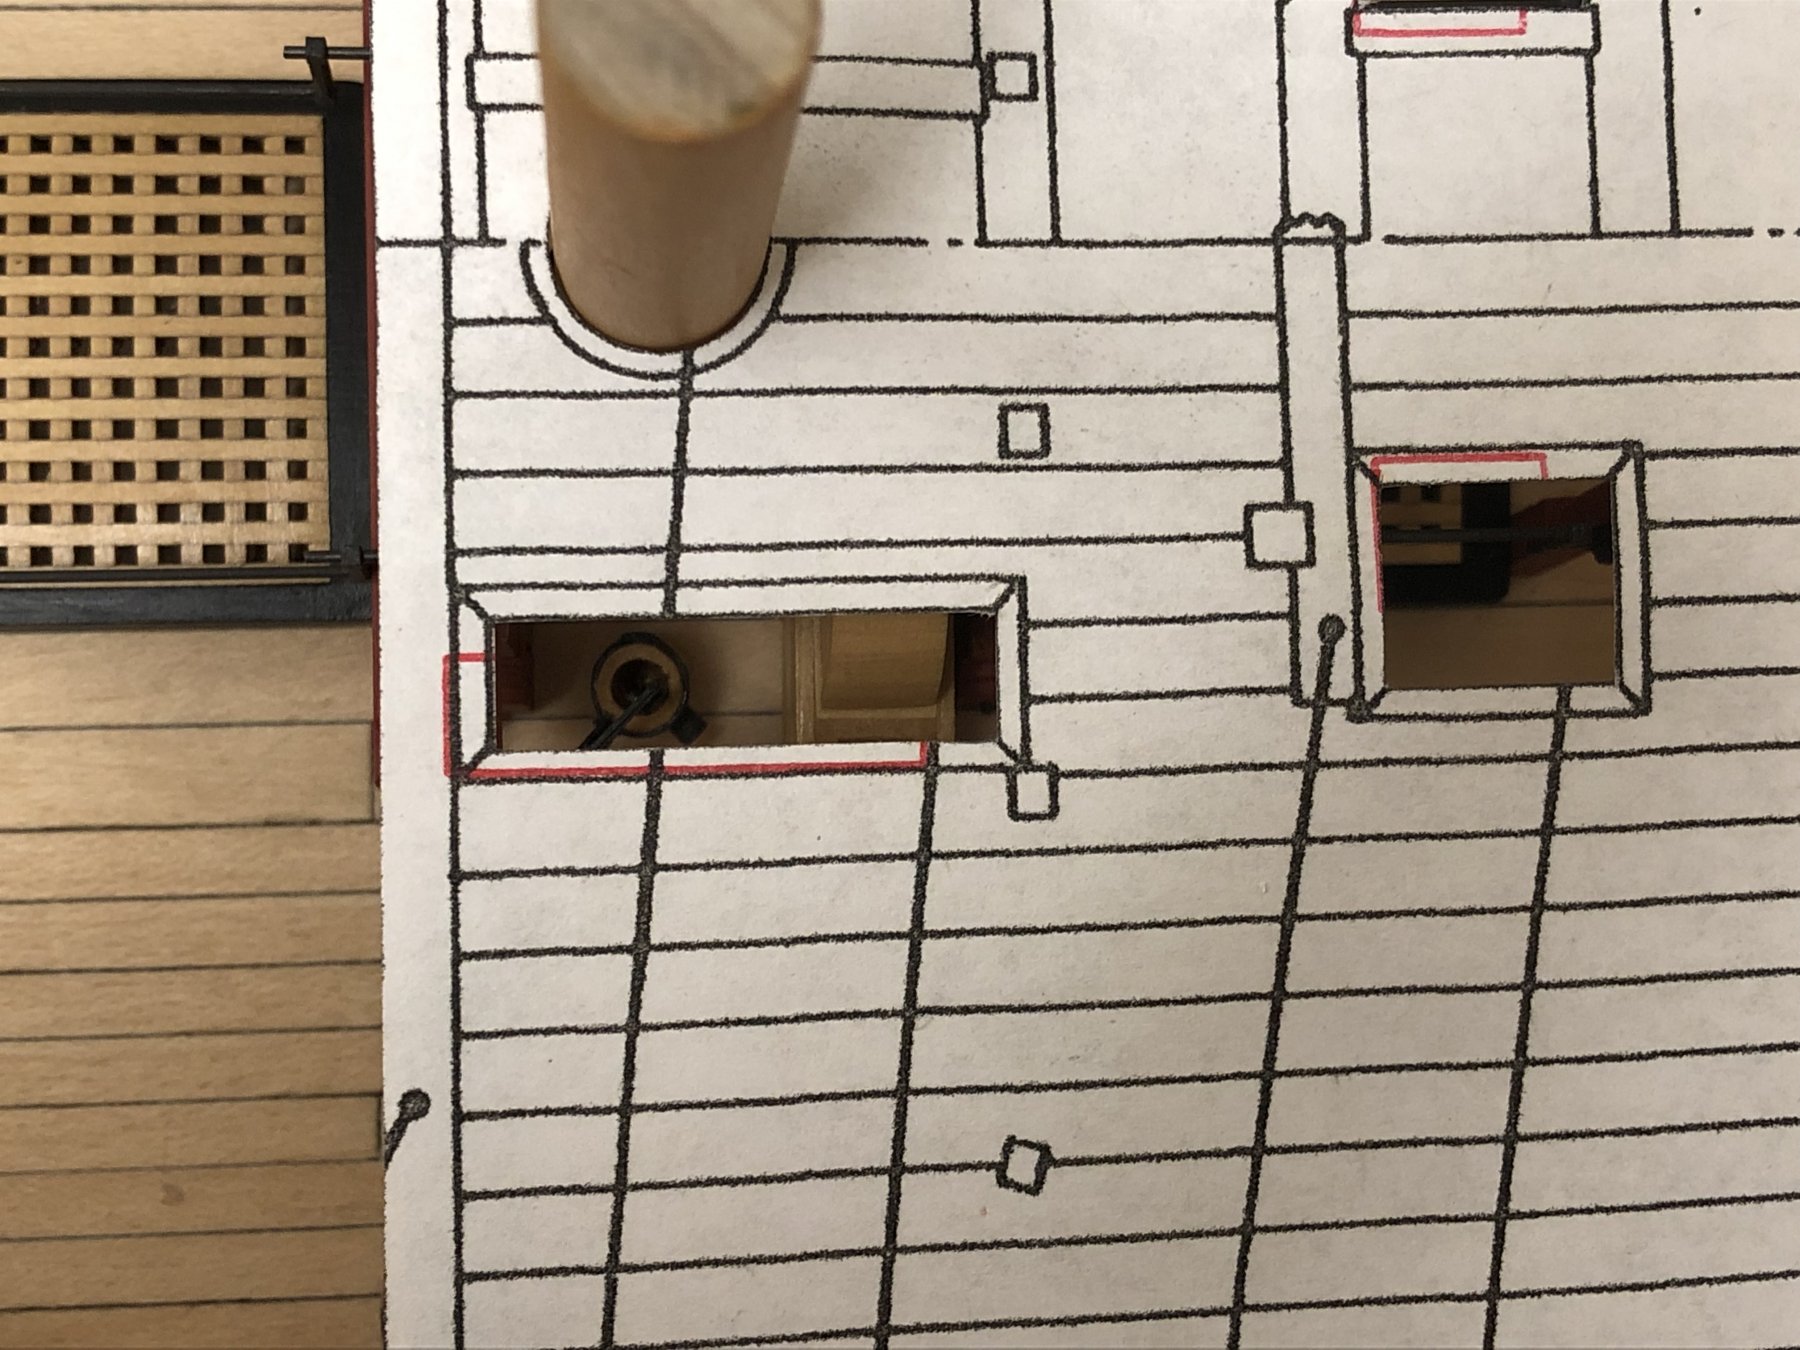
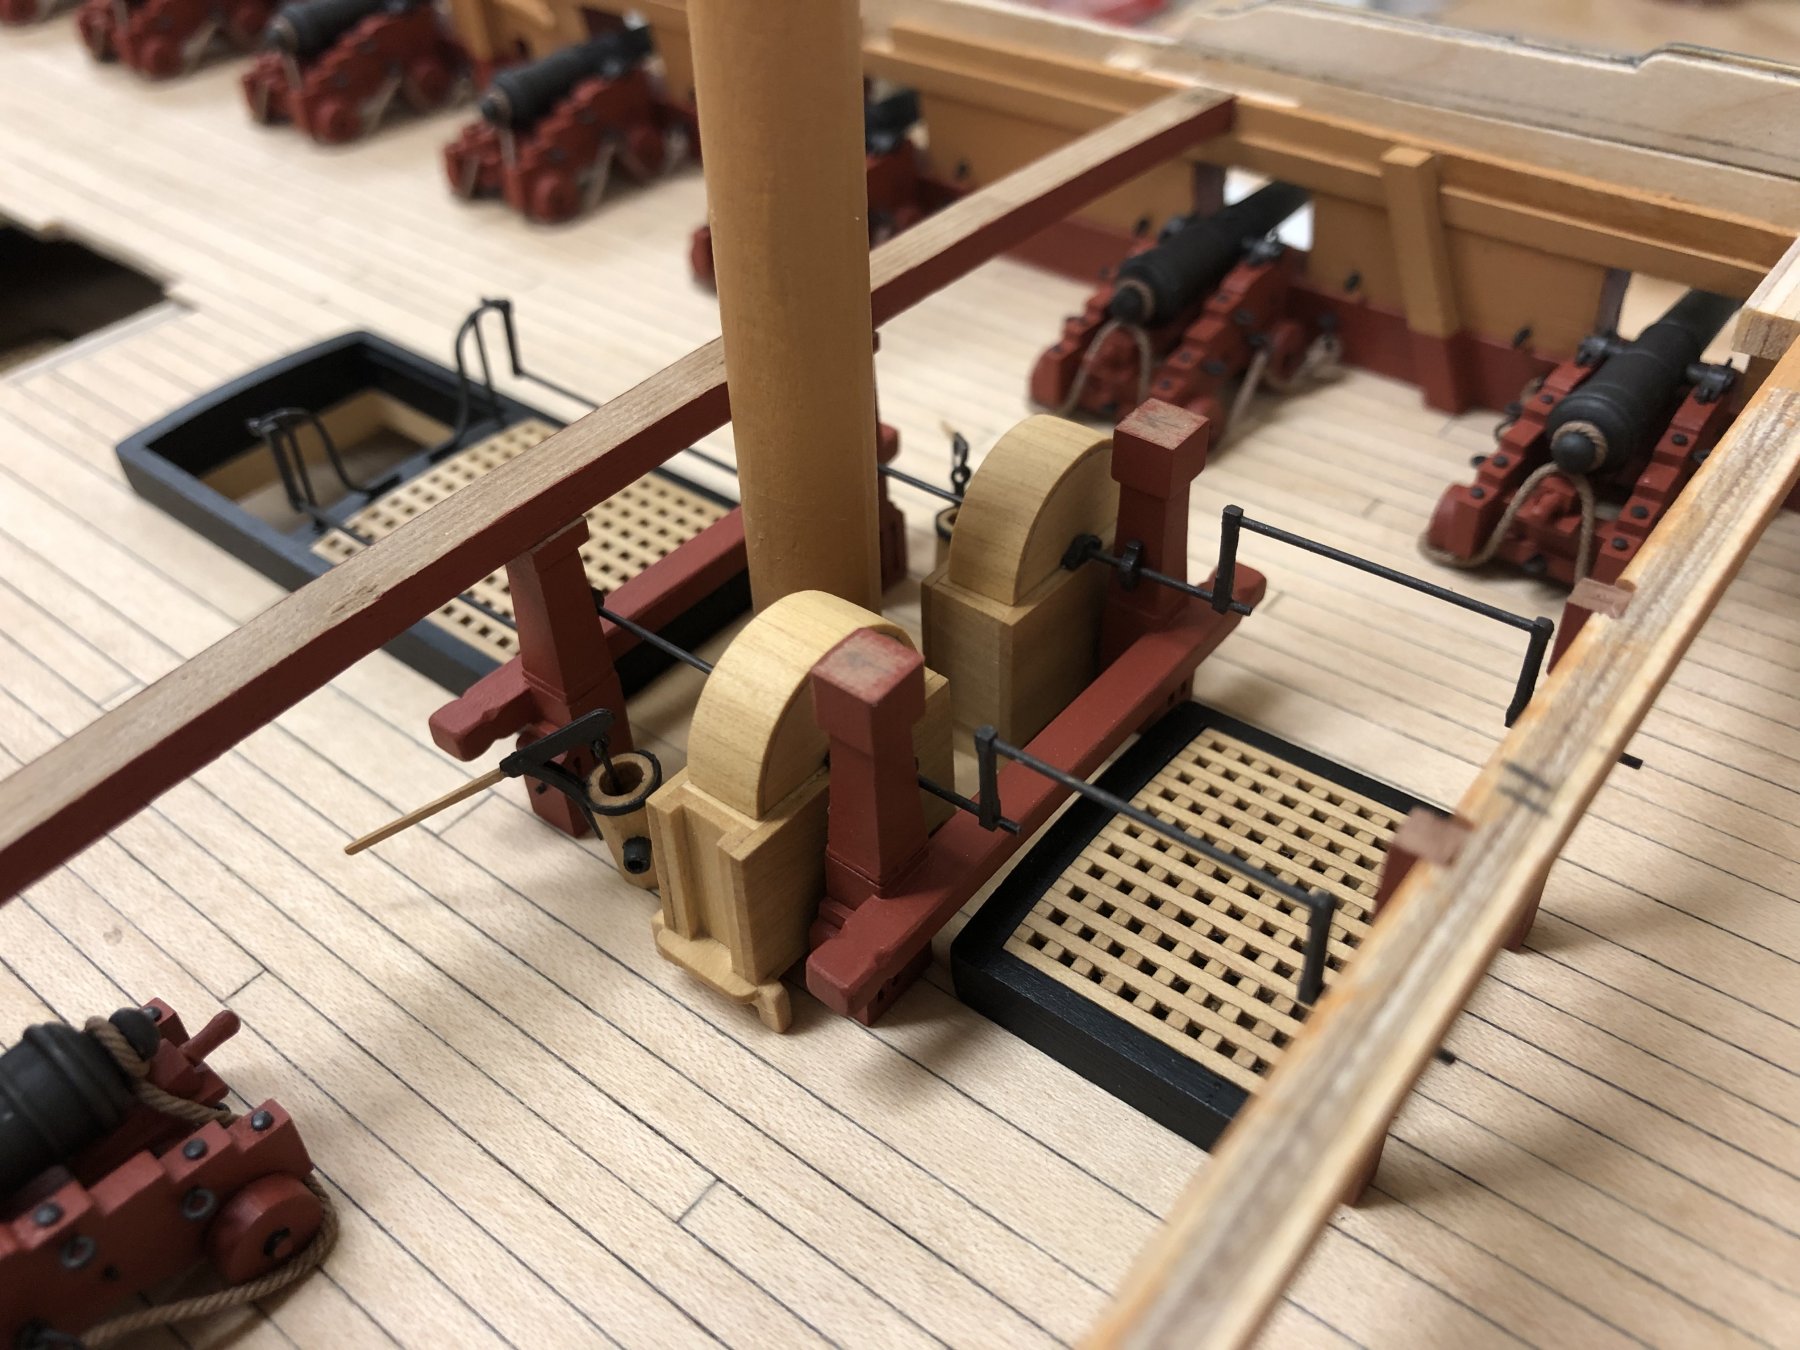
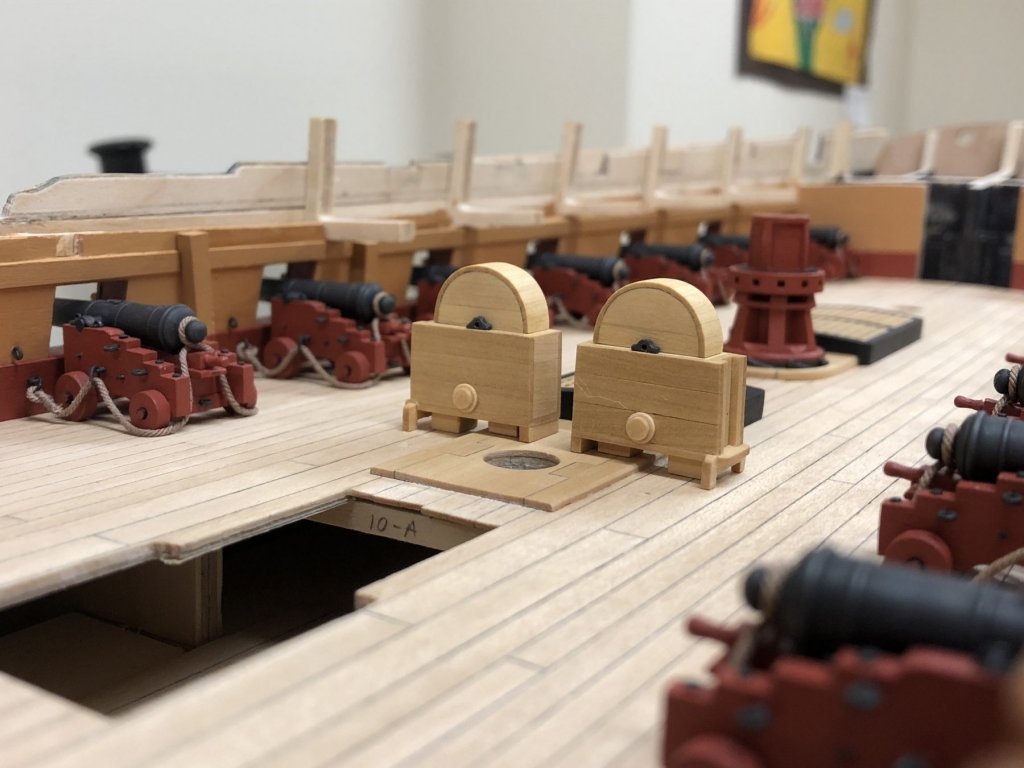
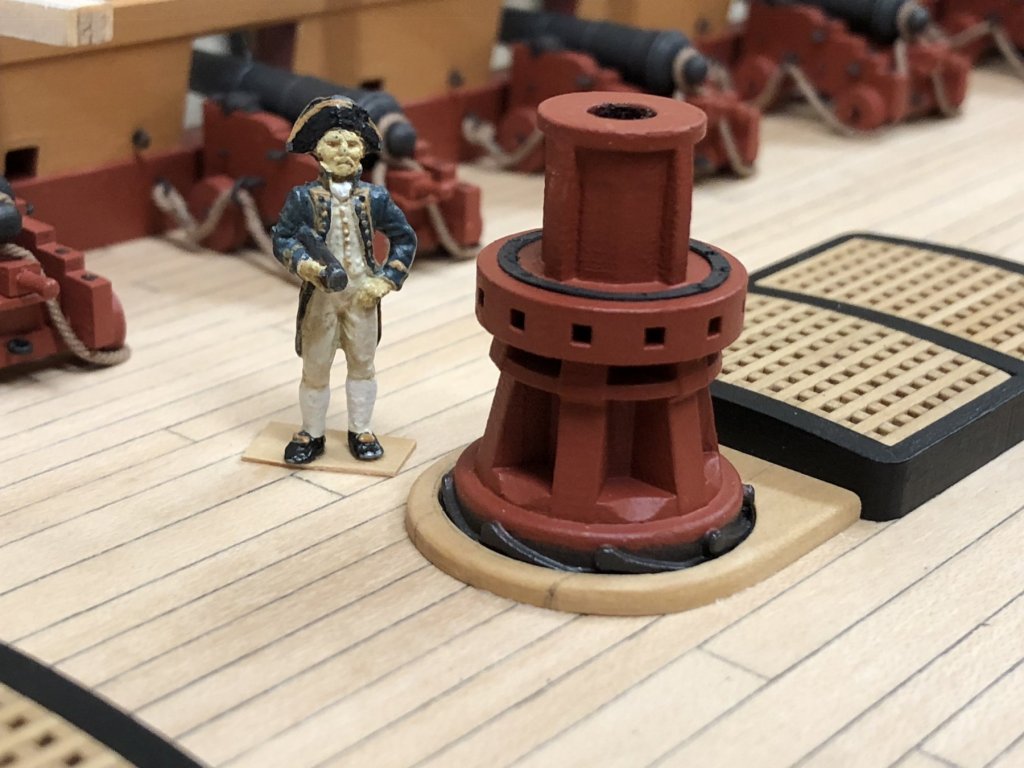
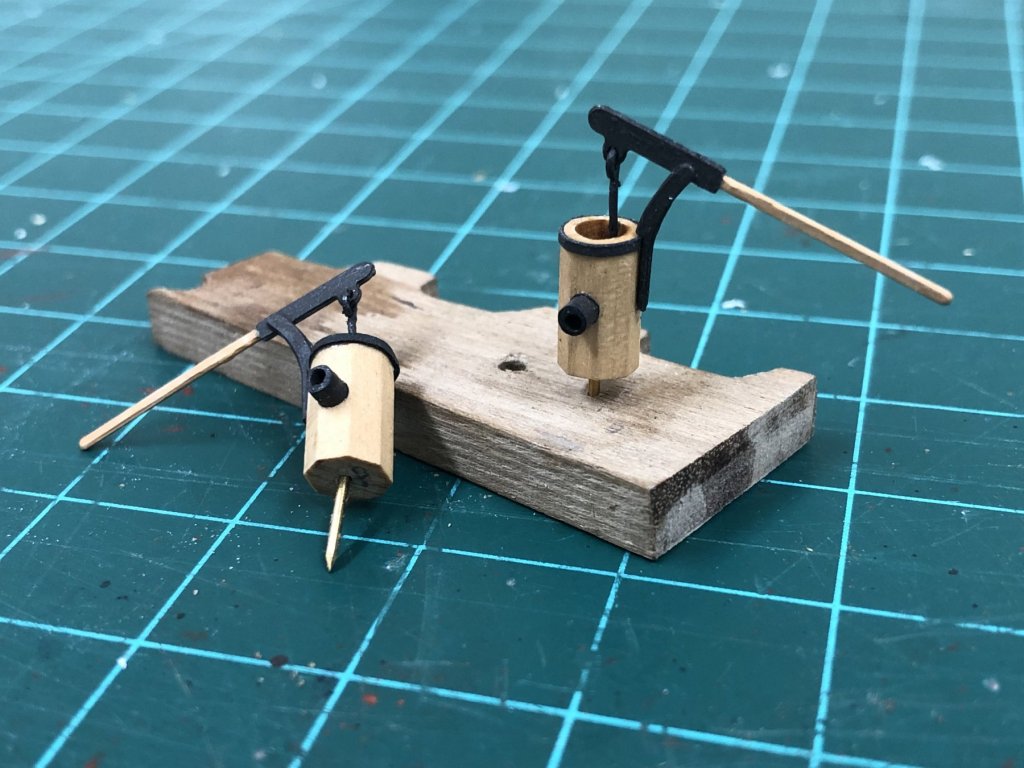
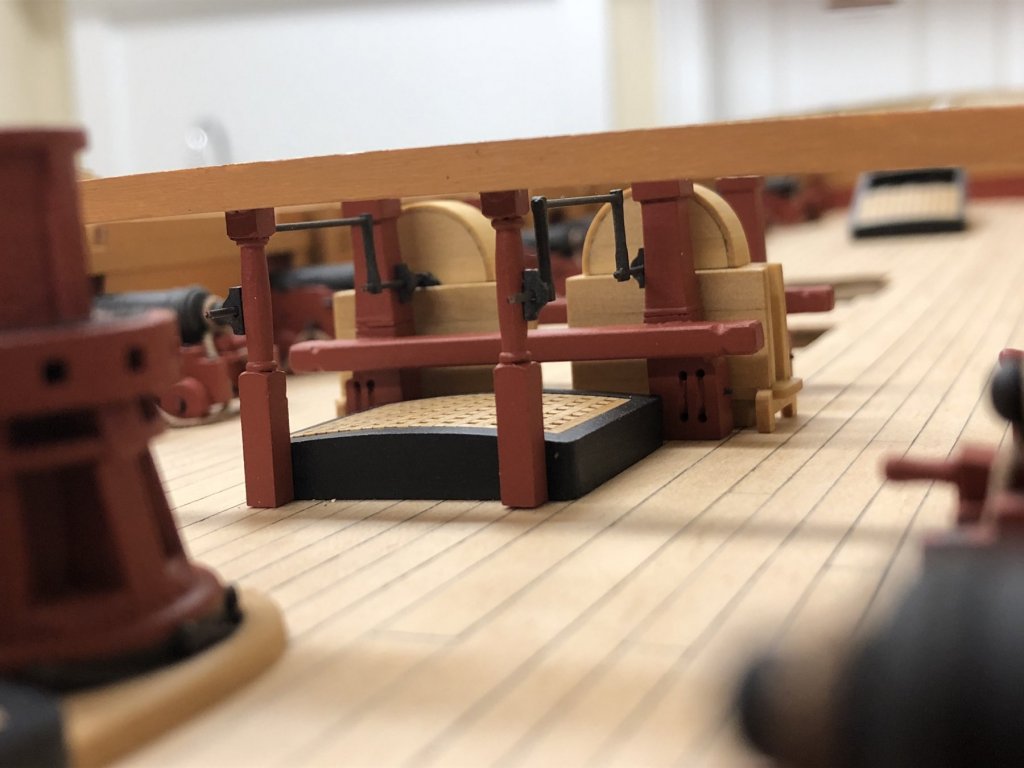
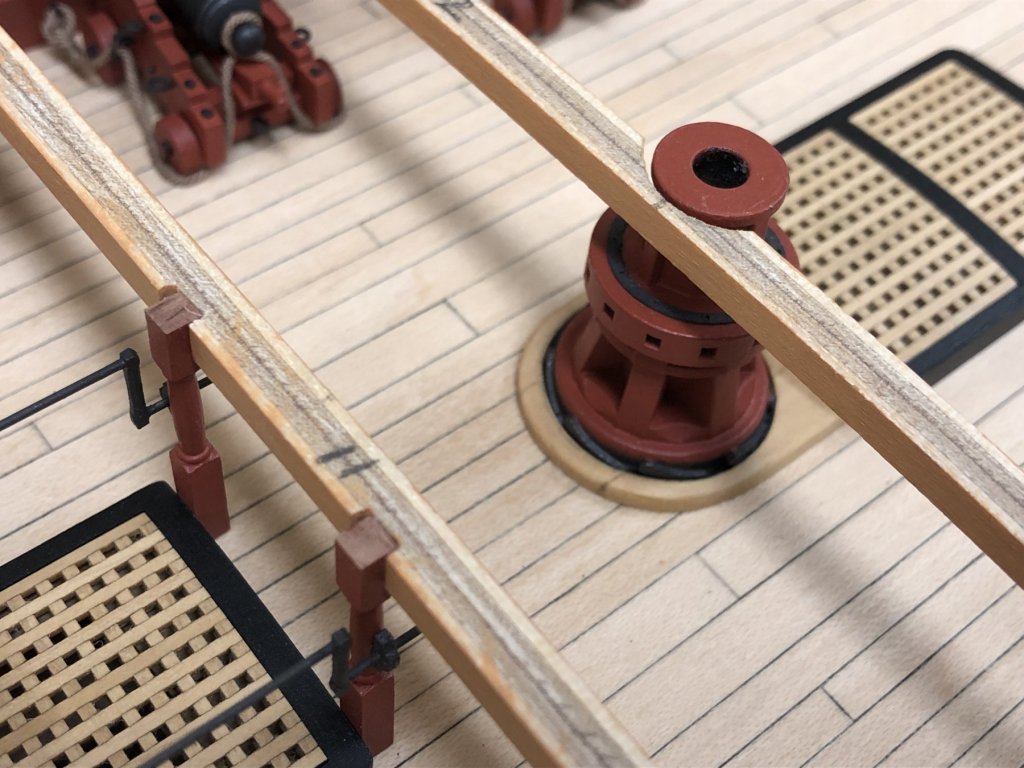
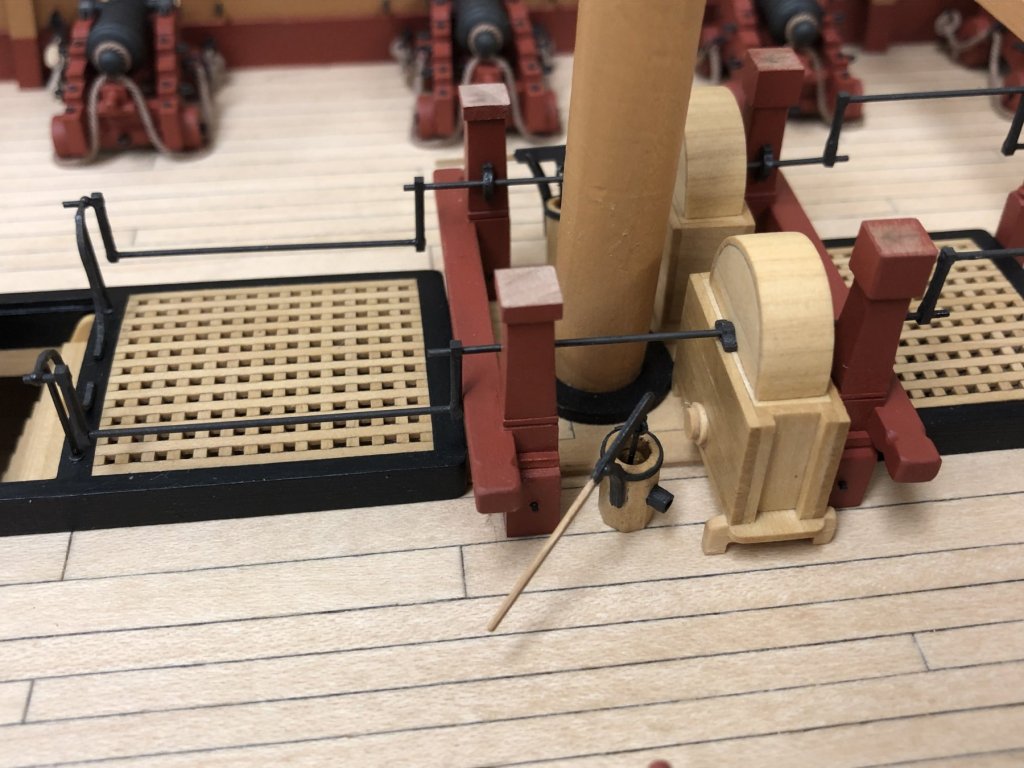
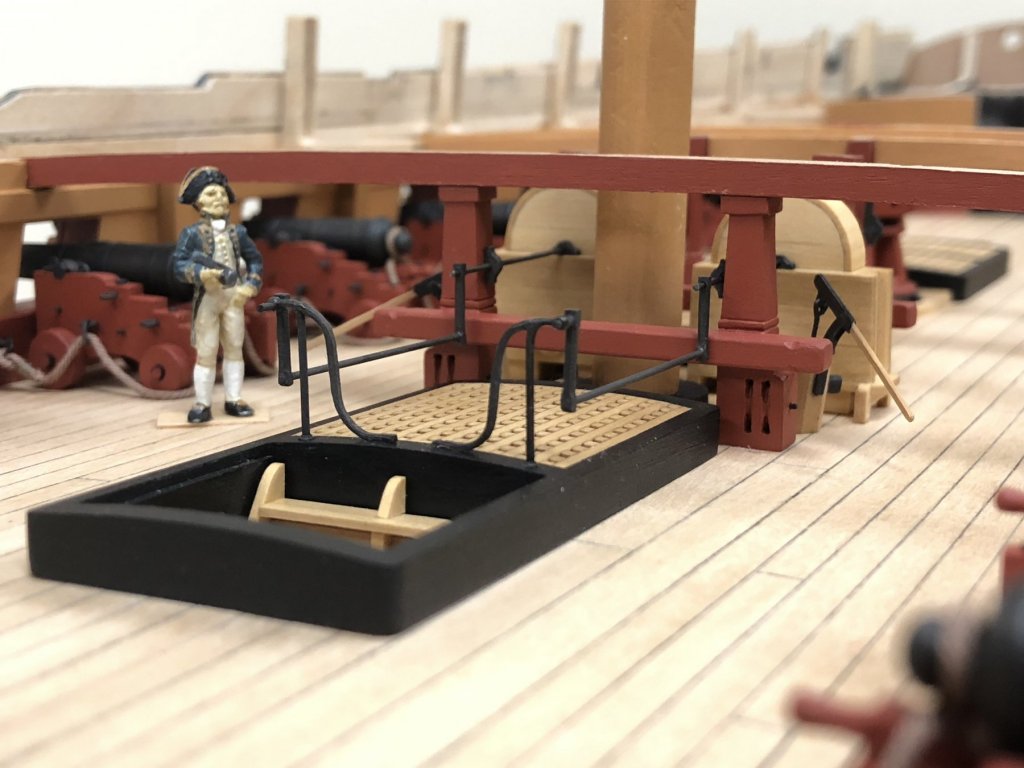
Hi all, Well finally been able to get some things done that tangibly move things forward. The area around the mainmast is one of the more interesting and complex areas to get situated. All of these items were scratchbuilt, which of course resulted in the usual re-does as the geometry is critical to get right as the pump axel and cranks need to align with minimal tolerances. Capstan and aft coamings now glued into position, the deck beam needs to be modified to allow the capstan to be positioned appropriately. Little bit of rework on the pumps, the simulated leather washer I had previously painted kept jumping out at me and was a little too 'in your face'. Stripped this off and went with what seems to be a more traditional modeling approach to use layer of wood to simulate the gasket and plug. Here they are in final position. The main jeer bitts were then positioned first once the pumps were in place to finalise the dimensions of the middle pump brakes. The kit supplies some PE for these, but knew that these would never be satisfactory and have been planning to make my own. The supplied wire is around 0.8mm, so 1mm square styrene sections were drilled and cut to give a little more of an authentic look to the winches. To say this process is delicate and frustrating is an understatement - once drilled, the there is barely any structural strength to the styrene around the hole. The aft winches were made in one piece which allowed them to be aligned relatively easily and secured using thin CA which worked quite well. Once glued, the styrene was then gently filed to give a hint of the actual shape. Rhodings were made out of boxwood and painted, to my eye this gave a little better scale look. The stanchions had been made previously, and notches cut into the deck beam to allow these to be secured. The stanchions were finalized and installed...making the second curved bracing element to be the same as the first took a lot longer than expected. The layout of the main topsail sheet bitts dictates that the winches need to made separately reflecting actual practice. These longer winches proved much more challenging than the shorter ones, and many were attempted before 2 acceptable ones were completed. Elm tree pumps were shaped from boxwood stock, and the PE fittings came from an extra set I found left over from my Snake build. These were fun items to make up, but will not be finally fixed just yet as they are very delicate. Overall shots with everything in place shows just how crowed this area really is. Overall, very happy with how this ultimately turned out. The main topsheet bitts align underneath the deck beam at the forward end of the quarterdeck. Overlaying scaled copy from AOTS, one can get a good sense for the reason for the scuttles in the quarterdeck which would have been necessary to be able to remove the various pump shafts. I'm considering modding the quarterdeck to allow these scuttles to be left open to allow the pump mechanisms to be better seen.


-
Hi Ben, I also went with red in the hawse holes, mainly because it seemed consistent and brings a nice contrast which can be seen on many contemporary models. In reality, the holes would probably have been lined with lead sheet. Nice work on the headworks by the way!
-
Great to see you making progress again, very nice rigging and attention to detail. Love the anchor buoy, you really captured the feel of the real thing.
-
HMCSS Victoria 1855 by BANYAN - 1:72
Beef Wellington replied to BANYAN's topic in - Build logs for subjects built 1851 - 1900
Fantastic metalwork Pat, pleasure to catch up on all the great progress, the small details are the 'fun' things but make the model IMHO. Would love to have your abilities here!- 1,013 replies
-
- 5
-
-
- gun dispatch vessel
- victoria
- (and 2 more)