Beef Wellington
-
Posts
2,249 -
Joined
-
Last visited
Content Type
Profiles
Forums
Gallery
Events
Everything posted by Beef Wellington
-
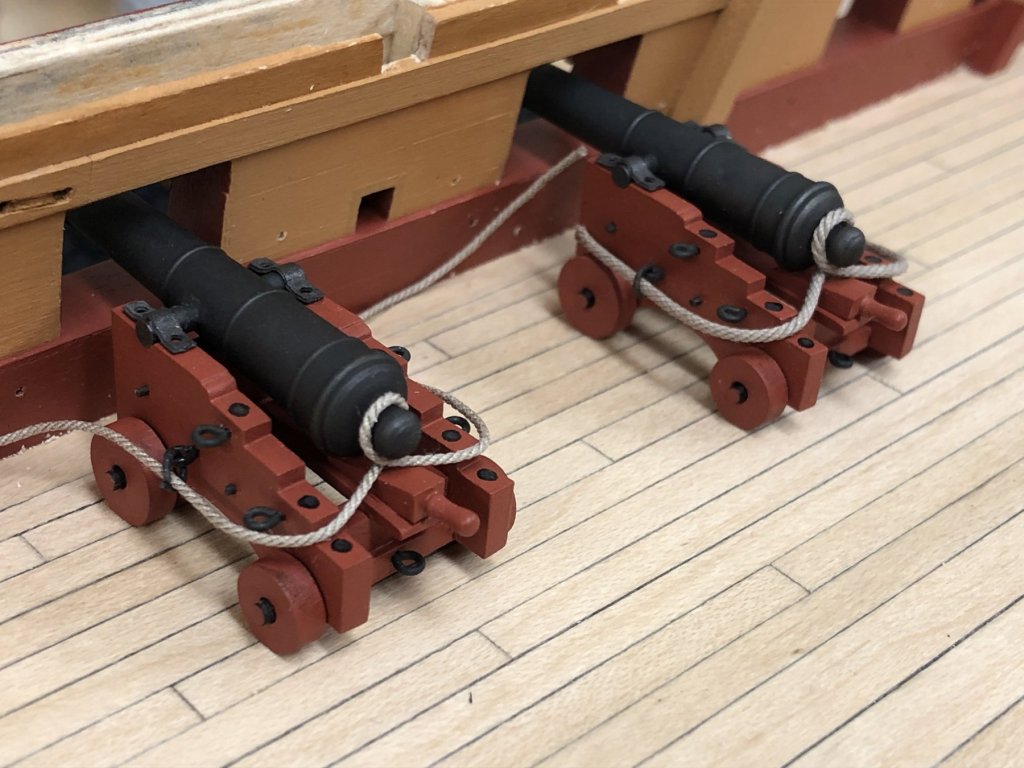
 Carl - sadly Victory doesn't have any 18lb'ers... Found the exact info I needed after a lot of digging in the 'armament' section: This translates as follows: 24lb 6 1/2" circumference - 0.82mm diameter at 1:64 18lb 5 1/2" circumference - 0.69mm diameter at 1:64 9lb 4 1/2 circumference - 0.57mm at 1:64 So not surprisingly, the smaller size is slightly too small (91% of actual), and the larger too large (127% of actual). Mathematics would point the smaller size being least inaccurate, so as always it seems it comes down to the 'eye of the beholder'. Interestingly, I had initially leaned toward the larger size as well, but changed my view. Cannons on Trincomalee are 18lb'ers, but the breech rope do look bulkier, however no info to suggest that these are indeed the 'period correct' size either. And so the modelers dilemma, follow sources, try to replicate (possibly inaccurate) real life examples, and/or follow your eye! (The cheesed hauling tackles jump out at me as a little incongruous being probably not contemporary practice (rather than more practical frapping) but this is a look modelers follow because it does look good!) The jury is still out...of course, this isn't a matter of life and death, its way more important than that 🙂
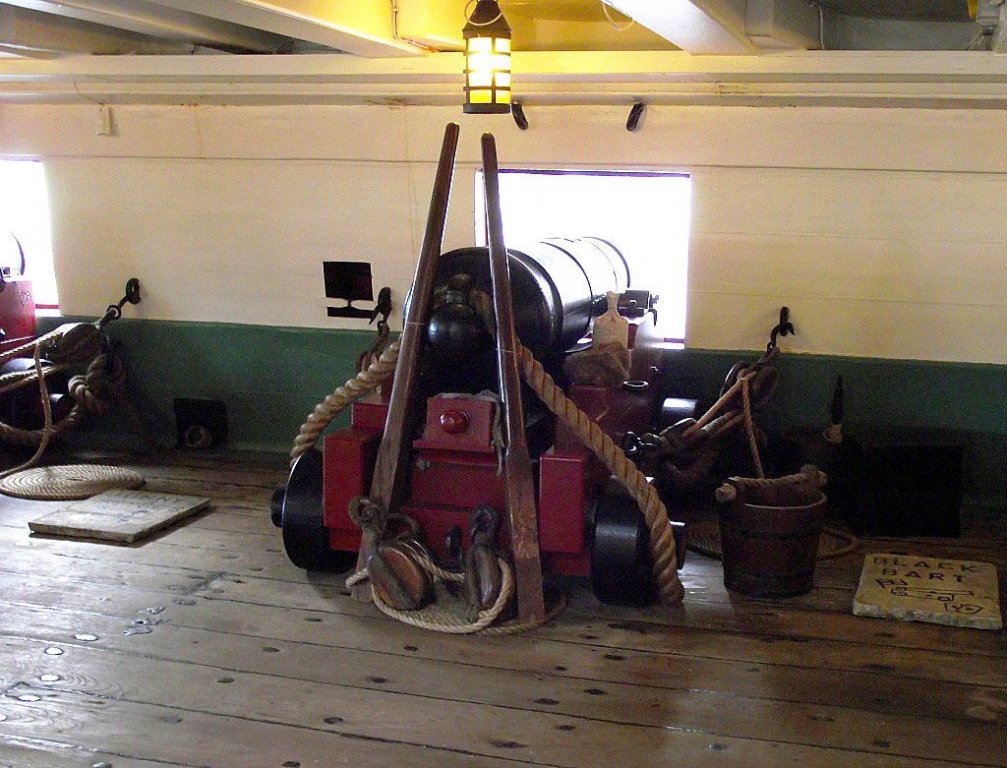
-
Beautiful model, I take my hat off to you Channell on your patience (and all others.) who also) enhance with PE. The results are really amazing and I think always makes the incredibly hard and tedious look simple when just looking at the results. The wood deck is a really nice addition with all the individually coloured planks. I too would like to see more of the Hood!
-
She's looking REALLY good Kevin, glad you are back working on her.
- 1,319 replies
-
- 6
-

-
- caldercraft
- Victory
- (and 1 more)
-
Bob - that's a really well executed repair. Looking forward to seeing your painted panels, think less than perfect painting looks better than the artificial perfections of decals. Everything is really coming together nicely, very nice neat work.
-
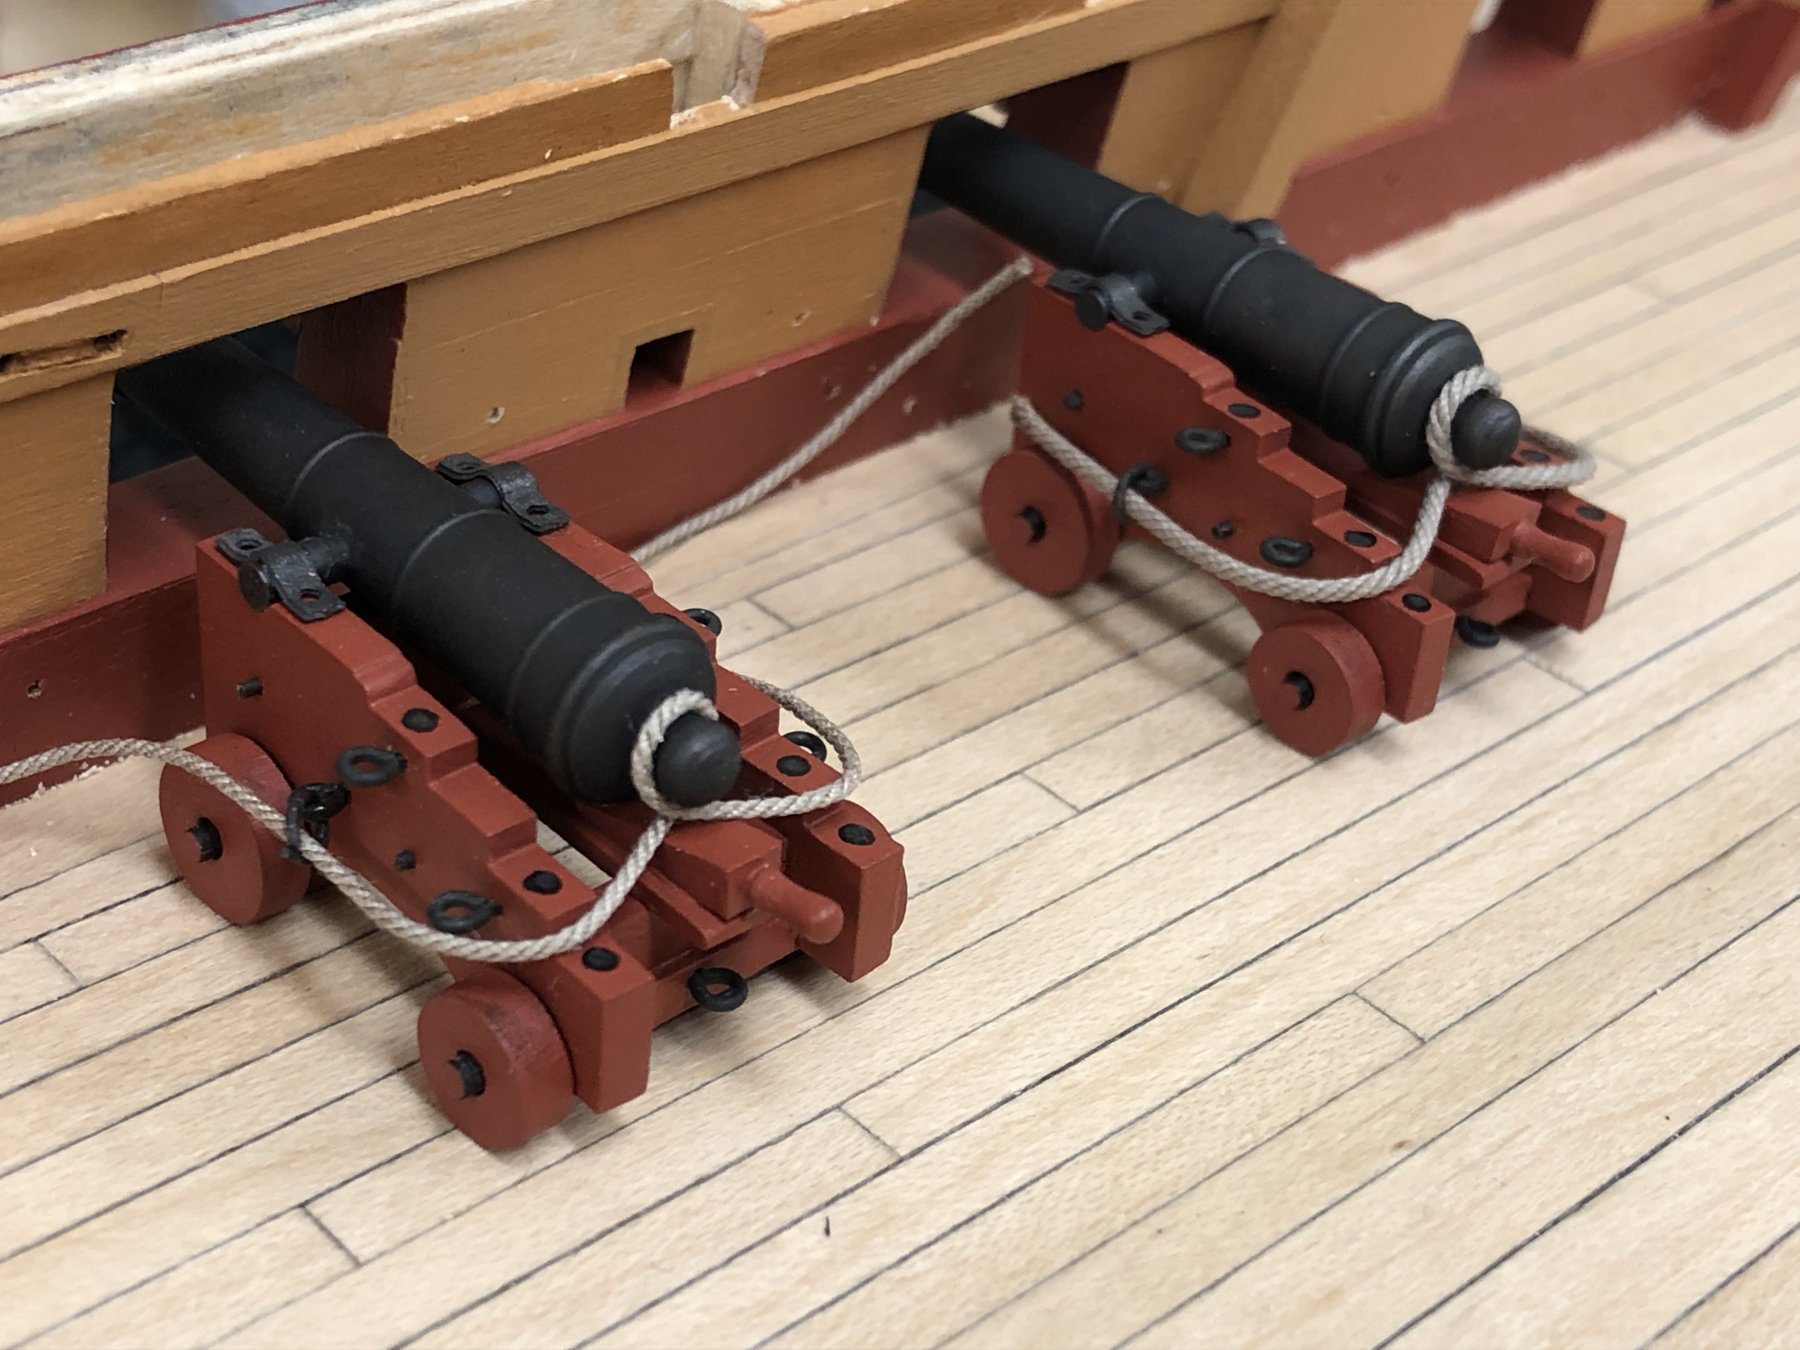
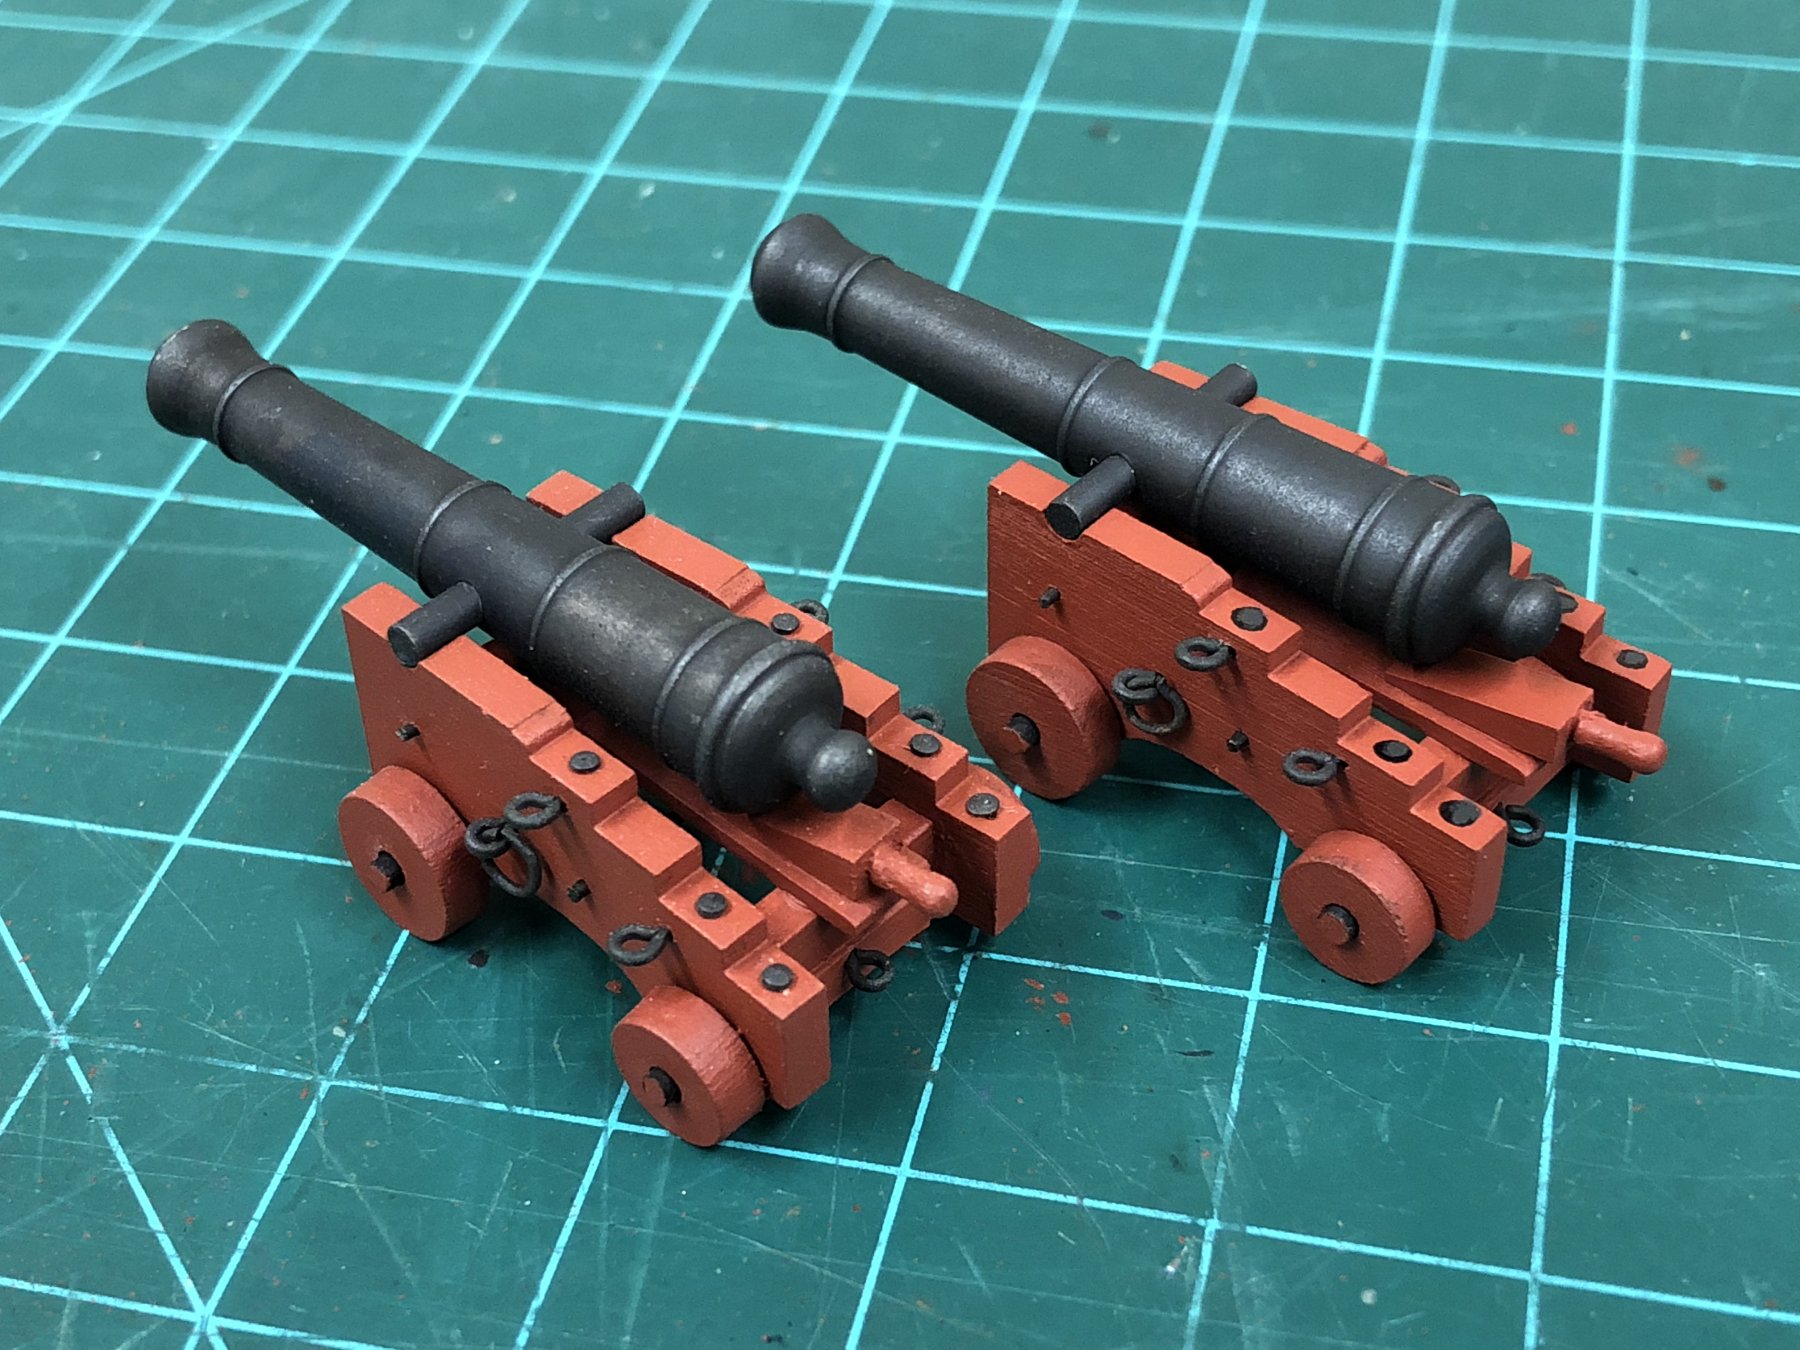
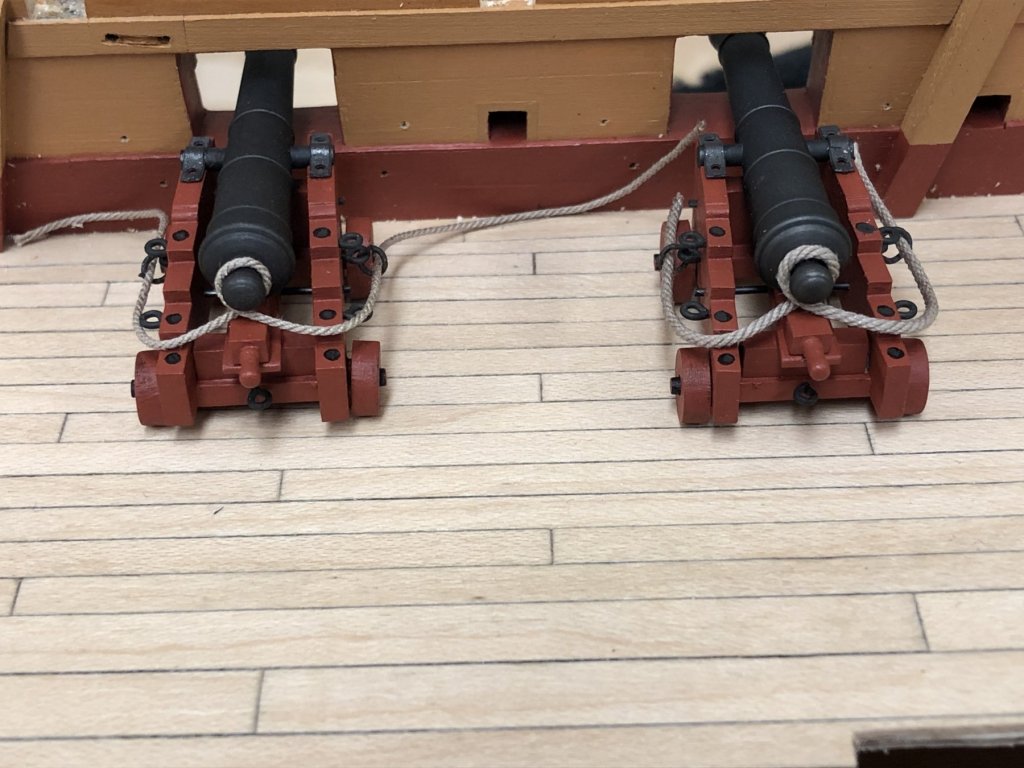
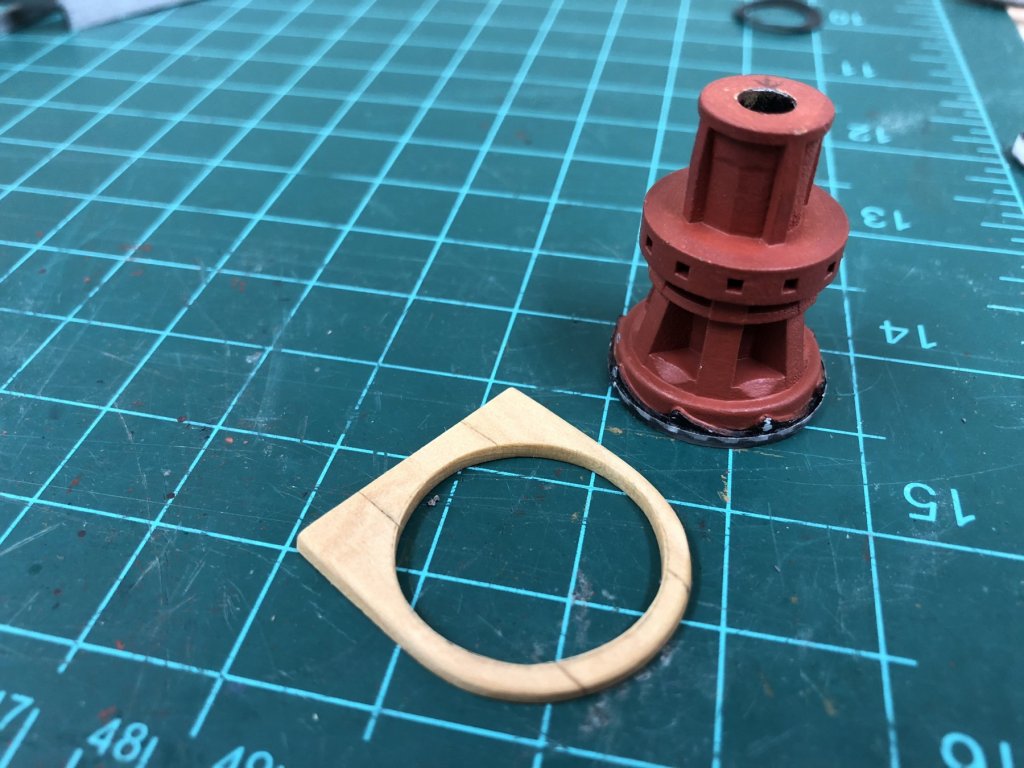
@Pat - I tried using a very fine sanding stick after coat of primer had been sprayed on. This worked in some cases, but less so in others, and not at all in all those hard to reach corners. I've never seen many samples of 3D printing to compare to so I may be being a little unfair, and of course it comes down to the materials supplied. I ordered the "Smoothest Fine Detail' option which was the 'best' finish of those available. Its odd as one side is almost perfect, the other much rougher...https://www.shapeways.com/product/9VPR7D8CW/1-64-lower-capstan-18th-and-19th-century?optionId=64749325. I suspect other materials offered by other suppliers could give better results. Taking stock: Not too much time in the shipyard this weekend, trying to get the garden ready for winter. The shipyard did however get a bit of a spring cleaning as I was getting a little bit tired of working in a 2"x2" square on my cutting mat despite working on a pretty large table. A few overall shots of where things stand as its been a while. Now the channels are glued, the chainplate locations could be drilled as well as the emergency rigging eyebolt positions. The scuppers have also been completed. The positioning of all of these things requires quite a bit of planning and luckily I didn't encounter any problems with the airing ports. (I seem to recall leaving off the foremost one because it is very tightly positioned between preventer links and would have been impossible to locate correctly and likely resulted in a necessary compromise with the chain alignments. Nearly all the parts for the upper gun deck have been completed an I'm still following the mantra of not gluing something into place until it absolutely needs to progress. Syren rope will be used, and I would welcome peoples' opinions on which size to use for the breech rope. Picked two sizes that seemed most appropriate, left is 0.025"/0.63mm, the right is 0.35"/0.88mm. Even though I'm sure it exists, I can't find info on what regulation would be - and even if I did, the carriages and barrels are best efforts at matching scale and undoubtedly not spot on, so the right "look" is probably more important. Upon consideration, I think I'm leaning toward the smaller size, but again would appreciate input...


-
I believe the "Cruizer" kits are similar (if not identical in many regards) to the Snake kit offering of which there are quite a few comprehensive build logs on this site. The only real major differences being the addition of platforms on Snake, use of carronades vs canons and the additional mast. I believe both of the kits are earlier Caldercraft releases, so I think you may find them a little less refined than later offerings (certainly fewer detailed PE parts). Good luck getting started.
- 102 replies
-
- 1
-
-
- cruiser
- caldercraft
- (and 1 more)
-
Pat - the capstan is the 3D printed one I had previously ordered. I had ordered the 'best quality' I could from Shapeways as well as a few other things, but in my opinion the quality of finish won't fly for items that are openly visible. However, I can live with these for items that are mostly obscured (stove and lower capstan). I'll be scratching my own quarterdeck capstan. Paul - thanks for confirming.
-
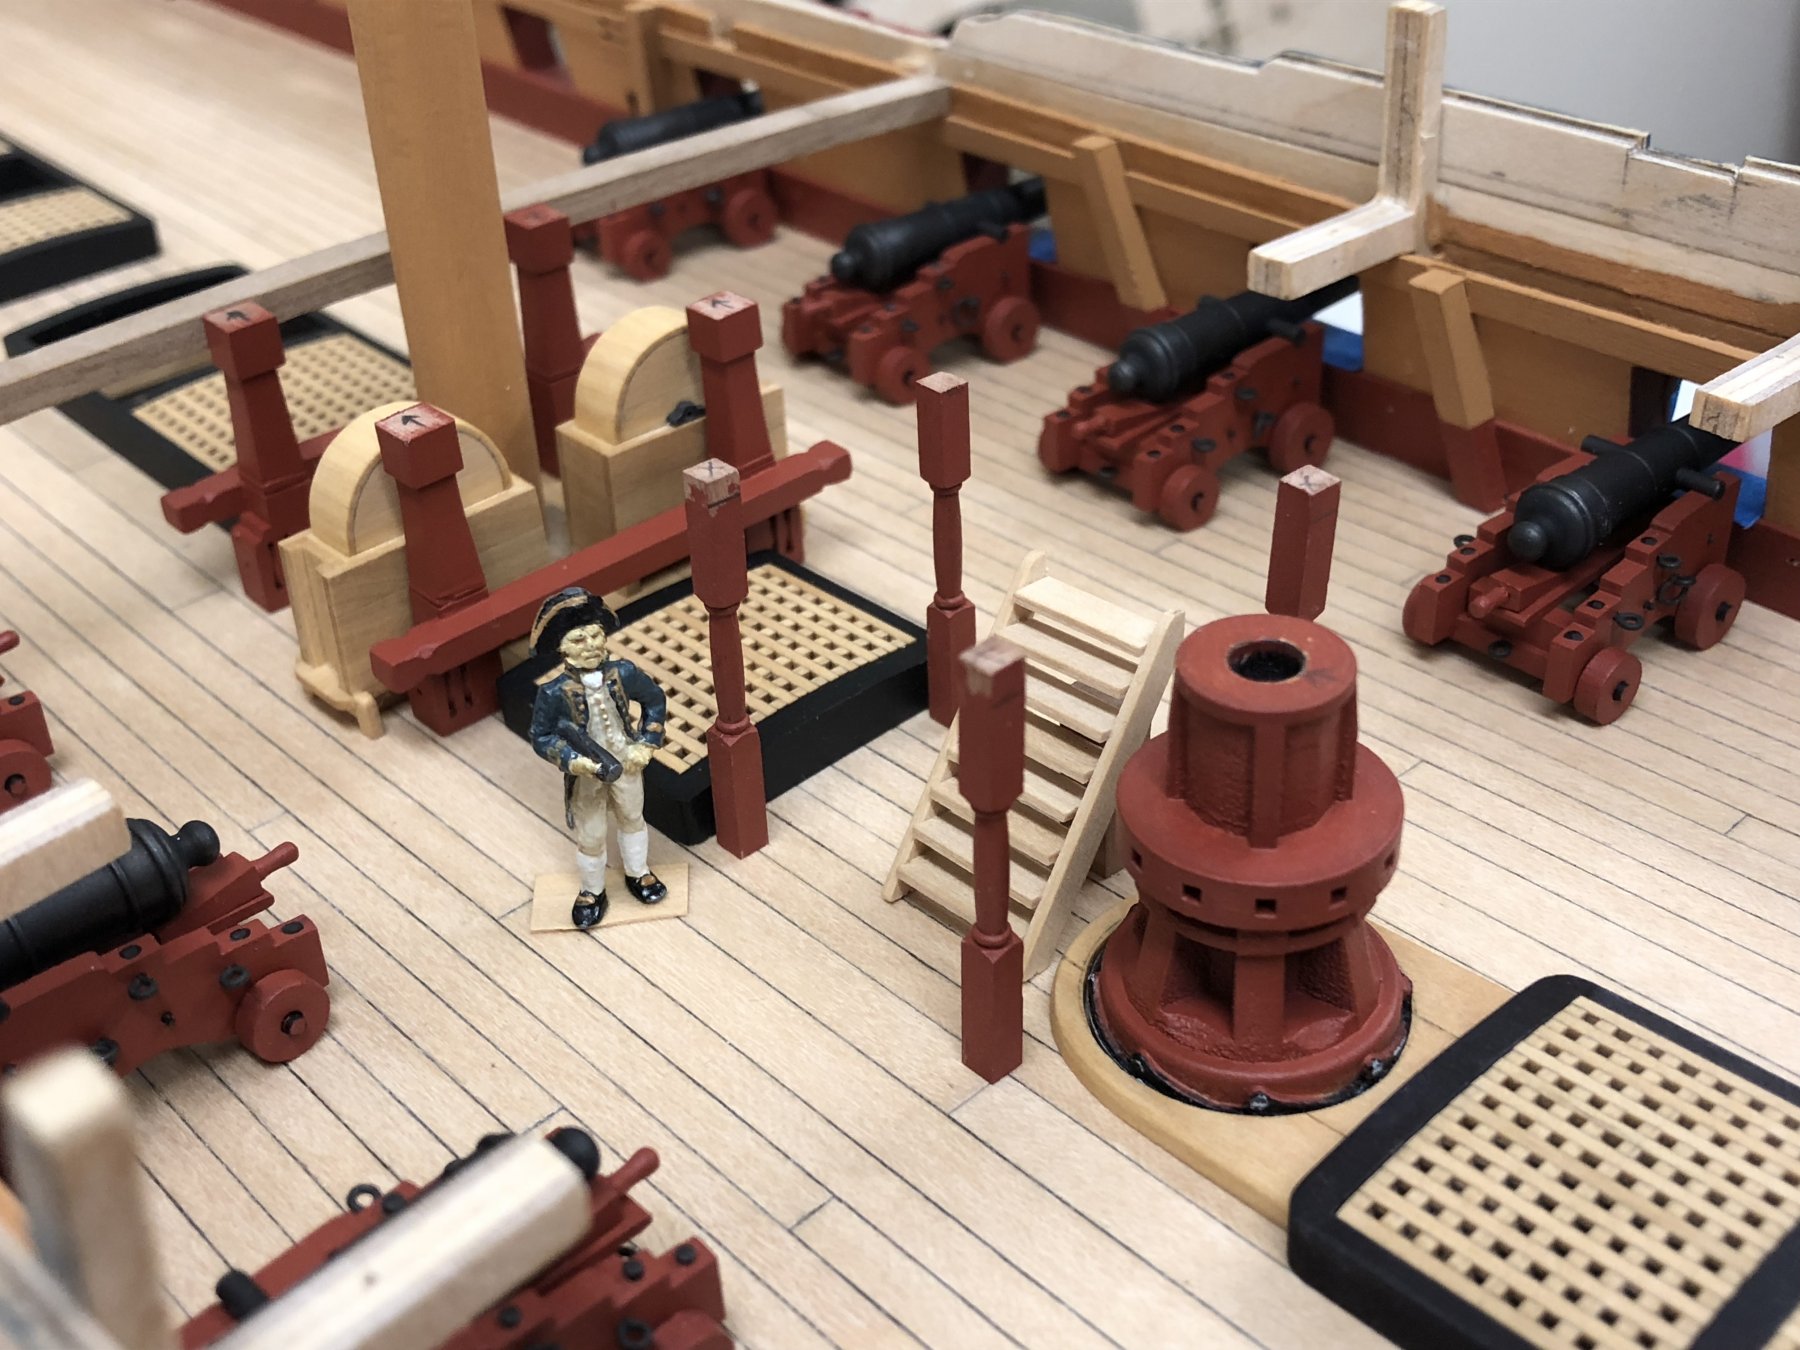
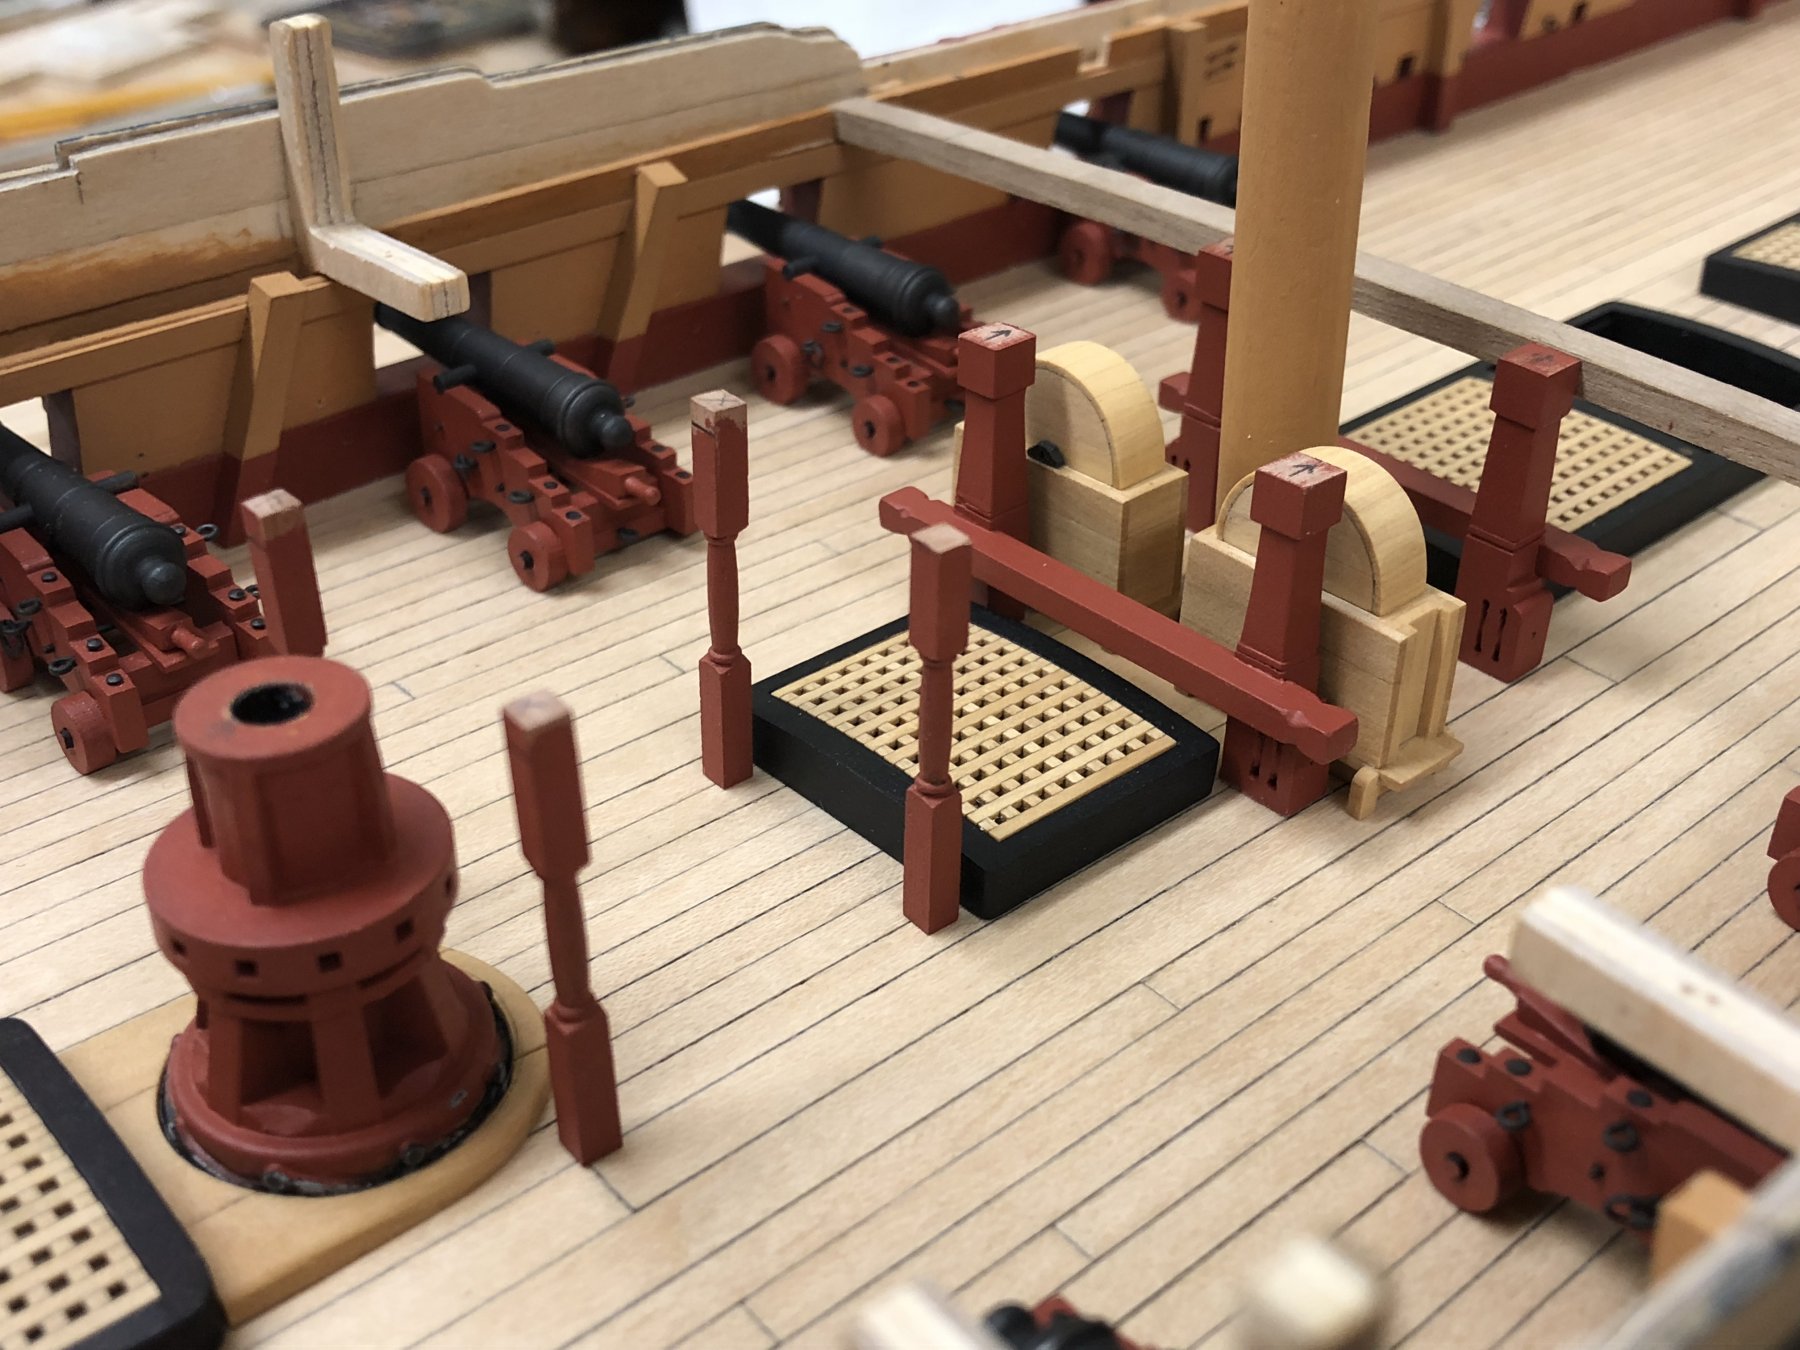
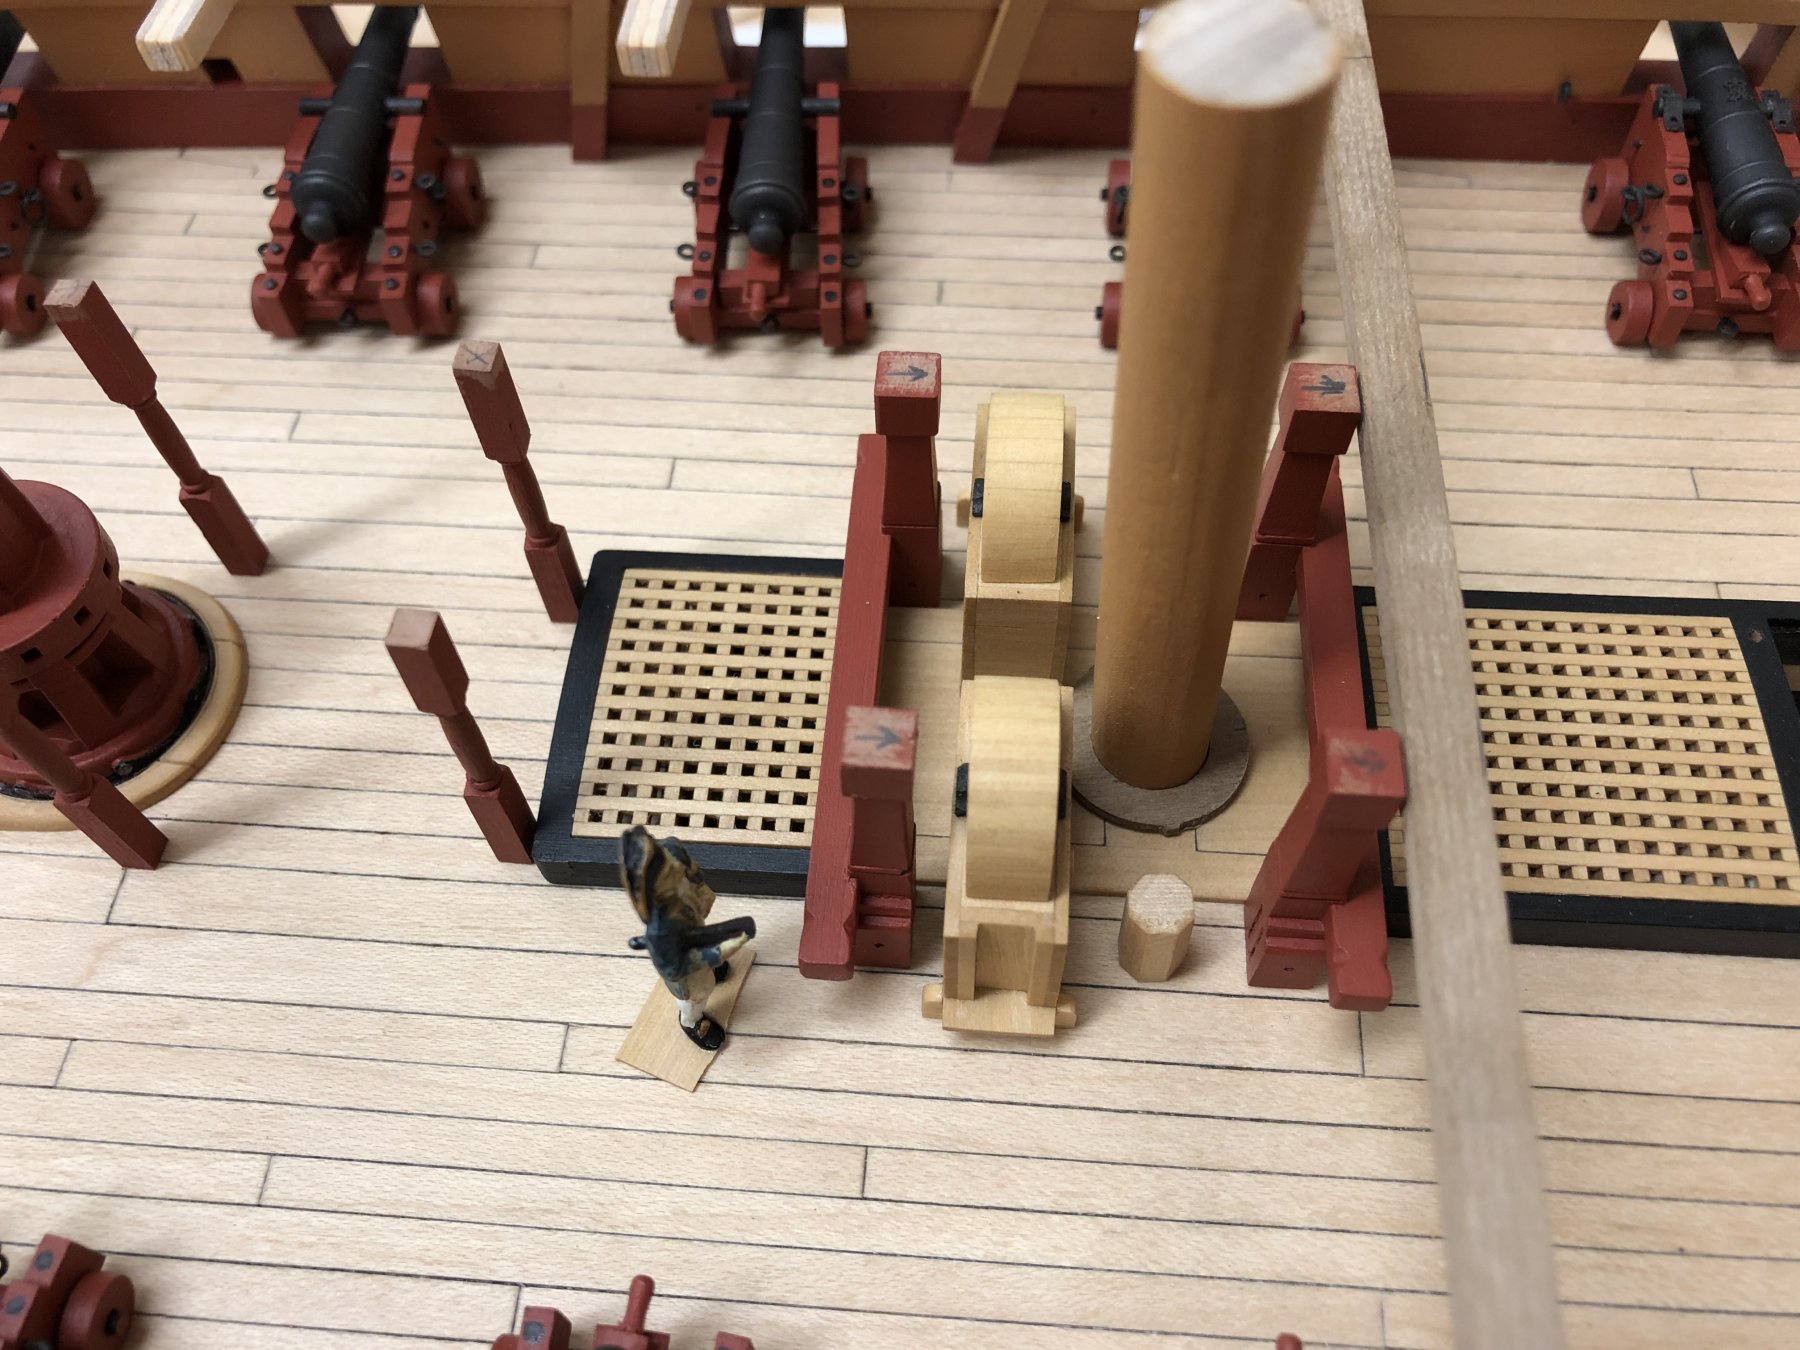
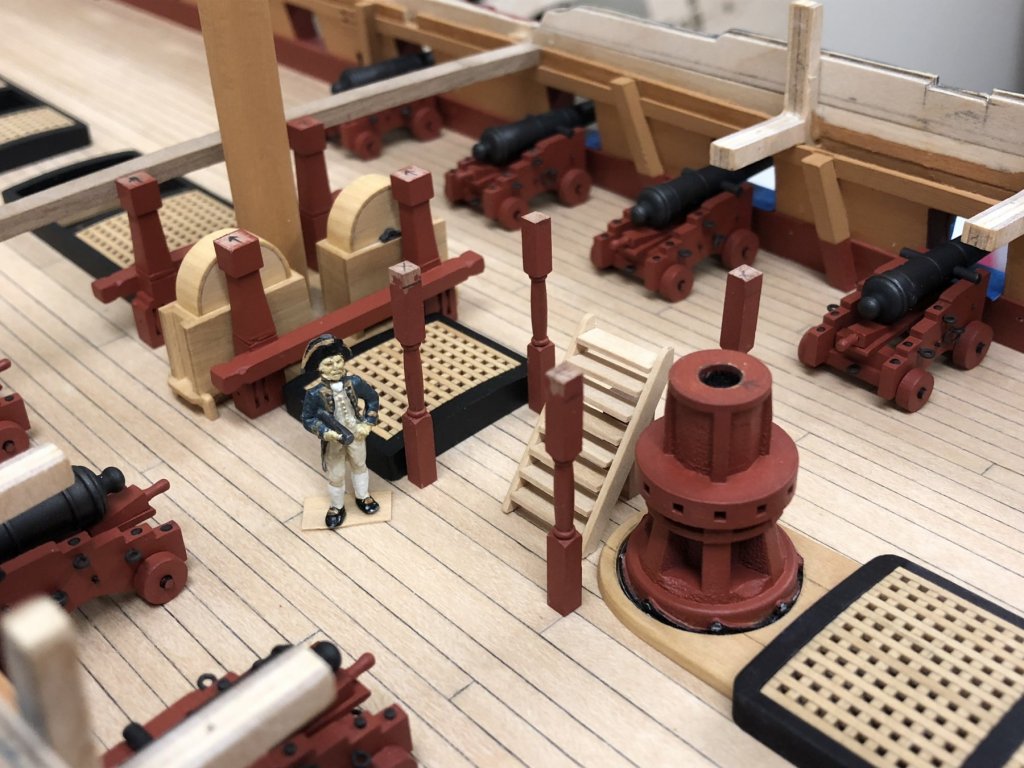
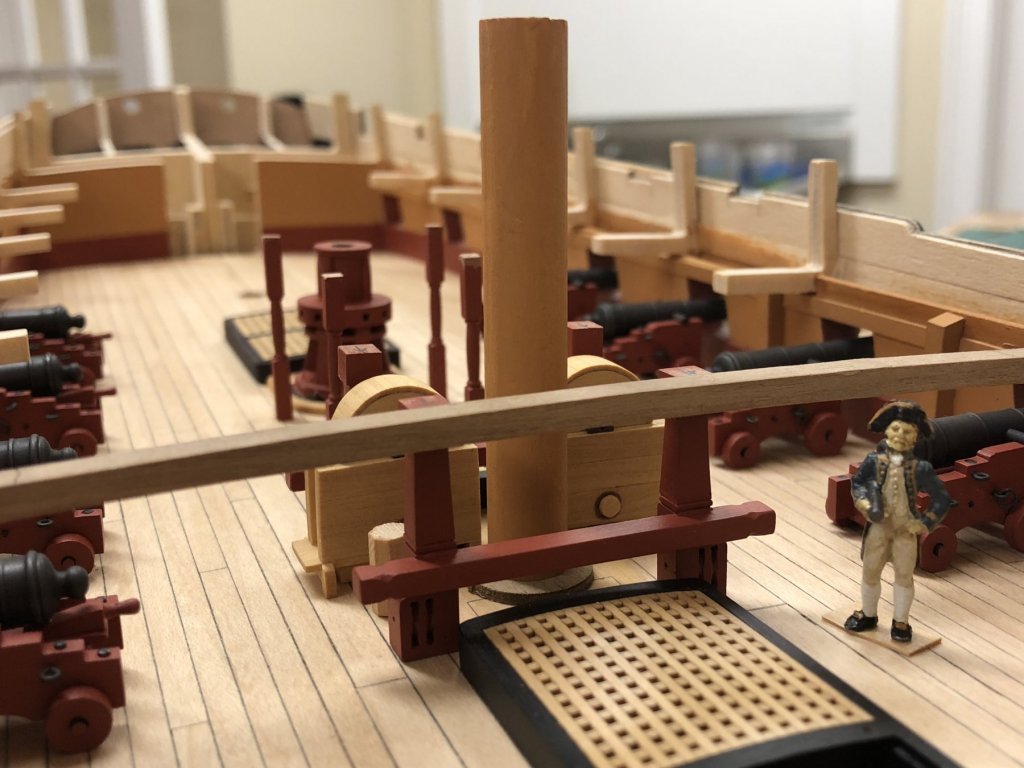
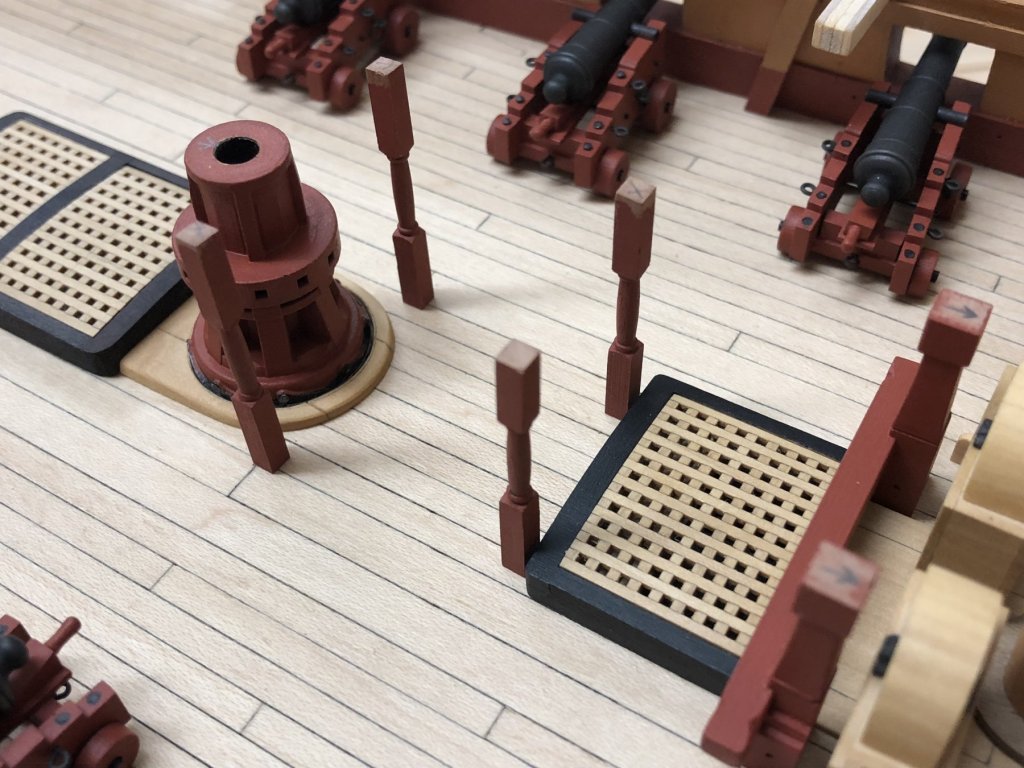
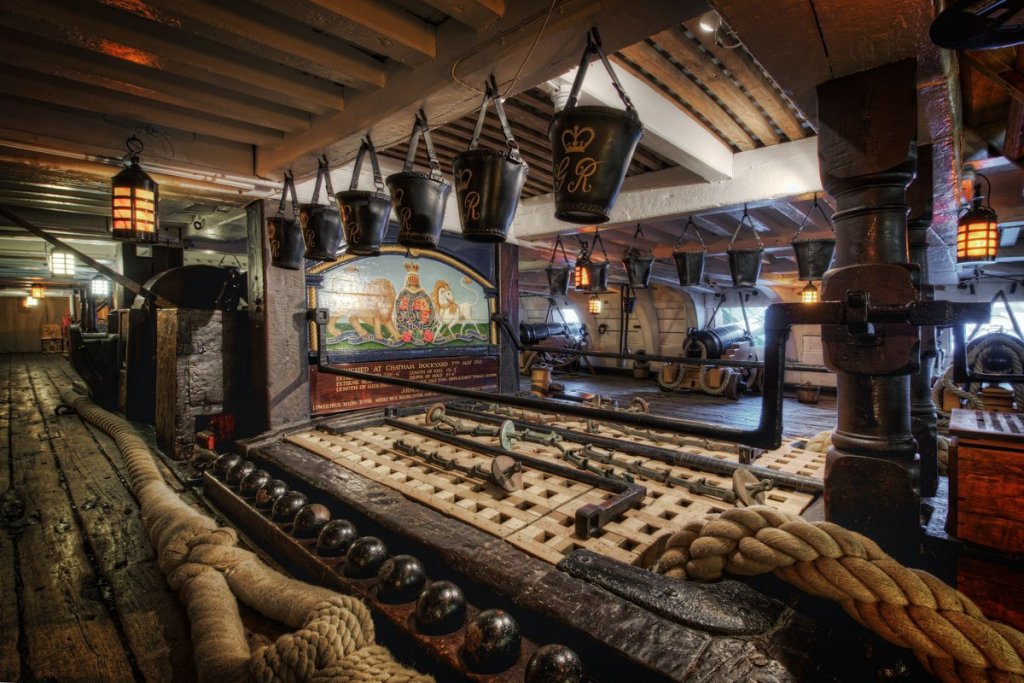
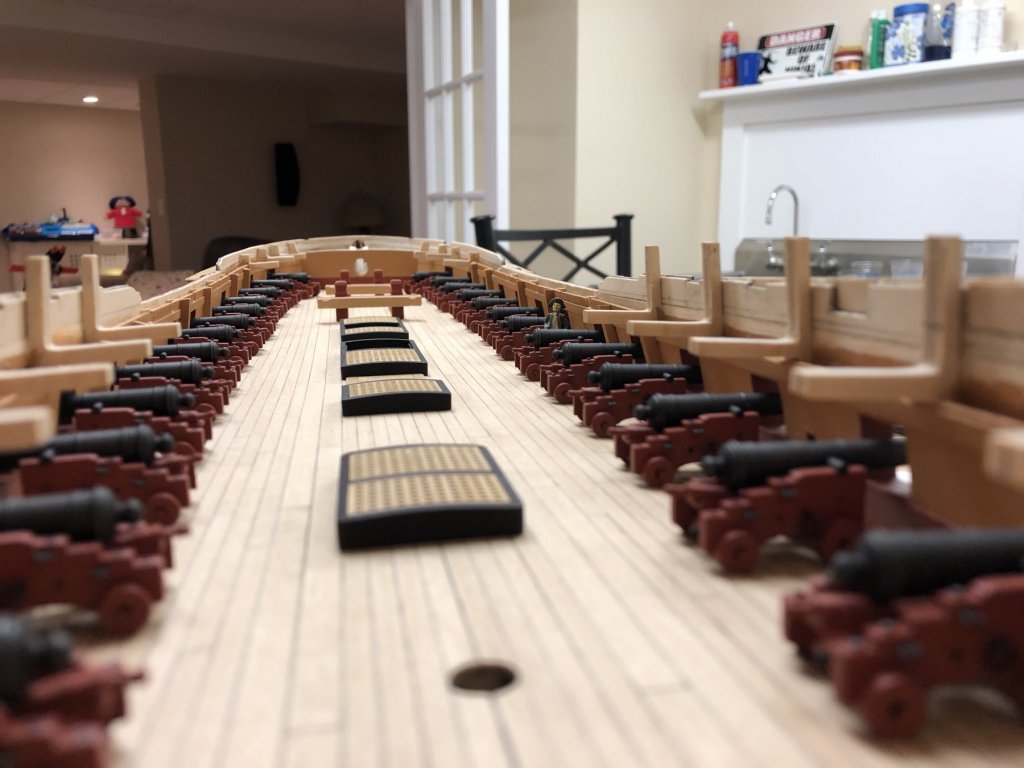
Thanks everyone as always for continued interest.... Jim - not going to be able to put canon rigging off much longer....ugghh The area around and immediately aft of the pumps is really quite congested and requires some planning. The main jeer and topsail sheet bitts were scratched, parts from the kit look a little oversize to my eye. Pillars were made square in section after studying as many pictures as I could find, these seem to be a mix between square and round, but I don't think my turning skills are up to making round ones. Side blocks and fake sheaves were also added. For the aftermost stanchions, I followed the AOTS diagrams which shows these to be of smaller dimension. All of these items will require some final finishing. The capstan step was cut out of a single piece of 2mm boxwood and 'joints' faked by scoring with a knife and filling with pencil lead. This took a while with just hand tools and I couldn't help but think of a toilet seat from the end result! These details will be visible but obscured so forcing myself not to be too fussy. The base of the capstan itself as sanded back to the pawl rim which sits in the hole in the capstan step. (This requires a lot more finishing to get the surface to be acceptable) Pictures are hopefully self explanatory. I've shaped some box for the elm tree pump shafts and I've placed an offcut just to get a sense for positioning.... And to mystery that's been puzzling me for a while (and Rob alludes to in his Ethalion log), how does the placement of the pump brakes reconcile in the this workspace in such close proximity to the capstan and companion? I seem to recall reading 'somewhere' that some stanchions were removeable which would explain the location around the capstan - once both sets were removed this would make this workable. In later ships, these seem to have been replaced by hinged iron columns which makes a lot of sense. if anyone could corroborate that would be much appreciated! Lastly, given the pump brakes also extend to this area, these would really be a permanent accident waiting to happen at the foot of the ladder to the quarterdeck which must have received quite a bit of use. I can't find any reference to this, bit I have to suspect that pump brakes were removeable, and unshipped when not in use. On the Artios class, there is a set forward, and 2 sets aft - in normal seagoing routine I would speculate that not all banks would have been needed, but could easily have been placed in the event or expectation of an emergency. The last photo below from Victory seems to show exactly this, and it also makes the square section joining each brake much more functional. Again, if anyone can point me to sources would be much appreciated!


-
Looking good Rob, I've been giving a of thought to this particular area as well. Hopefully I'll get a chance to post something later today in my log with my thoughts rather than cluttering up yours... 🙂
-
Hi Ian, looking good there, nice prep work! Assuming you're going to be using the kit blocks, have you considered using 'tub sander' to tumble the blocks? Taking away the sharp edges makes these look more accurate and help reduce the common problem of looking too big. Also, personally I find it easier to position and drill out holes needed for the ringbolts before assembly when they can be laid flat before construction, but, just my opinion.
-
Simply beautiful Thomas. Hats off to you.
-
Love those last shots, great looking fake sheaves and wonderful rigging which looks just the right scale, very nice!
- 1,306 replies
-
- 5
-
-
- syren
- model shipways
- (and 1 more)
-
Just had a chance to catch up on your very interesting project OC, really nice paint job and ‘weathered’ deck. Following you over the finish line now!
-
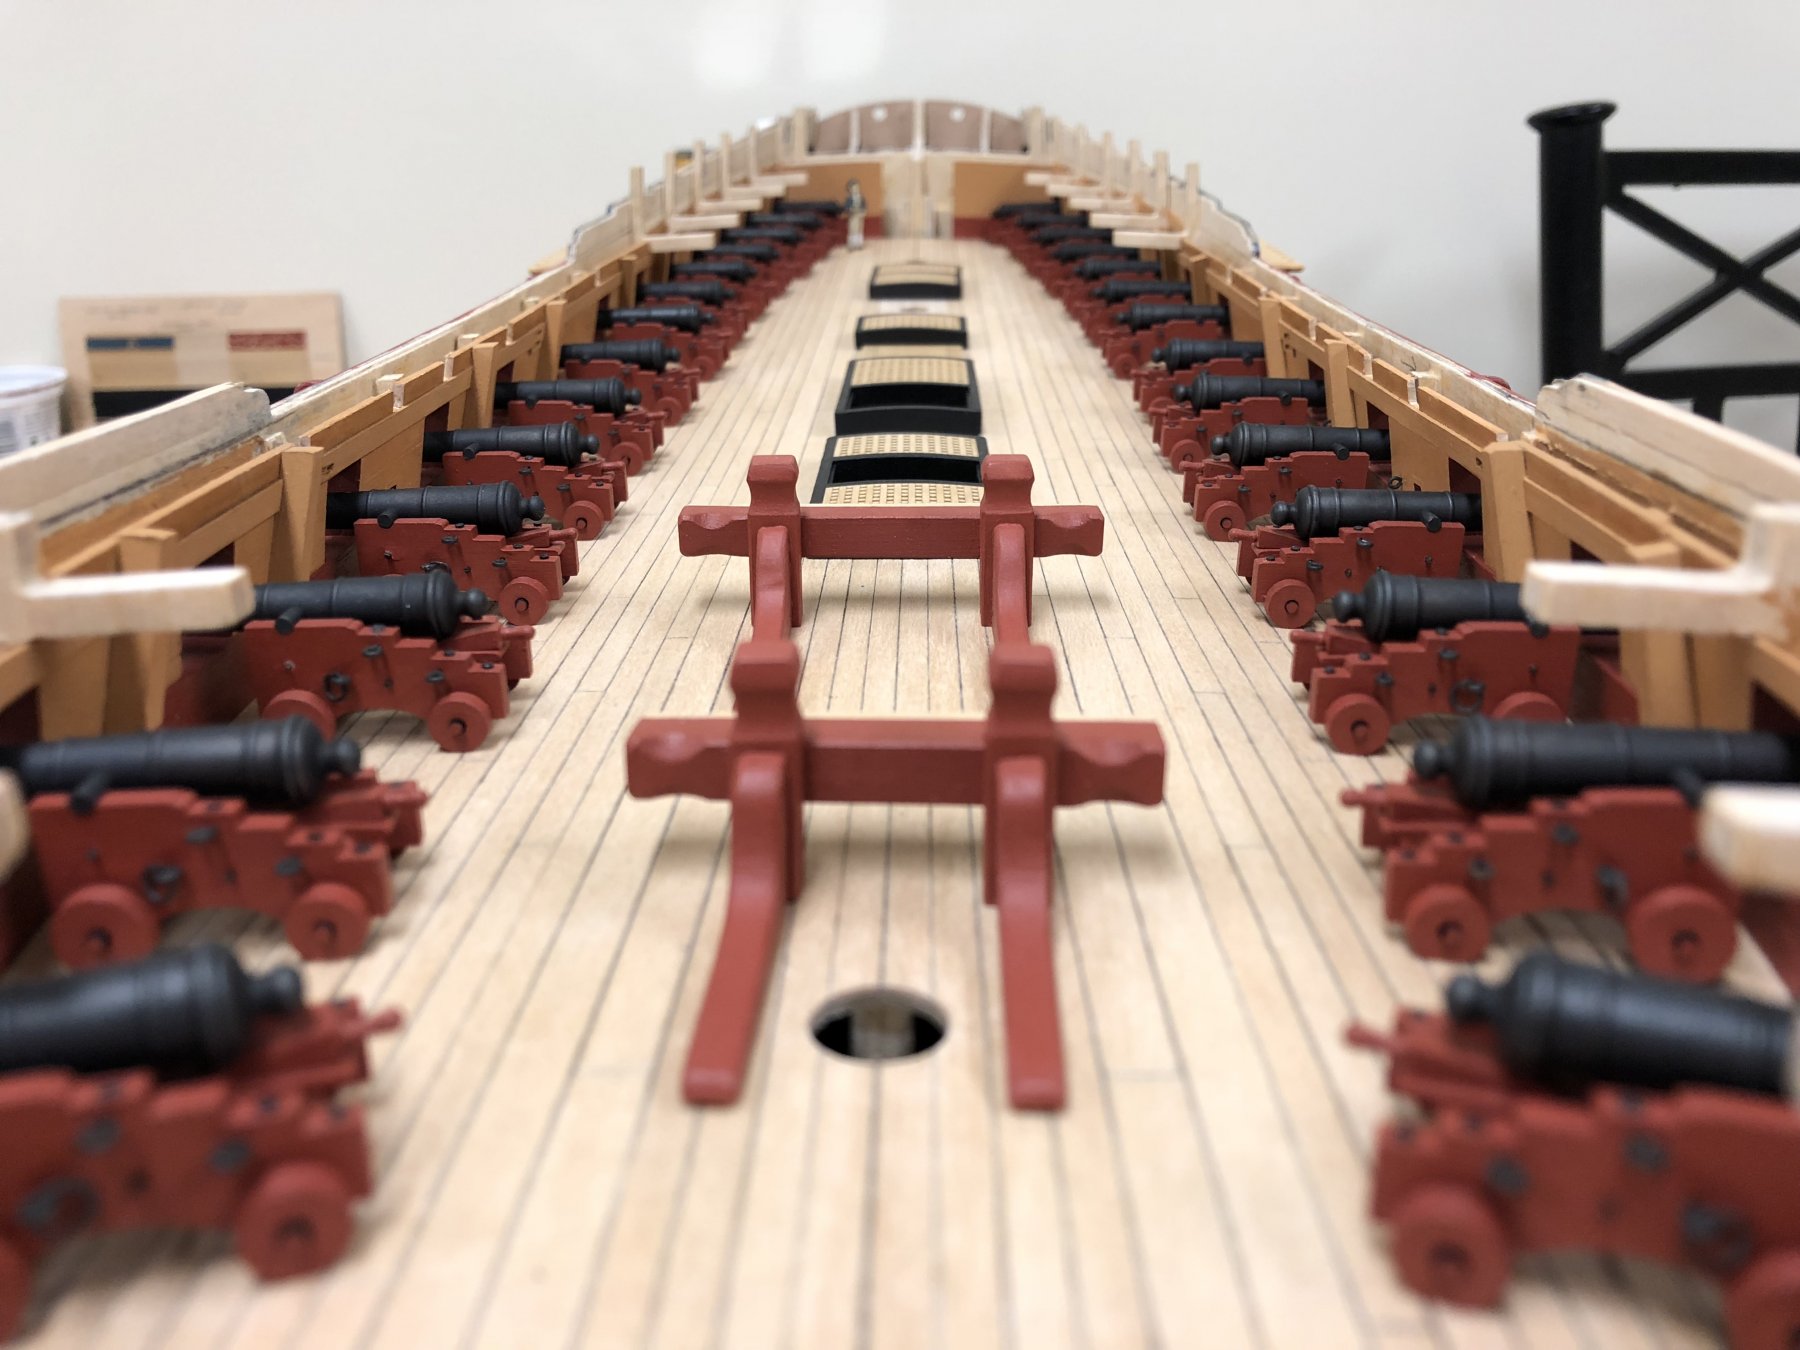
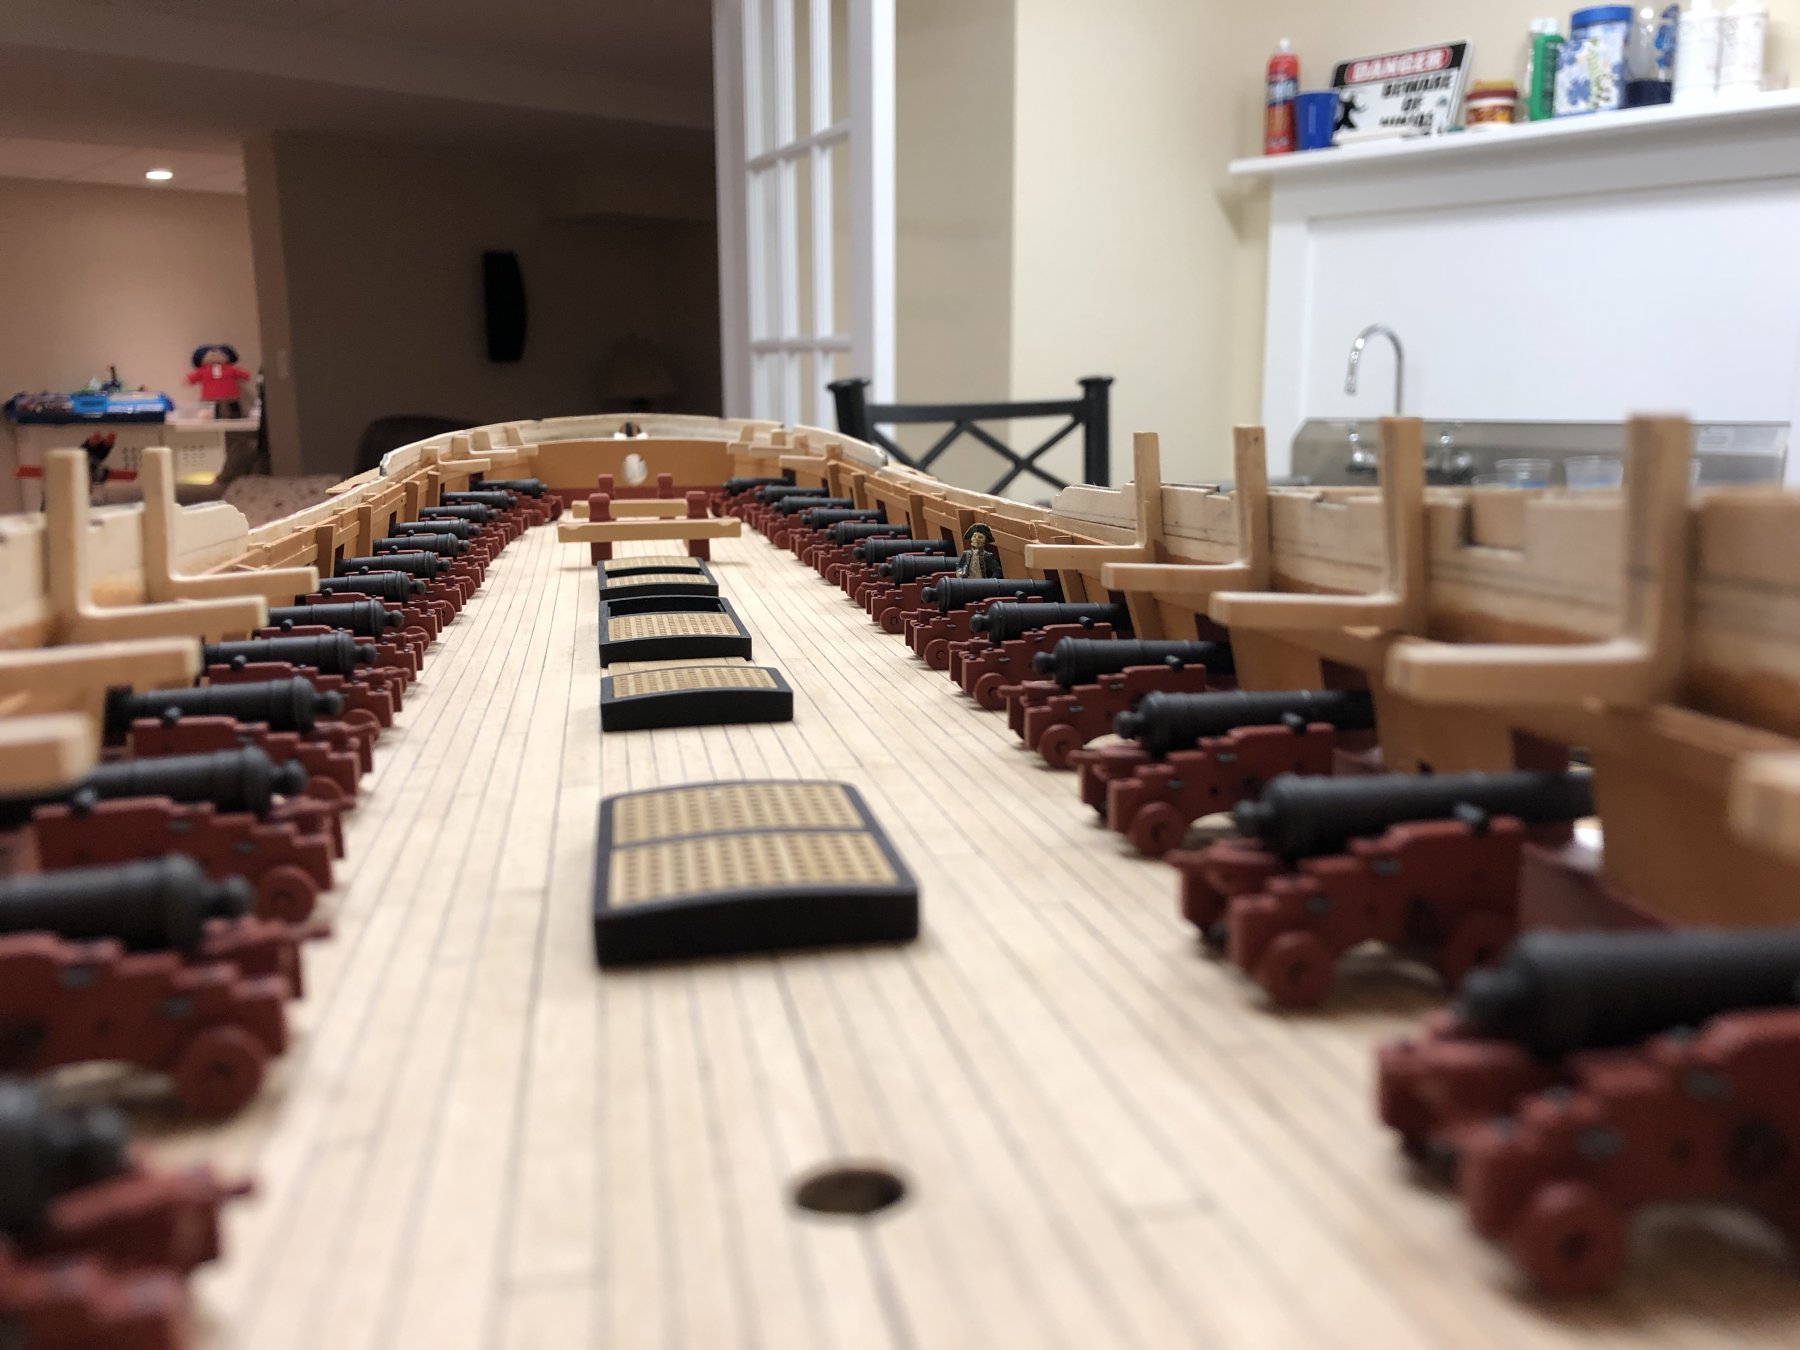
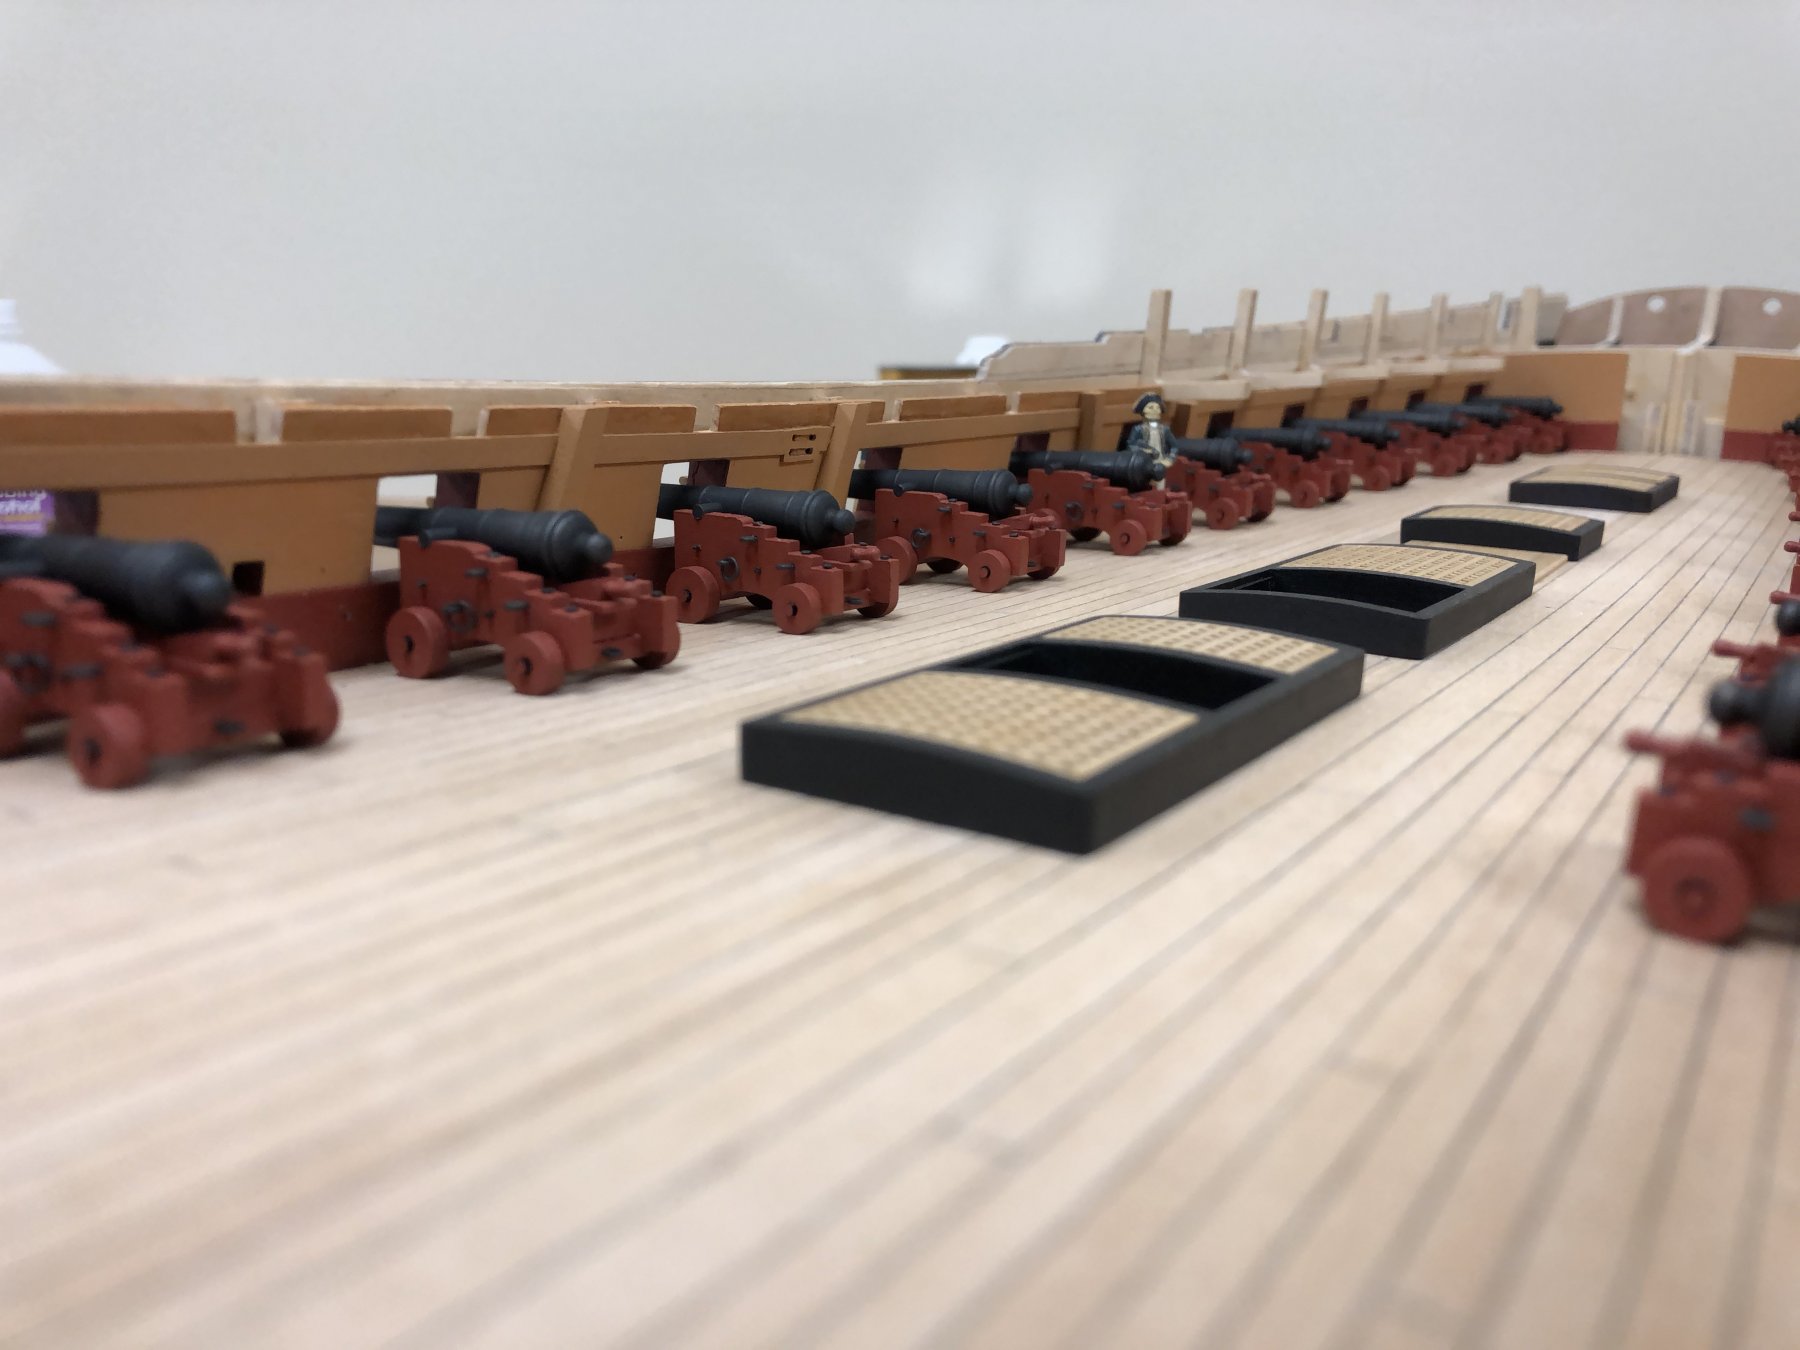
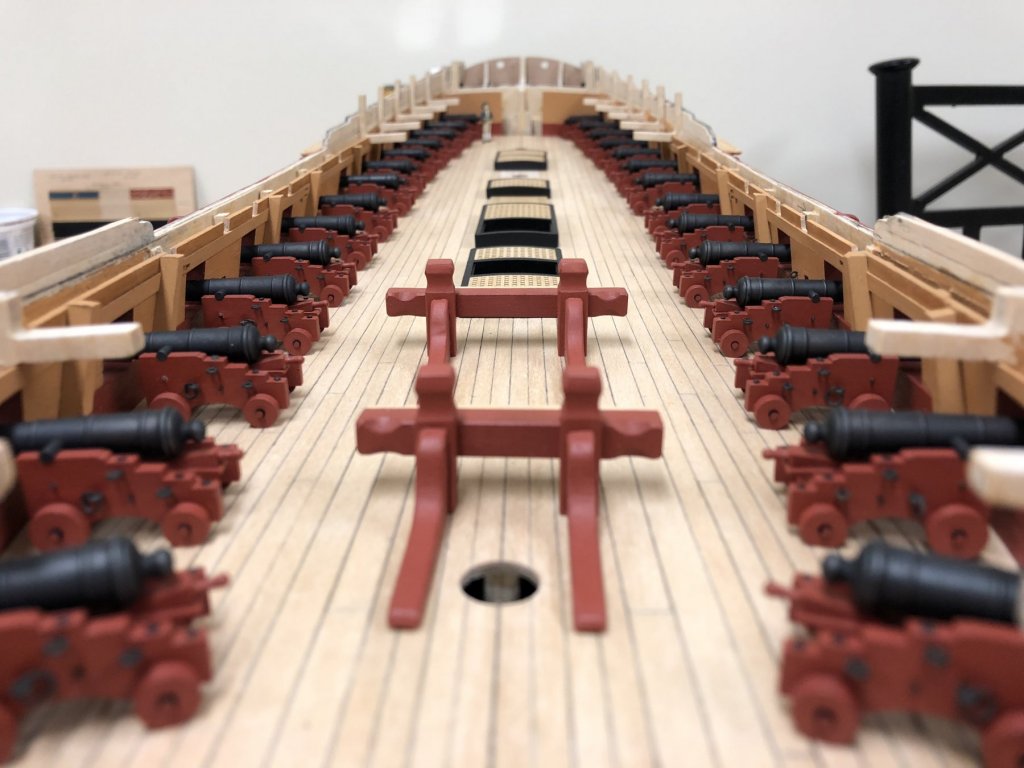
Cheers Gents, appreciate the support, comments and likes... Welcome aboard Ian 🙂 A rather dreary rainy day precluded any other activities so as able get a decent amount of time in. Spent most of the day completing the cannon carriages, these really are incredibly time consuming and seemingly never ending, but can now report are complete. I did decide to cheat a little on those carriages that will be mostly obscured away from the waist. Rather than continuing to use the pins to simulate bolts which are incredibly fiddly, the carriage bolts were simulated using a fine tip black pen and then touch of dark iron paint to tone it down. Pins have been used on all the carriages that will mount in or immediately about the waist. The macro photo below shows the 'real' bolts in the foreground and the 'cheat' in the rear. At real life viewing distance these are difficult to tell apart if you didn't know - the difference really being the lack of about 8hrs of cursing. Experimentation with the cap squares and royal cyphers next...


-
Really happy to hear this news Chris. I know that EVERYONE has their own thoughts and opinions on subject matters...there seem to be some subjects that already have a large number of kits, cutters and schooners being some of them. I wonder if a custom pole of your top 3 ideas may help you prioritize, similar to what Chuck did.
-
Always intrigued by these card models, they look very interesting and a nice subject matter. Definitely looking forward to following your progress.
-
Chuck - where do you get your brass strip from, or do you cut it yourself from sheets? If so, how do you do that? Many thanks.
- 421 replies
-
- 5
-
-
- medway longboat
- Syren Ship Model Company
- (and 1 more)
-
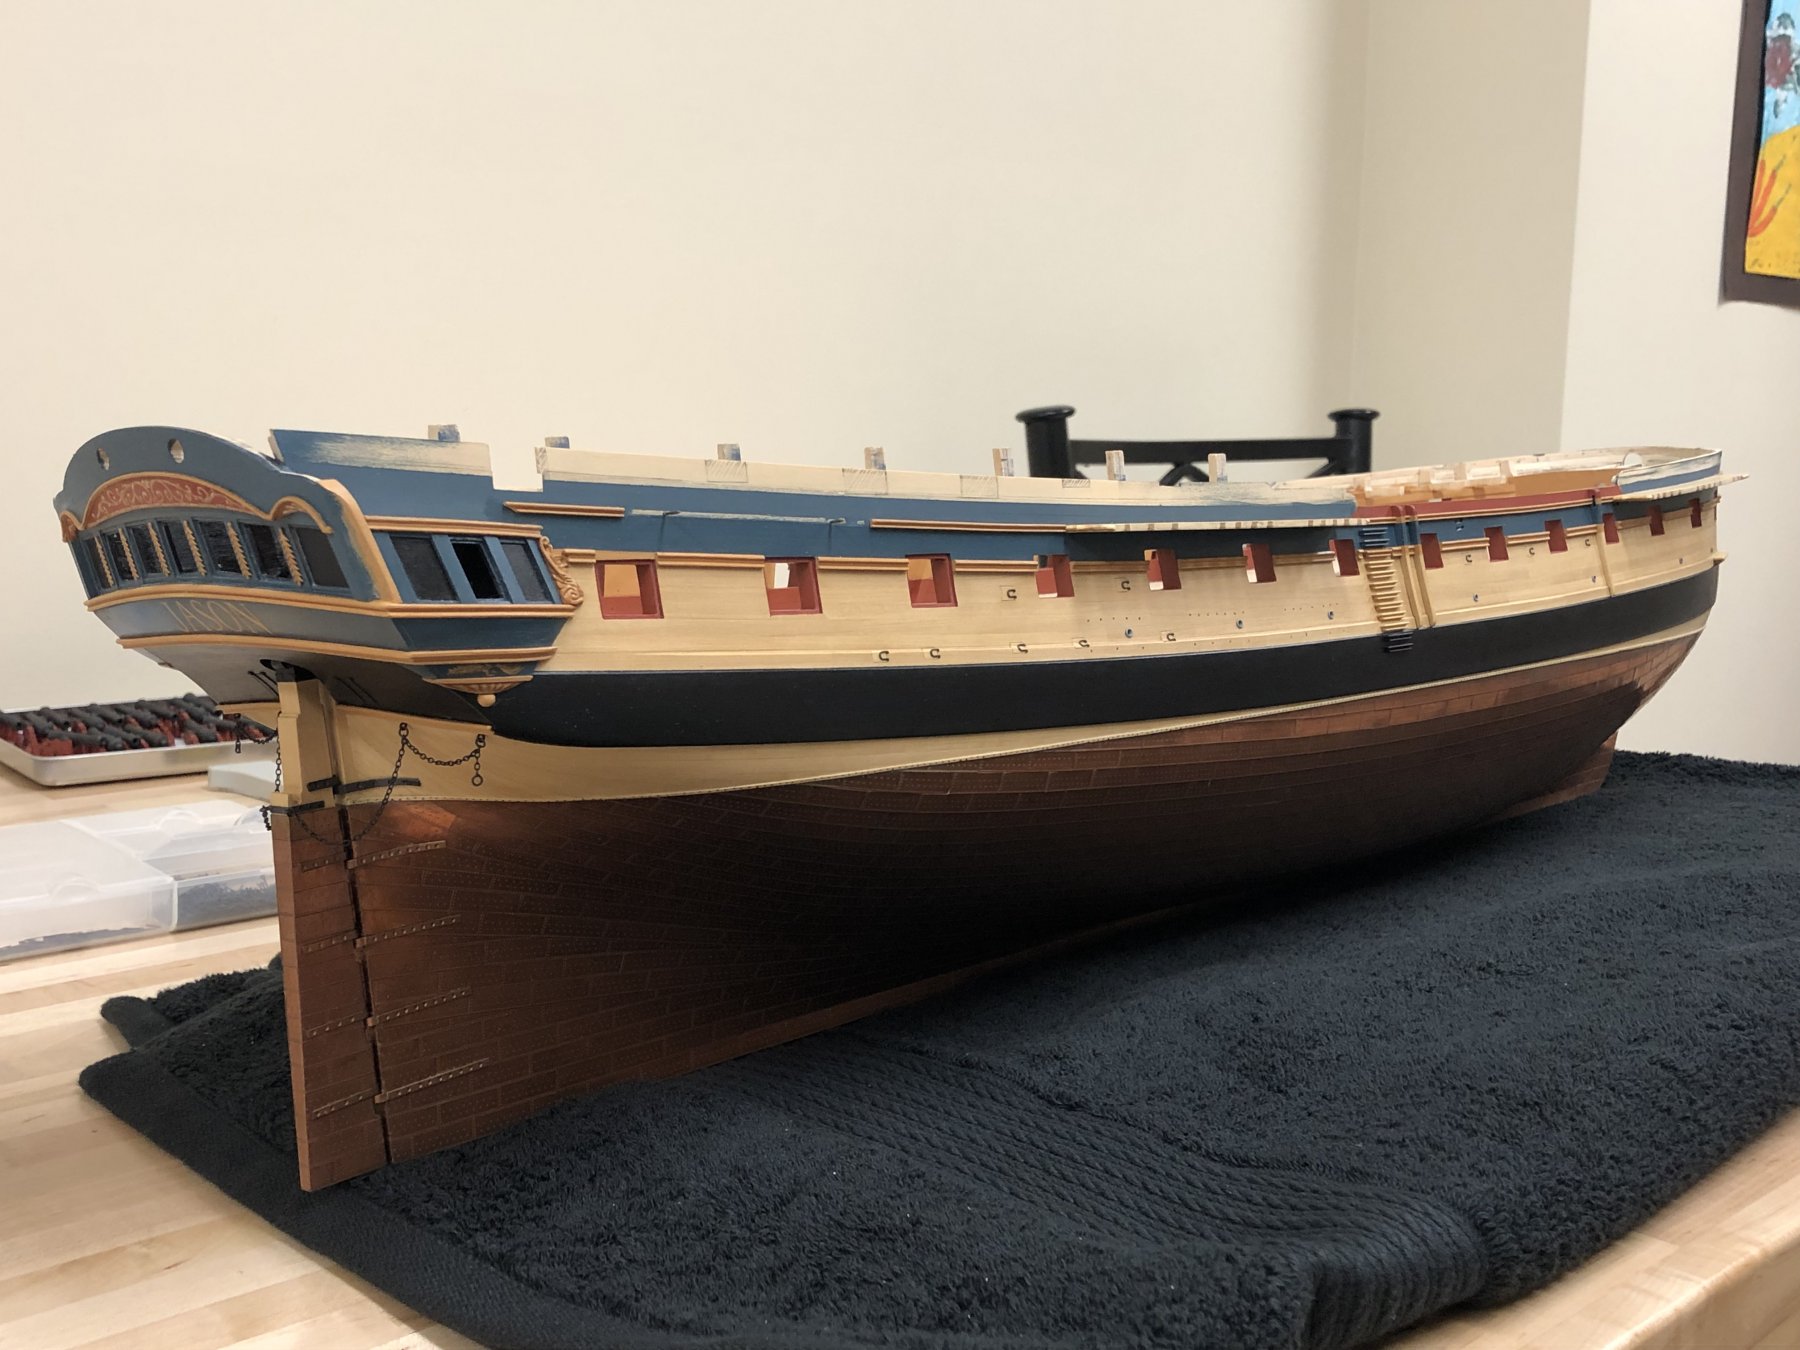
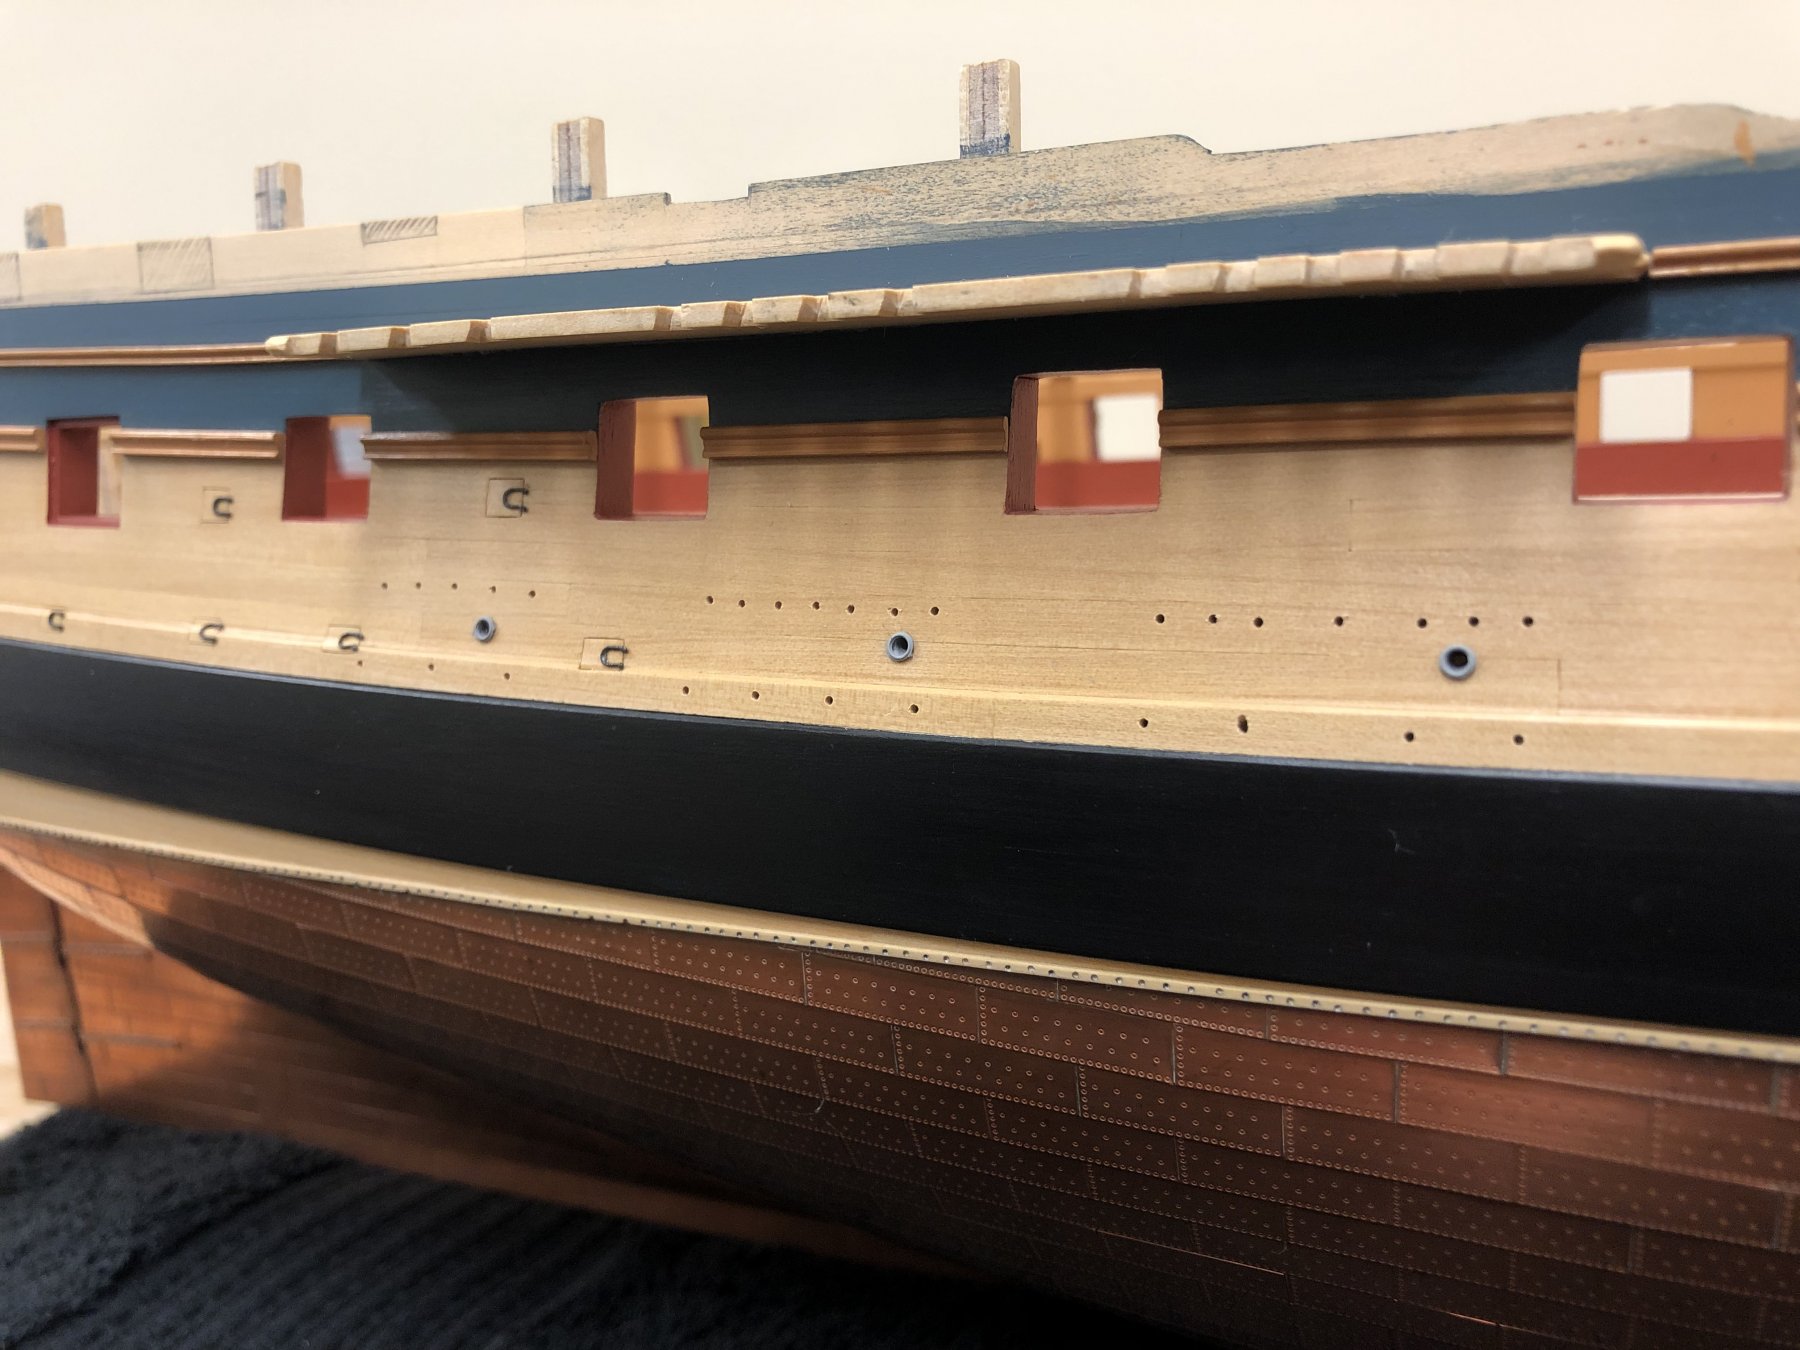
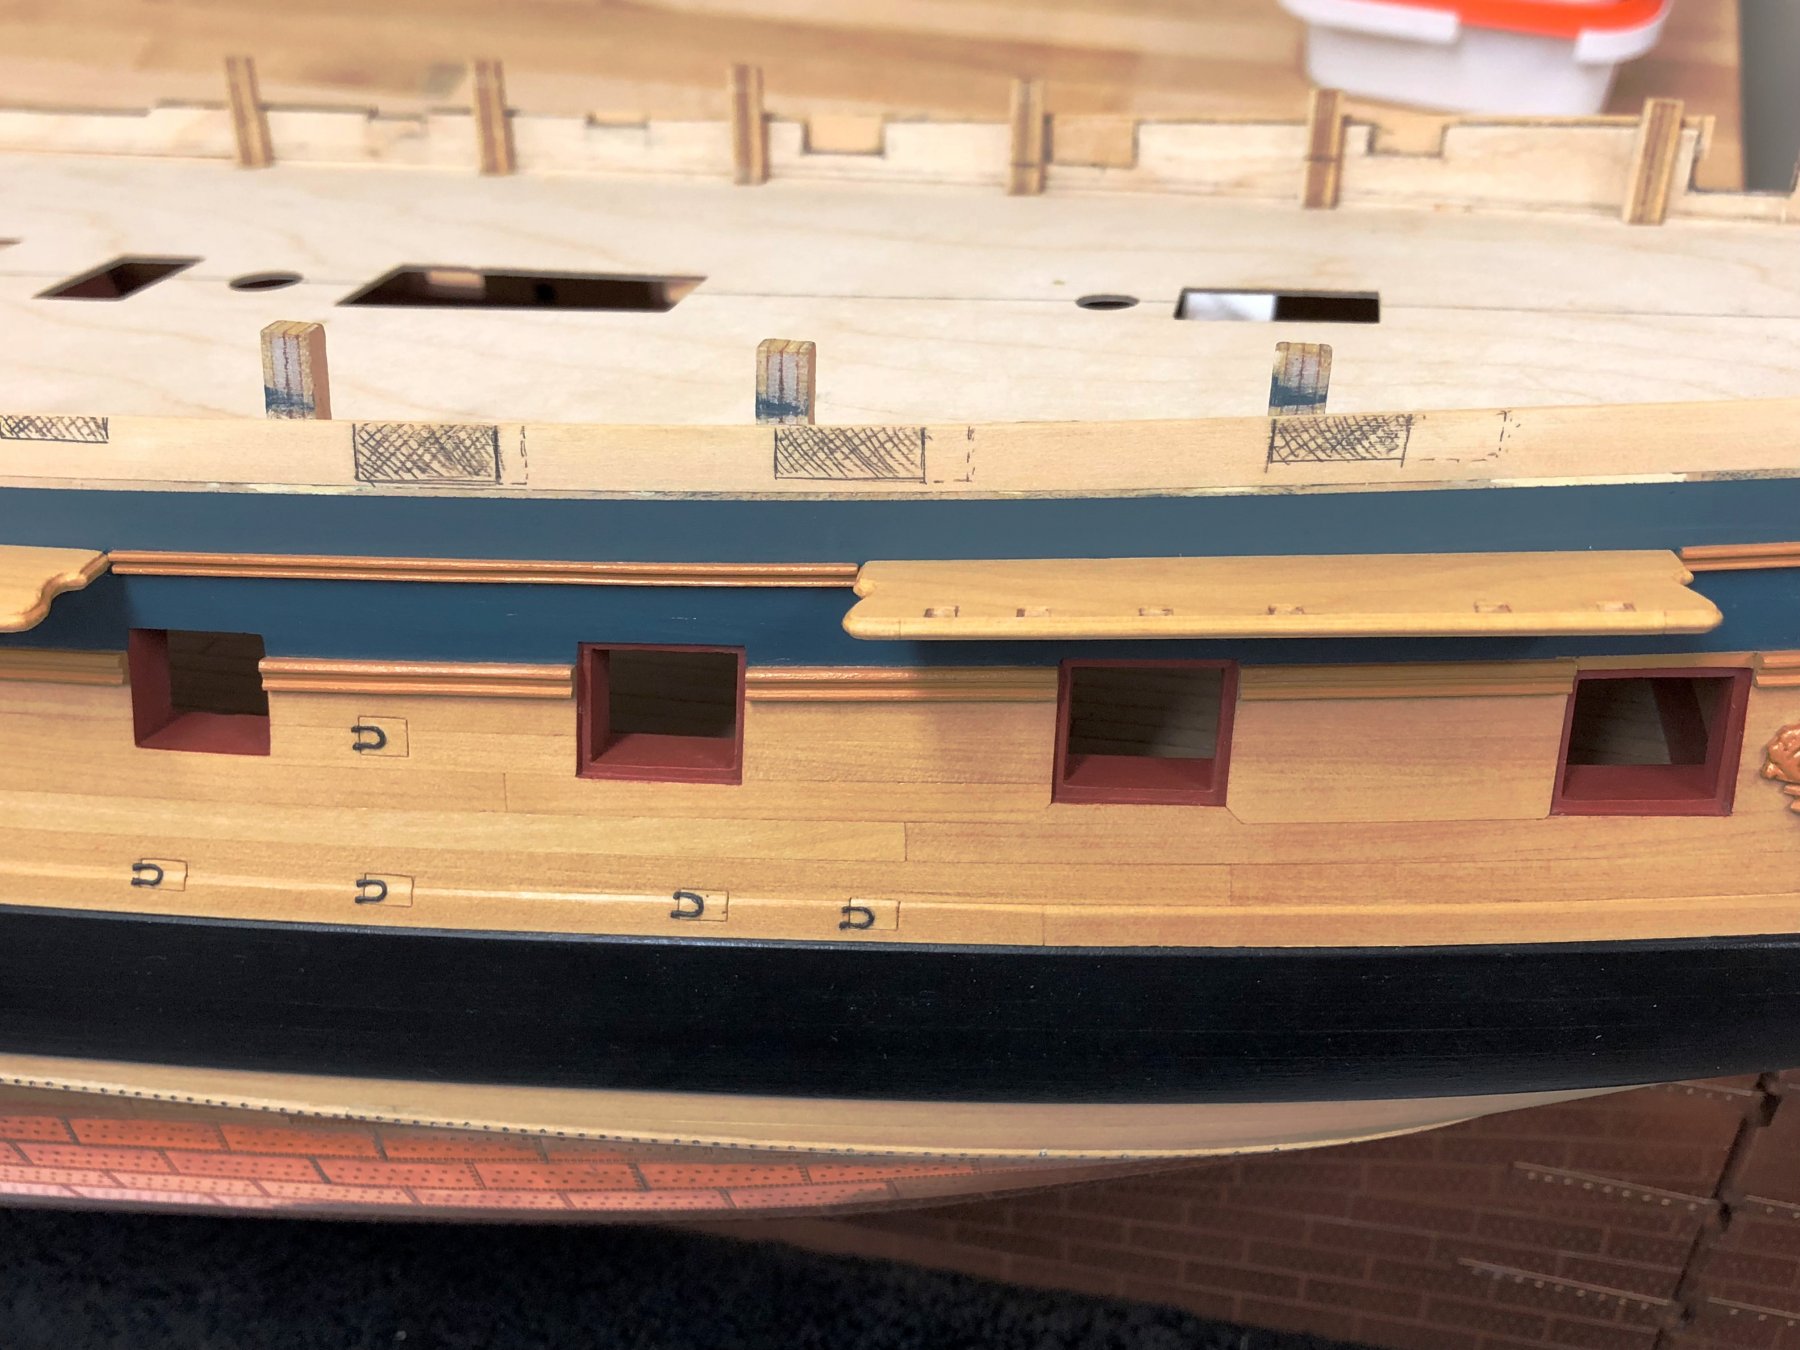
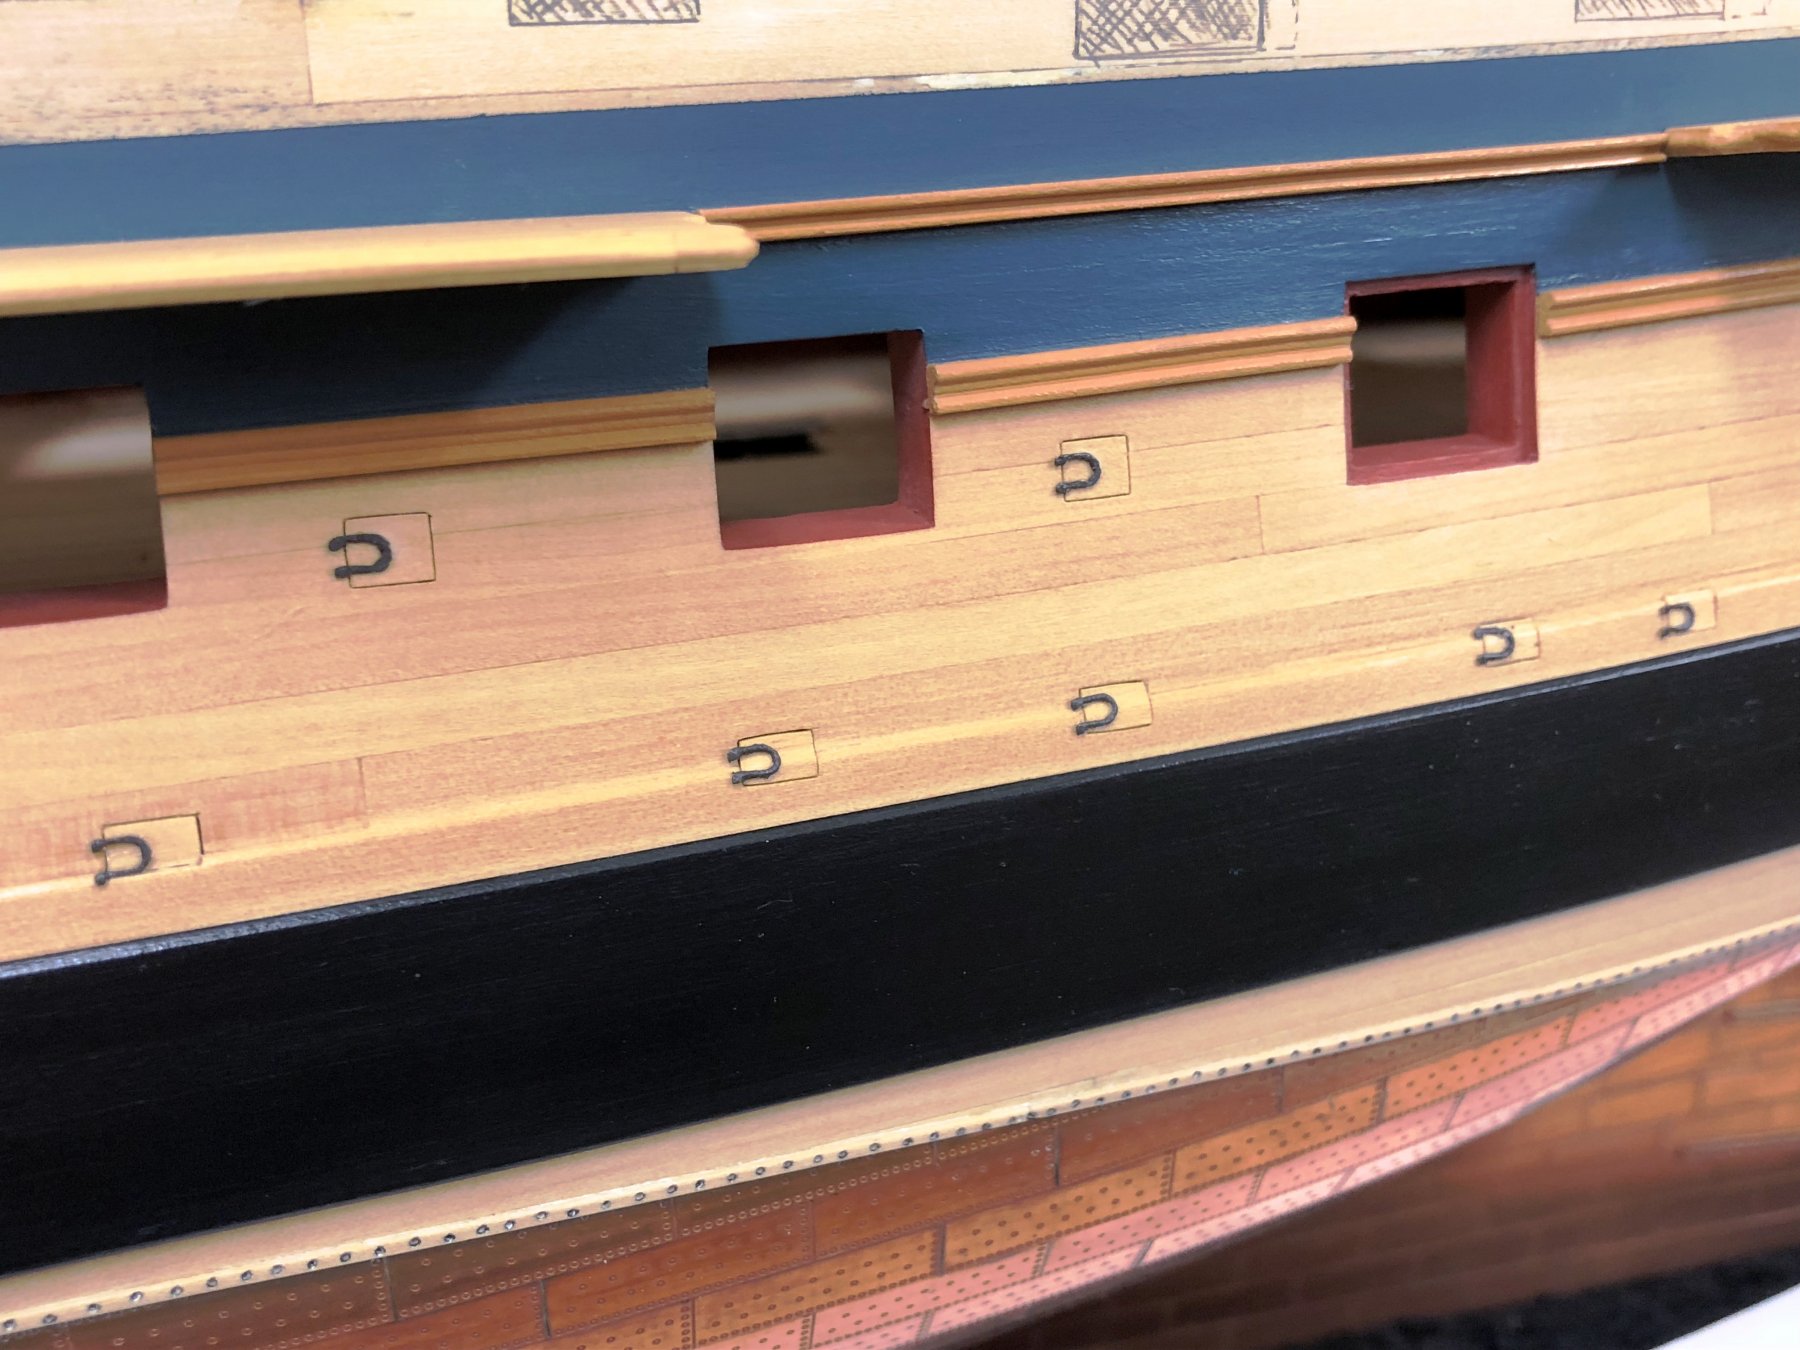
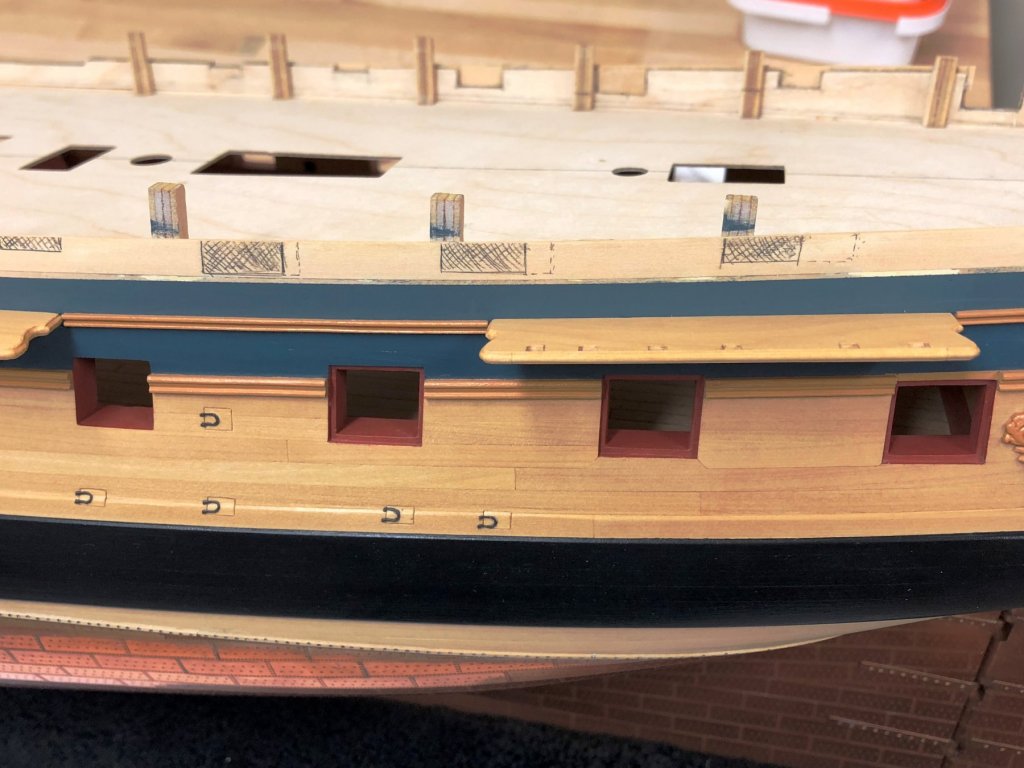
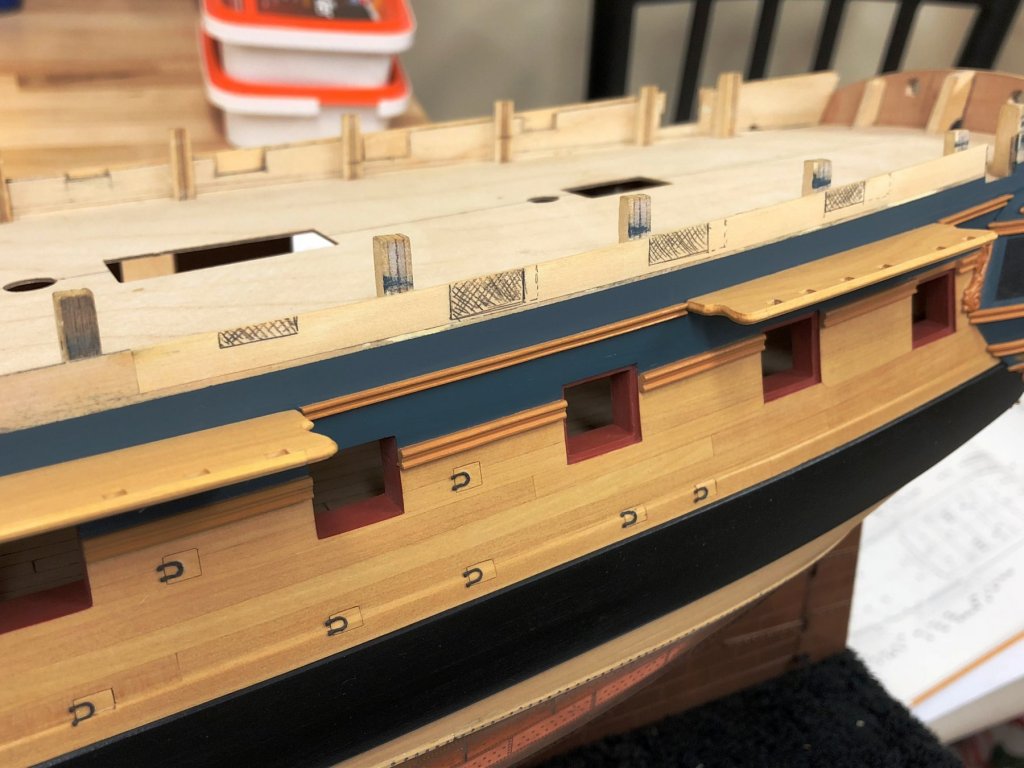
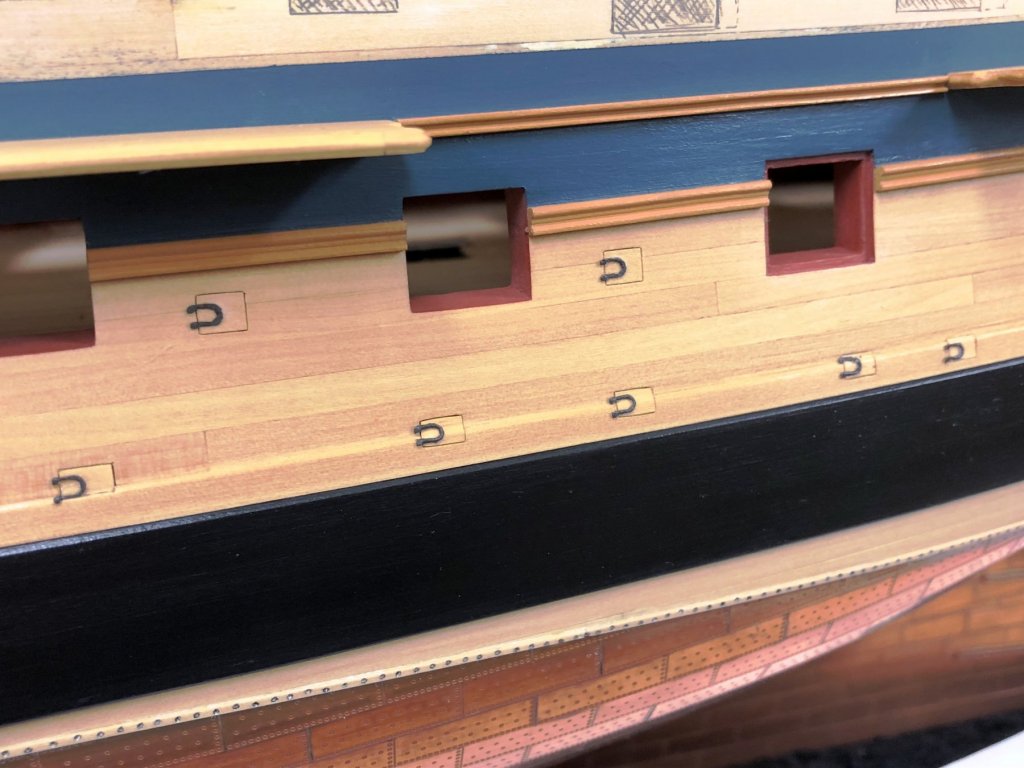
Well I'm back on track at least after the destruction, painful, but glad its behind me.... The bigger channels are completed now and ready to be glued into position, I'll be leaving the attachment of the smaller channels for the topmast backstays until after the quarterdeck is glued into position. A final finish has been put on the hull, which means that I can now start to put some of the detailing in place in conjunction with fitting the chains. There seem to be a number of position where space will be tight, so fingers crossed previous planning works out. For reference, I've marked out the expected position of the quarterdeck ports (and the previous template position with a dotted line) but will not be cutting these out until the quarterdeck is in place. This shows them in relation to the actual position of the deadeyes, with a bit of imagination (I used string and a mock up of the masts) its clear that the previous port locations would be obscured (the second and third from the stern are the tricky ones). Even though not obscured, the 4th port from the rear was moved so the port separation is equalized as much as possible. My advice to anyone modifying the kit (or even building from the box) is to leave the positioning and cutting out of any these quarterdeck ports until after the final position of the deadeyes is known. Unfortunately, the PE hinges supplied in the kit are too small and dimension, and too bulky, for the sizes of the sweep/airing ports estimated from the AOTS plans. Luckily I had purchased a PE set for (I think!) the HMS Grenado way back and it contains some useable hinges. These smaller PE sets are pretty reasonably priced, and I've found can be handy to have as they contain a multitude of potentially useful fittings (hooks etc.) which can be used to supplement the older 'bare bones' CC kit PE sets. These were given a few coats of paint to bulk them up a bit as although they are theoretically the same scale, the ports on Grenado are of smaller dimension. Placement on the airing ports proved a little challenging due to the elevated profile of the black-strake that runs through these.
-
Will definitely be following along on this, love the pre-Dreadnaughts. Looking at her beside the Yamato without all the extraneous deck fittings and armament in picture above shows a lot of resemblance to form U-boats and later submarines.
-
Yes, very nice companion cover BE, the subtle plank edge highlighting looks just right - if I had a vote, I'd vote to keep it natural, but could be swayed either way depending on how you are planning to finish the coamings to get a nice contrast.
- 574 replies
-
- 2
-
-
- cheerful
- Syren Ship Model Company
- (and 1 more)
-
Hi Stergios, I followed the same principle for the other stays. i.e. where a pair is possible on each side, these were looped and seized around the mast top. Where a single is necessary, a false splice was made to make a loop to go over the mast top.
- 1,144 replies
-
- 1
-
-
- snake
- caldercraft
- (and 1 more)
-
The stern came together very well and seems you've got the tricky alignment just right with the various curvatures of the rails, looks very pleasing...and well done for getting the coppering done, certainly not one of the most interesting or diverse activities but looking very good. Will be following from here on if I may.
-
Brian - I made my post at same time as you, obviously great minds think alike...🙂
-
If GBP100 decrease by 50%, (i.e. $50), it will need to increase by 100$ (i.e. $50) to get back to same price. Prices in the EU by law must include VAT, which is different to the US and possibly other places where any associated taxes are added afterwards to quoted prices Using a simplistic example, assume a site quoted cost of GBP120 including VAT (GBP100 cost plus GBP20 VAT@20%), you need to reduce the quoted price of GBP 120 by 16.67% (i.e. ~GBP20 given rounding) to get the price excluding VAT of GBP 100.
-
I've found that photocopying or scanning/printing the plans and then cutting out the profiles as a guide is pretty easy. As for cutting out the cut parts, you don't mention how thick it is or the material, but anything from a larger Exacto blade to a fret saw could work. Even thick walnut tends to cut easily with a sharp blade and patience, plywood or MDF likely needs a toothed blade. Take it easy as you can trim off any excess once its free with a sanding stick. Good luck!
- 389 replies
-
- 1
-
-
- bluenose
- model shipways
- (and 1 more)